Creating redistributions (Test phase)
To redistribute stock between different warehouses you should create a redistribution in your system.
To do so, proceed as follows:
-
Open the menu Stock » Redistribution (Test phase).
-
In the side navigation on the left, click on add New redistribution.
→ The menu for creating a new redistribution opens.
A new redistribution can be created in three steps.
In the first step, you need to enter redistribution details. In the second step, add redistribution items and in the third step, finalize your redistribution.
1. Entering redistribution details
In the first step, you should fill in the fields in the Redistribution details and Status and Tags sections. Refer to the information about all the fields given in Table 1.
| Setting | Explanation |
|---|---|
Source warehouse |
Select the source warehouse from the drop-down list, from which the transfer should be made. |
Target warehouse |
Select the target warehouse from the drop-down list, to which the transfer should be made. |
Delivery date |
Select the delivery date for the redistribution or click Today to automatically set today’s date. |
External redistribution ID |
Enter the external redistribution ID. |
Owner |
Select the owner (the editing user). If you set a default owner, they will be preselected. Otherwise, owners with the user rights to create redistributions can be selected from the drop-down list. |
Tags |
Optional: Select one or several tags for the new redistribution. |
Status |
Optional: Select a status for the redistribution. |
Once you’re done with all the settings, click on Redistribution items to go to the next step.
2. Redistribution items - finding and adding items
Once you have entered all the redistribution details, you can now add your desired items to the cart as redistribution items in this step.
2.1. Searching for items
By using the search (search), you can find the desired items and add them to the redistribution. Use one of the following options to search for items:
Searching for items:
-
Option 1: Click on search to see a list of all items.
-
Option 2: Enter something into the search field and click on one of the automatic suggestions.
-
Option 3: Click on tune to narrow down the search results with filters.
You can also use the filters listed in the following table to narrow down the search results.
| Filter | Explanation |
|---|---|
Item ID / Variation ID / Variation number |
Enter one or a combination of these three values. If you enter multiple search terms, only the first two will be used to search by item ID, variation ID, variation number, and barcode. Results that match any of the terms will be displayed. The item name will only be searched if your input contains more than four characters. |
Item ID |
Enter an ID to filter by items with this ID. |
Item name |
Enter a name to filter by items with this name. |
Variation no. |
Enter a variation number to filter by items with this variation number. Tip: For this filter, a partial search is also possible. This means that you only need to enter the first characters of the variation number to search for it. |
Variation ID |
Enter a variation ID to filter by items with this variation ID. |
Barcode |
Enter a barcode to filter by items with this barcode. |
Manufacturer |
Enter a manufacturer to filter by items with this manufacturer. |
Supplier item number |
Enter the number of the supplier to search for items with this supplier number. |
Variation tag |
Enter a tag to filter for variations with this tag. |
Only display items in stock |
Activate this option (done) to filter for items with physical stock. |
Only display active items |
Activate this option (done) to filter by active items. |
2.1.1. Saving the current filter
You have the option to save your filter. Saved filters can be selected each time the menu is opened under (bookmark icon), similar to bookmarks. Every user can save their own filters.
To save a current filter, proceed as follows:
-
Start a search.
-
Click on Saved filters (bookmarks).
-
Click on bookmark_border Save current filter.
-
Enter a name and toggle the optional settings as needed (toggle_on).
-
Click on Save.
→ The filter settings now appear under Saved filters (bookmark).
2.1.2. Applying saved filters
To apply saved filters, proceed as follows:
-
Click on Saved filters (bookmarks).
-
Click on an existing filter setting.
→ The search is started and the filter settings are displayed at the top as chips.
The item table can be customised according to your needs. This means that you can decide which information is displayed in the table columns and in what order they are placed. To adjust the table, proceed as follows.
Customising the table:
-
Click on Configure columns (settings).
→ The Column Configuration window opens. -
Select which columns you want to be displayed. Refer to the information given in Table 3.
-
Move (drag_indicator) the columns so they are displayed in the desired order.
-
Click on Confirm to save your settings.
Once you have customized the table, this selection will be saved. The table remains the same even after you have completed this redistribution and created additional redistributions. You can change the layout any time. A list of the available columns can be found in Table 3. This table also indicates whether a column is a default column. Default columns are displayed when tables are not customised.
| Setting | Explanation |
|---|---|
Item ID |
Displays the item ID. Clicking on the item ID redirects you to the item details. This is a default column. |
Variation ID |
Displays the variation. Clicking on the variation ID redirects you to the item details. This is a default column. |
Barcode |
Displays the barcode of the item. This is a default column. |
Item ID / Variation ID |
This column displays the item ID and the variation ID next to each other and not in two separate columns. Clicking on the item or variation ID redirects you to the item or variation details. This is a default column. |
Variation no. |
Displays the variation number. Clicking on the variation number redirects you to the variation details. This is an optional column. |
Item name |
Displays the name associated with the item. This is a default column. |
Attributes |
Displays the attributes associated with the item. This is a default column. |
Variation name |
Displays the name associated with the variation. This is a default column. |
Availability |
Displays the availability of the item. This is a default column. |
Net stock |
Displays the net stock of the item. This is a default column. |
Quantity in source warehouse |
Displays the quantity of items in the source warehouse. This is a default column. |
Quantity in target warehouse |
Displays the quantity of items in the target warehouse. This is a default column. |
Quantity in supply |
Displays the quantity of ordered items. This is a default column. |
Quantity |
Enter the quantity to be added to the shopping cart. You can only enter whole numbers. Negative quantities or quantities which exceed the net stock are not allowed. If you enter such quantities, an error message is displayed. If the added quantity sets the stock in the warehouse to 0 or lower, the row is displayed in red. |
Units contained |
Displays the number of units contained in the packaging unit. |
2.2. Adding items to the shopping cart
After you have found all the desired items using the search or filters, you can now add them to the cart. To do so, proceed as follows.
Adding items:
-
Enter the quantity to be redistributed in the Quantity column.
-
At the end of the respective row, click on Add items to shopping cart (add_shopping_cart) to add the item to the shopping cart.
-
Repeat these steps until all redistribution items that should be redistributed are included in the cart in the required quantities.
2.3. Editing the shopping cart
You can edit some fields directly in the shopping cart table. This is called inline editing.
At the moment this feature is available for the following fields:
-
Ordered quantity
Proceed as follows to edit the fields in the table.
Edit fields directly in the shopping cart table:
-
Click on edit in the table header next to the field you want to edit.
→ Several icons will be displayed above the header in the editing mode. Refer to Table 4.
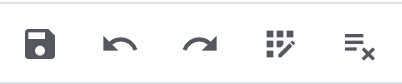
| Symbol | Element | Explanation |
|---|---|---|
save |
Save |
Saves the changes. |
undo |
Undo |
Undoes the last change, unless this change has already been saved. |
redo |
Redo |
Restores the previously undone change. |
app_registration |
Activate the editing mode for all columns |
If you click on edit in a field that has editing mode available, you can click on app_registration to activate the editing mode for all columns. |
playlist_remove |
Deactivate the editing mode for all columns |
Click on playlist_remove to deactivate the editing mode for all columns and return to the overview. |
Note: The changes are only valid for the redistribution they are done in. If you want to adjust the item settings in general, you can do so in the menu Item » Edit item in the corresponding tab.
Items in the cart can also be deleted. Click on Delete (delete) at the end of each respective row to do so.
Once you have finished editing all the desired items in the cart, click on Overview to proceed to the third and final step. You can also go back to the redistribution details by clicking on Redistribution details. Items in the shopping cart will be saved when you navigate forward or backward.
The shopping cart table is customisable. This means that you can decide which table columns are displayed in which order. When you have adjusted the table, this selection will be saved.
Customising the table:
-
Click on Configure columns (settings).
→ The Column Configuration window will open. -
Select which columns you want to be displayed.
-
Move (drag_indicator) the columns so that they are displayed in the order you need them in.
-
Click on Confirm to save your settings.
| Setting | Explanation |
|---|---|
Item name |
Displays the name associated with the item. You can edit (edit) the item name if needed. |
Supplier information |
Displays the information about suppliers that is stored in the variation. |
Attributes |
Displays the attributes. |
Barcode |
Displays the barcode of the item. |
Price |
Displays the price. You can edit the price if needed. |
Discount [%] |
Displays the discount in percent. If needed, adjust the discount. |
Discounted price |
Shows the discount that was selected for this redistribution item. |
Ordered quantity |
Displays the quantity of the items. If needed, adjust the quantity. |
Item ID |
Displays the item ID. You can open the item by clicking on the ID. |
Variation no. |
Displays the number of the variation. Clicking on the variation number will take you directly to the settings of that specific variation. |
Variation ID |
Displays the variation ID of the redistribution item. You can open the variation by clicking on the ID. |
Variation name |
Displays the name of the variation. |
Model |
Displays the model of the variation. |
Supplier item number |
Displays the supplier’s item number. |
Supplier item name |
Displays the supplier’s item name. |
System purchase price |
Displays the system purchase price. |
Units contained |
Displays the number of units contained in the packaging unit. |
3. Overview - Finalising a redistribution
In the final step, you will see an overview of all the settings you configured for the redistribution in the previous steps before creating the redistribution.
In the overview table, you will see info boxes displaying various amounts for this redistribution:
-
Net order value
-
Item amount
In the Redistribution details, you can adjust the delivery date, and owner if needed.
Below the redistribution details, a table with Status and Tags is displayed, which you can adjust here if necessary.
The table with the Redistribution items provides an overview of the settings you made in the previous step.