Companies
On this page of the manual you will learn everything about how to manage companies in PlentyONE. You manage companies in the CRM » Companies menu. You can, among others, create, search and edit companies and link contacts with the company.
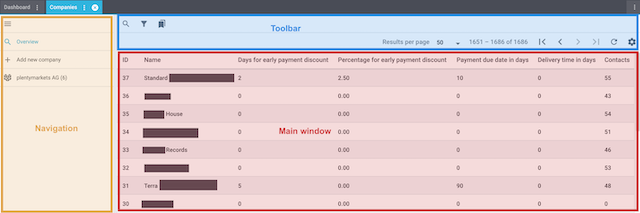
The CRM » Companies menu is structured as follows:
-
Navigation: Here you can navigate through different parts of the menu. The currently selected section (blue font) is displayed in the main window on the right. If you open several companies at once, they will be displayed underneath each other. Click on menu to expand or collapse the navigation bar.
-
Toolbar: Here you can search for companies, adjust the columns in the overview, set the results to be shown per page and click through the pages with the companies.
-
Main window: Here you can see whichever section is currently open.
-
Overview: When you start a search, you’ll see the results in an overview. The overview provides information about the companies found at a glance. For example, you can see the number of linked contacts and the terms of payment that you saved, such as early payment discount and percentage for early payment discount.
-
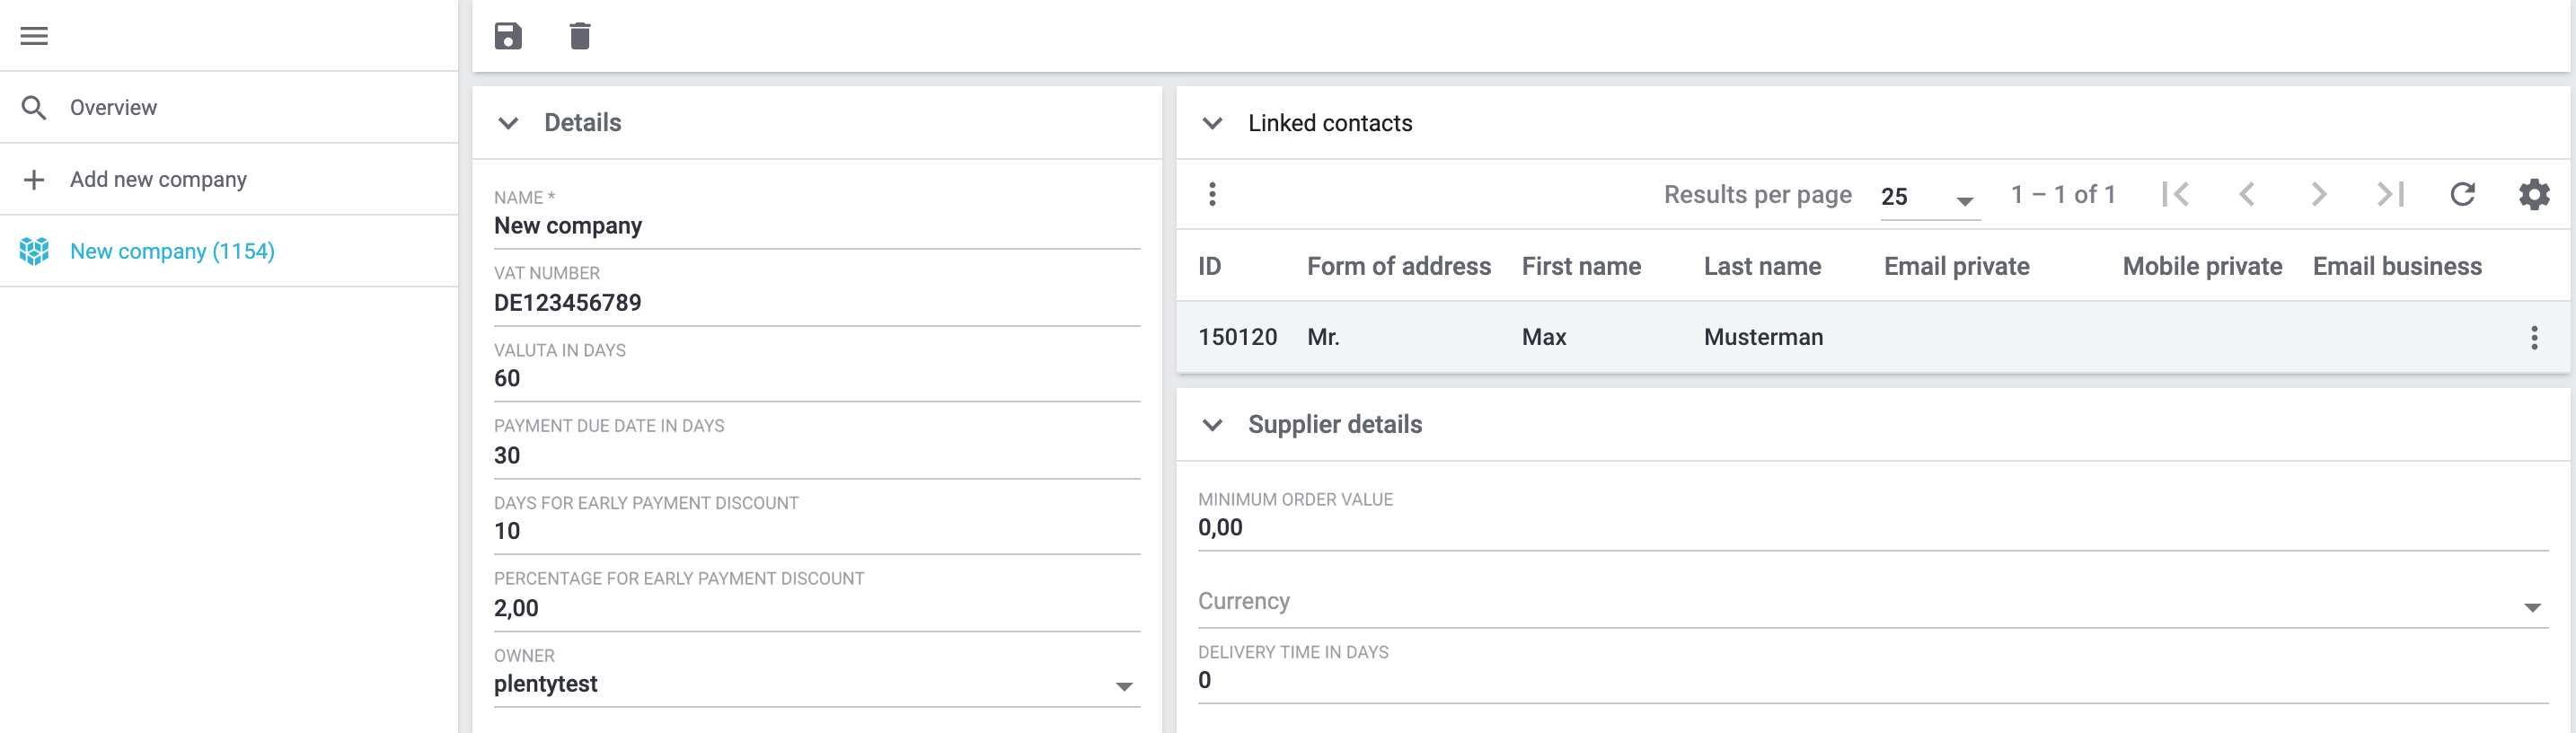
Detail view: When you open a company, its details are displayed in the main window on the right. The detail view of a company is divided into the sections Company details, Linked contacts, Supplier details, Messenger and Orders.
The Messenger section shows all conversation of all contacts that are linked with this company. The Orders section shows all orders of all contacts that are linked with this company.
-
1. Assigning rights
Users with roles that are not of the type Administrator can only see certain sections and menus in PlentyONE. This means they only have limited access to the system. If employees work with the company UI, they need at least the following rights:
-
CRM > Company > Read
-
CRM > Company > Update
-
CRM > Company > Create
-
CRM > Company > Delete
Note that only users with roles of the type Administrator can grant rights.
Assigning rights:
-
Open the menu Setup » Account management » Roles.
→ The roles overview opens. -
Click on New (add).
→ The role creation menu opens. -
Enter a name for the role.
-
Switch to the advanced mode by toggling Advanced (toggle_on) slider.
-
Assign the rights for the respective section by ticking the check boxes indicated above.
Note: You can either grant rights for complete sections or limit the rights you grant the user. To only grant limited rights in a certain section, expand the section. -
Save (save) the settings.
|
The simple mode and advanced mode are connected. If you check menu visibilities in the simple mode the corresponding permissions in the advanced mode will be checked automatically. The connection only exists in this direction. If you check permissions in the advanced mode no menu or plugin visibilities will be checked automatically. |
2. Creating a company
The user interface to create a new company allows a high degree of flexibility for positioning content and data. This works by intuitively positioning sections for content and elements on the dashboard via drag-and-drop. Each section and each element can be further edited by clicking on in the top right of the company data record. Table 1 contains an overview on the functions available in the editing mode of company data record.
Element |
Symbol |
Explanation |
Edit view |
Opens the company data record for editing. |
|
Undo |
undo |
Undoes the last change, unless this change has already been saved. |
Redo |
redo |
Restores the previously undone change. |
Default view |
This section displays the view that is currently opened. Click on to switch to another view or to create a new view. |
|
Restoring the previously saved state |
restore |
Resets the company data record to the state that was last saved. |
Save |
save |
Saves the changes made to the company data record. By doing so, you can save as many different views as you like. |
more_vert |
Click on this symbol between the components to add or remove columns and lines or to reduce or enlarge the column sizes. |
|
Edit |
edit |
When you edit the component, you can see in the Elements section on the right side which elements have not been used yet and are therefore still available. Elements that have already been added are disabled and cannot be used another time. |
Delete |
delete |
Deletes the component. |
Close |
close |
Closes the editing mode. If you have not saved the changes yet, a security inquiry appears. |
Proceed as described below to create a new company.
Creating a company:
-
Go to CRM » Companies.
-
Click on add New company on the left side of the screen.
-
Enter the data or select the options from the drop-down lists. Note Table 2.
-
Save (save) the settings.
| Setting | Explanation |
|---|---|
Company details |
|
Name* |
What’s the name of the company? Name is a mandatory field. |
VAT number |
What’s the VAT number of the company? |
Valuta in days |
Enter the time period (starting when the invoice is created) when you wish for an additional time period before the payment due date time period begins. |
Payment due date in days |
Enter the payment due date in days. |
Early payment discount in days |
Enter the number of days (starting when the invoice is created) in which the company can pay the pending amounts at a discounted price. |
Percentage for early payment discount |
Enter the value in percent that the company may subtract if they make the payment within the time period Early payment discount. |
Owner |
Which owner should be assigned to the company? Select a name from the drop-down list. |
Supplier details |
|
Currency |
Select the currency from the drop-down list. This currency is primarily considered for the respective items and orders. |
Minimum order value |
Enter the minimum order value for the system currency selected above. |
Delivery time in days |
Enter the delivery time in days. |
You can use the options Valuta, Payment due date, Days for early payment discount and Percentage for early payment discount to set up the following terms of payment:
60 days valuta, 30 days net (payment due date), 10 days with a 2% early payment discount
Explanation: If the payment of an order reaches you within 10 days, the company receives a discount of 2%. The payment is late after a total of 91 days. When incoming payments are imported and assigned, they are automatically checked internally to see whether the company’s early payment discount is valid. If the early payment discount time period has expired, the order receives the status Partial payment received.
The terms of payment listed above are automatically applied to the order and the documents. It is possible to manually adjust or enter the terms of payment in the order, if no values have been saved yet in the company data record (see Table 2) and in the customer class.
3. Searching for a company
In order to search for specific companies, enter a search term in the search fields or select the drop-down list settings. You can enter multiple search terms into the search fields at once. This makes your search run quicker and more accurate.
Searching for a company:
-
Go to CRM » Companies.
-
Option 1: Click on search (Search)to get a list of all companies.
-
Option 2: Enter the company name into the search field.
-
Option 3: Click on tune to narrow down the search results with filters.
-
-
Enter the company ID, company name or the name of the assigned owner.
Tip: You can enter multiple search terms into the search fields at one time. This makes your search run quicker and be more accurate. -
Click on Search.
→ The companies that correspond to the search criteria entered are shown in the overview.
3.1. Saving the current filter
When you start a search, your selected filters are displayed up top as so-called “chips”. You can save these filters to apply them again more quickly and easily in the future.
Saving the current filter:
-
Start a search.
-
Click on Saved filters (bookmarks).
-
Click on bookmark_border Save current filter.
-
Enter a name for the filter.
-
Decide whether
-
this filter should be set as default filter (toggle_on)
-
this filter should be created for all users (toggle_on).
-
-
Click on SAVE.
→ The filter now appears under Saved filters (bookmarks).
| Use drag-and-drop to arrange the filters in a specific order by clicking on Move (drag_indicator). Click on delete to delete a filter. |
3.2. Applying saved filters
Applying saved filters:
-
Click on Saved filters (bookmarks).
-
Click on a filter that you have already created.
→ The search is started and the filter settings are displayed up top as so-called “chips”.
3.3. Setting a default filter
To make sure that you don’t have to select a filter that you use quite often from the list of your saved filters every time when opening the CRM » Companies menu, you can set a created filter as default filter. Every time when you open the companies UI, this filter will be automatically applied.
You can set the filter as default filter directly when creating it as described in Saving the current filter or you can set the filter as default in the overview afterwards.
Click in the line of the saved filter on star_border Set as default. If you want to set another filter as default filter, deactivate the currently selected default filter by clicking on star Do not use as default.
4. Configuring columns
For the following sections, you can specify which columns should be displayed there:
-
Linked contacts section in the company data record
-
Messenger section in the company data record
-
Orders section in the company data record
4.1. Company overview
Click in the company overview in the top right on Configure columns (settings) and activate (check_box) the columns that you want to see in the overview.
You can also deactivate (check_box_outline_blank) activated columns again.
Click on drag_indicator and hold down the symbol to change the order of the columns with drag-and-drop. The following columns are available:
-
ID
-
Name
-
VAT number
-
Valuta in days
-
Early payment discount in days
-
Percentage for early payment discount
-
Payment due date in days
-
Delivery time in days
-
Minimum order value
-
Currency
-
Owner
-
Number of linked contacts
4.2. Linked contacts in the company data record
Click in the company data record in the Linked contacts section in the top right on Configure columns (settings) and activate (check_box) the columns that you want to see in the overview.
You can also deactivate (check_box_outline_blank) activated columns again.
Click on drag_indicator and hold down the symbol to change the order of the columns with drag-and-drop. The following columns are available:
-
ID
-
Form of address
-
Title
-
First name
-
Last name
-
Email private
-
Phone private
-
Mobil private
-
Email business
-
Phone business
-
Mobile business
-
Created at
-
Updated at
-
Action
The following fields are activated by default: first name, last name, email private, phone private, mobile private and action (more_vert).
Note: By clicking on Action (more_vert) in the line of the linked contact, another window (delete Delete contact link) opens. Via this setting, you can remove the link between company and contact.
4.3. Messenger in the company data record
The Messenger section shows all conversation of all contacts that are linked with this company.
Click in the company data record in the Messenger section in the top right on Configure columns (settings) and activate (check_box) the columns that you want to see in this overview.
You can also deactivate (check_box_outline_blank) activated columns again.
Click on drag_indicator and hold down the symbol to change the order of the columns with drag-and-drop. The following columns are available:
-
Extend relations
-
Status
-
Short ID
-
Relations
-
Subject
-
Preview
-
Priority
-
Tags
-
Folder
-
Deadline
-
Created at
-
Updated at
-
Type
-
Status
-
Follow-up date
-
Referrer
-
Attachments
-
Billed messages
-
Billed minutes
-
Subscribed
-
Actions
You can create a new message in the Messenger section of the company data record. In this case, no contact is preselected. The search in the recipients fields only displays contacts that are linked with this company.
For further information, refer to the Messenger page.
4.4. Orders in the company data record
The Orders section shows all orders of all contacts that are linked with this company.
Adding new orders is not possible via the company data record. This section is therefore only intended to provide information and an overview.
Click in the company data record in the Orders section in the top right on Configure columns (settings) and activate (check_box) the columns that you want to see in this overview.
You can also deactivate (check_box_outline_blank) activated columns again.
Click on drag_indicator and hold down the symbol to change the order of the columns with drag-and-drop. The following columns are available:
-
Order ID
-
Gross order value
-
Main
-
Order status
-
Order type
-
Invoice number
-
Payment method
-
Order date
-
Referrer
-
Contact ID
-
Contact name
-
Referrer name
-
Client
-
Incoming payment
-
Outgoing items
-
Shipping
5. Editing a company
You can edit a company’s details at any time. To do so, proceed as described below.
Editing the company:
-
Go to CRM » Companies.
-
Search the company that you want to edit by means of the filter settings as described in the Searching for a company chapter.
→ The companies that correspond to the search criteria entered are shown. -
Click in the line of the company.
-
Carry out the changes. Note Table 2.
-
Save (save) the settings.
6. Linking company and contact
You can search for a contact in the Linked contacts section of the company data record and link it with the company. To do so, proceed as described below.
Linking company and contact:
-
Go to CRM » Companies.
-
Search the company that you want to link to a contact by means of the filter settings as described in the Searching for a company chapter.
→ The companies that correspond to the search criteria entered are shown. -
Click in the line of the company.
-
In the Linked contacts section, click on Link contacts (more_vert).
→ A new window opens. -
Enter the name or the ID of the contact in the Search contact field.
Note: Enter at least 3 letters of the name. Your system then suggests contacts that have already been saved. -
Select the contact from the list of suggestions.
-
Click on Create contact link (person_add).
→ The contact is now linked with the company and is shown in the Linked contacts section.
By clicking in the line of the contact, you will be automatically directed to the contact data record in the CRM » Contacts menu.
7. Removing the link between company and contact
You can remove the link between contact and company in the Linked contacts section of the company data record. To do so, proceed as described below.
Removing the link between company and contact:
-
Go to CRM » Companies.
-
Search the company for that you want to remove the link with a contact by means of the filter settings as described in the Searching for a company chapter.
→ The companies that correspond to the search criteria entered are shown. -
Click in the line of the company.
-
In the Linked contacts section in the line of the contact, click on more_vert.
→ A new window opens. -
Click on Delete contact link (delete).
→ The link to the contact is removed and the contact is deleted from the overview in the Linked contacts section.
8. Deleting a single company
If you don’t need a company data record any longer, you can delete it any time. The contact data records that are linked with the company will not be deleted. Only the assignment of the company to the contact and the company itself will be removed when deleting the company.
Note: The link to the company will also be removed in the contact data record in the CRM » Contacts menu.
If you want to delete multiple companies at the same time, note the explanations in the Deleting multiple companies chapter.
Deleting a single company:
-
Go to CRM » Companies.
-
Search the company that you want to delete by means of the filter settings as described in the Searching for a company chapter.
→ The companies that correspond to the search criteria entered are shown. -
Click in the line of the company.
-
In the toolbar at the top, click on Delete (delete) .
→ A window appears and you need to confirm your decision. -
Click on Delete.
→ The company is deleted and removed from the overview.
9. Deleting multiple companies
Instead of deleting every company individually, you can save time and delete multiple contacts at the same time by using the group function. Once you selected (check_box) at least one company in the overview, the more_vert button becomes visible. Behind this button, you can find the option to delete the selected companies.
Deleting multiple companies at the same time:
-
Go to CRM » Companies.
-
Search the companies that you want to delete by means of the filter settings as described in the Searching for a company chapter.
→ The companies that correspond to the search criteria entered are shown. -
Select (check_box) the companies that you want to delete.
-
In the toolbar at the top, click on more_vert and then on Delete (delete).
→ A window appears and you need to confirm your decision. -
Click on Delete.
→ The companies are deleted and removed from the overview.