First login
Welcome to PlentyONE. Let me show you the first steps in your new system!
1. Logging in for the first time
All you need to get started is the welcome email that you received from PlentyONE. It contains the information that you’ll need to log in. The connection is encrypted, which makes every login secure.
Log into a system:
-
Click on the link in the email to access the PlentyONE login screen.
-
Enter your email address and password.
Or: enter your plenty ID, user name and password you received via email. -
Click on Login.
|
How do I log back out?
Move your mouse cursor over the user symbol () and then click on Logout. |
2. Setting your own password
Once you’ve logged into PlentyONE for the first time, you should change the automatically generated password that you received in the welcome email. The workflow of changing your password slightly differs, depending on whether you used email address or plenty ID and user account name to log in.
Change password with login via email:
-
Open the Account settings » Security menu.
-
Enter your current password under Current password.
-
Enter your new password under New password.
-
Save (save) the settings.
-
Log out and then back in with the new data.
Change password with login via plenty ID and user account name:
-
Click on the profile picture in the top right.
→ A drop-down list opens. -
Click on PlentyONE account.
→ The account settings of the central login opens. -
Open the Account settings » Security menu.
-
Enter your current password under Current password.
-
Enter your new password under New password.
-
Save (save) the settings.
-
Log out and then back in with the new data.
|
Further information about the account settings
You can create additional user accounts for your colleagues and save various information within each account, e.g. an e-mail address and access rights. Here you can find further information about user accounts. |
3. Finding your way around the back end
The main navigation bar is up top. But there’s much more behind all the menus. You’ll notice that drop-downs appear when you move your mouse over the various menus that let you access all important areas of PlentyONE.
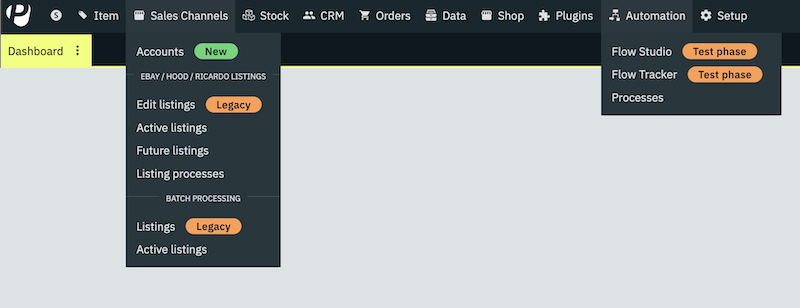
-
PlentyONE Logo (Start) = On the left, you will see the PlentyONE logo. This is where you can find information related to your PlentyONE System. For example, here you can view your contract with PlentyONE. or you can access the PlentyONE changelog and see which new features have recently been released.
-
Modules = In the middle, you’ll find the PlentyONE modules that keep your day-to-day business running smoothly. The modules all fit together perfectly: From Item management to the web shop, fulfilment and payment.
-
Setup = This menu is where you configure the tools and functions in your PlentyONE System. Take a look at our assistants and at the quick start. These resources are designed help new users set up their systems.
|
What do the colourful tags mean?
When hovering over the different main menu items in the back end, you will find several tags. These tags indicate for example that a new menu item has been added.
|
4. Tools for working more efficiently
On the right side of the main navigation bar, you’ll find a few tools that help you work more efficiently with your PlentyONE System.

-
Search = Enter a word into the search bar if you want to:
-
search for this term in all of the back end menus.
-
open the search function in the manual with this search term.
-
-
Notification centre = The notification centre provides important information from different areas of the PlentyONE System. If you dismiss a message, you cannot restore it. The message remains visible for other users.
-
Service offers = The help menu () is where you can access various support offers.
-
plentyShop preview = Click on your plenty ID to open the start page of your online store in a preview.
-
Account = Click on the user icon () to access your user account. Here you can e.g. change the name and password that were sent to you in the welcome email.
5. Attention techies: Accessing the back end via URLs
You can access specific areas of the back end directly by using UI actions. This saves you time and clicks. This section lists the variables and parameters that lead to the respective back end areas.
|
Note
You must be logged in to open a back end area with a URL. Also pay attention to lower-case and upper-case letters in parameter keys. |
5.1. Accessing a back end area with a URL
-
Enter https://plentymarkets-cloud-de.com or https://plentymarkets-cloud-ie.com as the first part of the path. Which information you should enter depends on whether your system is hosted in Germany or in Ireland.
-
Add
/and your plenty ID. -
Continue with the query string. It begins with a
?. -
Add
uiAction=. -
Add the key for the UI actions and the parameter with the corresponding ID. Note the information provided in <table-keys-ui-actions-parameters>.
-
Once you have entered all relevant information, open the URL to access the desired back end area.
|
Example
To open the variation detail view, the path has to consist of the following parameters: |
| Keys | Explanation |
|---|---|
ITEM_DETAIL |
Opens the item detail view for the specified item ID (itemId is a required parameter). |
ITEM_VARIATION_DETAIL |
Opens the variation detail view for the specified item ID and variation ID (itemId and variationId are required parameters). |
ORDER_DETAIL |
Opens the order detail view for the specified order ID (orderId is a required parameter). |
REORDER_DETAIL |
Opens the reorder detail view for the specified reorder ID, the item ID or the item ID of a reorder (only one of the three parameters can be specified here). |
TICKET_DETAIL_VIEW |
Opens the ticket detail view for the specified ticket ID (ticketId is a required parameter). |
CUSTOMER_DETAIL |
Opens the customer detail view for the specified customer ID (customerId is a required parameter). |
6. Handling of assistants
Our assistants will help you setting up your system step by step without any instructions or prior knowledge. Within the system you will find the virtual assistant under Setup.
6.1. Navigating in the assistant
Once you have completed a step, the Next button brings you to the next step. However, it is also possible to access the next step via the side navigation. Steps that have already been completed are highlighted in green in the navigation bar and you can jump back and forth between them.
6.2. Carrying out changes in the assistant
If you want to carry out changes in an assistant, it depends on whether they affect the following steps. If your changes do not affect following steps, you can immediately return to the summary and directly finalise the assistant. However, if you carry out changes that affect settings of following steps, you have to click through all following steps once again, as otherwise errors may occur.
6.3. Summary at end of assistant
On the last page of the assistant you will find a summary. Here, you can take a look at all settings that have been carried out in the different steps. If you reopen an assistant that has already been finalised, you get directly to the summary so you can find the setting that you want to edit with just one click.