PlentyONE account
With a PlentyONE account you login into every system that is connected with it and manage the language and time zone for those systems. Additionally, you assign passwords and activate the multi-factor authentication.
Since the 28th February 2024 you are redirected from plentymarkets-cloud-de.com and plentymarkets-cloud-ie.com to account.plentysystems.com. Until then, administrators and non-administrators can still use the old login. This means,you only need one URL to login.
|
Login URL with PID and user name
You can edit the login URL, so that PID and/or user name are prefilled. The URL \\https://account.plentysystems.com/login?pid=1234&user=JohnDoe has the PID 1234 and the user name JohnDoe prefilled. Take this URL and adjust it for your system. You can also just fill in the PID. |
1. Creating a PlentyONE account
Proceed as follows to create a PlentyONE account
-
Open the login.
-
Click on Create account.
-
Enter an email address.
-
Enter and confirm a password.
-
Click on Create new account.
If you received an invitation email and not have a PlentyONE account yet, create one by clicking on the link in the invitation.
2. Connecting an existing user account with a PlentyONE account
Unresolved include directive in modules/business-decisions/pages/central-login.adoc - include::page$user-account-access.adoc[]
3. Login
There are two ways to login into your system:
-
* via email and password
-
* via plenty ID (PID), user account name and password
|
Login via plenty ID, user account name and password
When you login with plenty ID, user account name and password you will be directly forwarded to the backend of the system. In this case, you will not have access to the system overview, thus you can only login into one system with your PlentyONE account. |
4. System overview
In the system overview you find all systems that are connected with your PlentyONE account as well as there plenty ID and system version. From this menu you login into a system of your choice. Besides that, you also get to the account settings (settings).
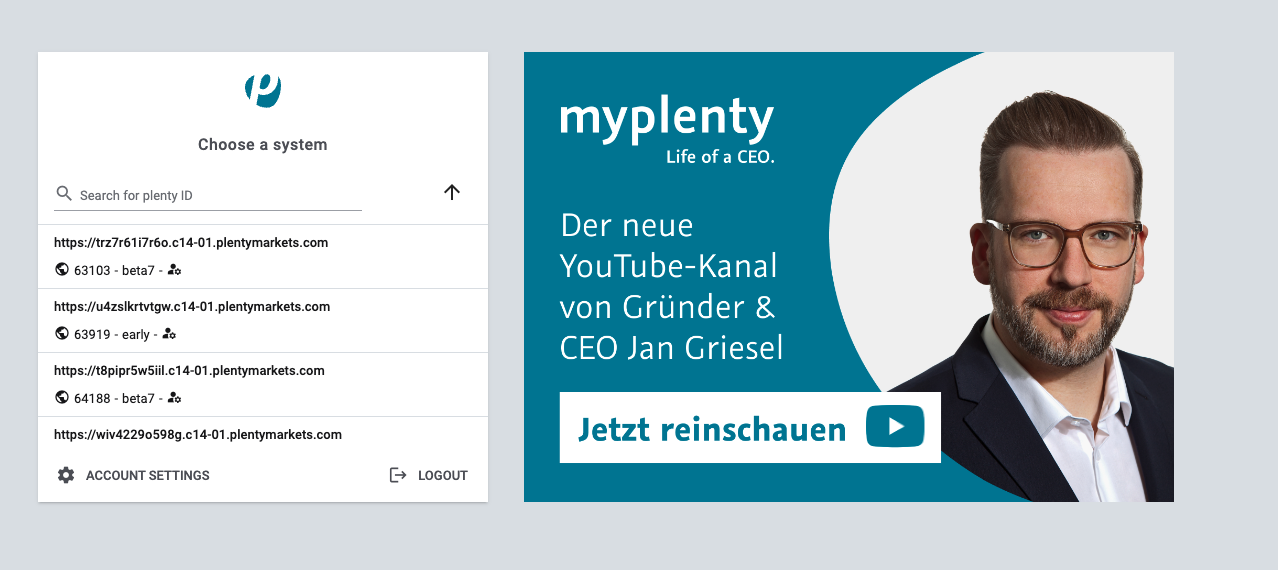
Below the domain of every system you find the following information from left to right:
-
* the plenty ID of the system (public)
-
* the system version
-
* if you are administrator in the connected system, this item will be shown: manage_accounts
With search for plenty ID (material:public) you search for a specific system by entering the plenty ID. To sort the system either descending or ascending by plenty ID, click on arrow_upward.
5. Account settings
In the account settings menu carry out settings that apply for your PlentyONE account and every connected system. The account settings are separated into the two menus Account and Security.
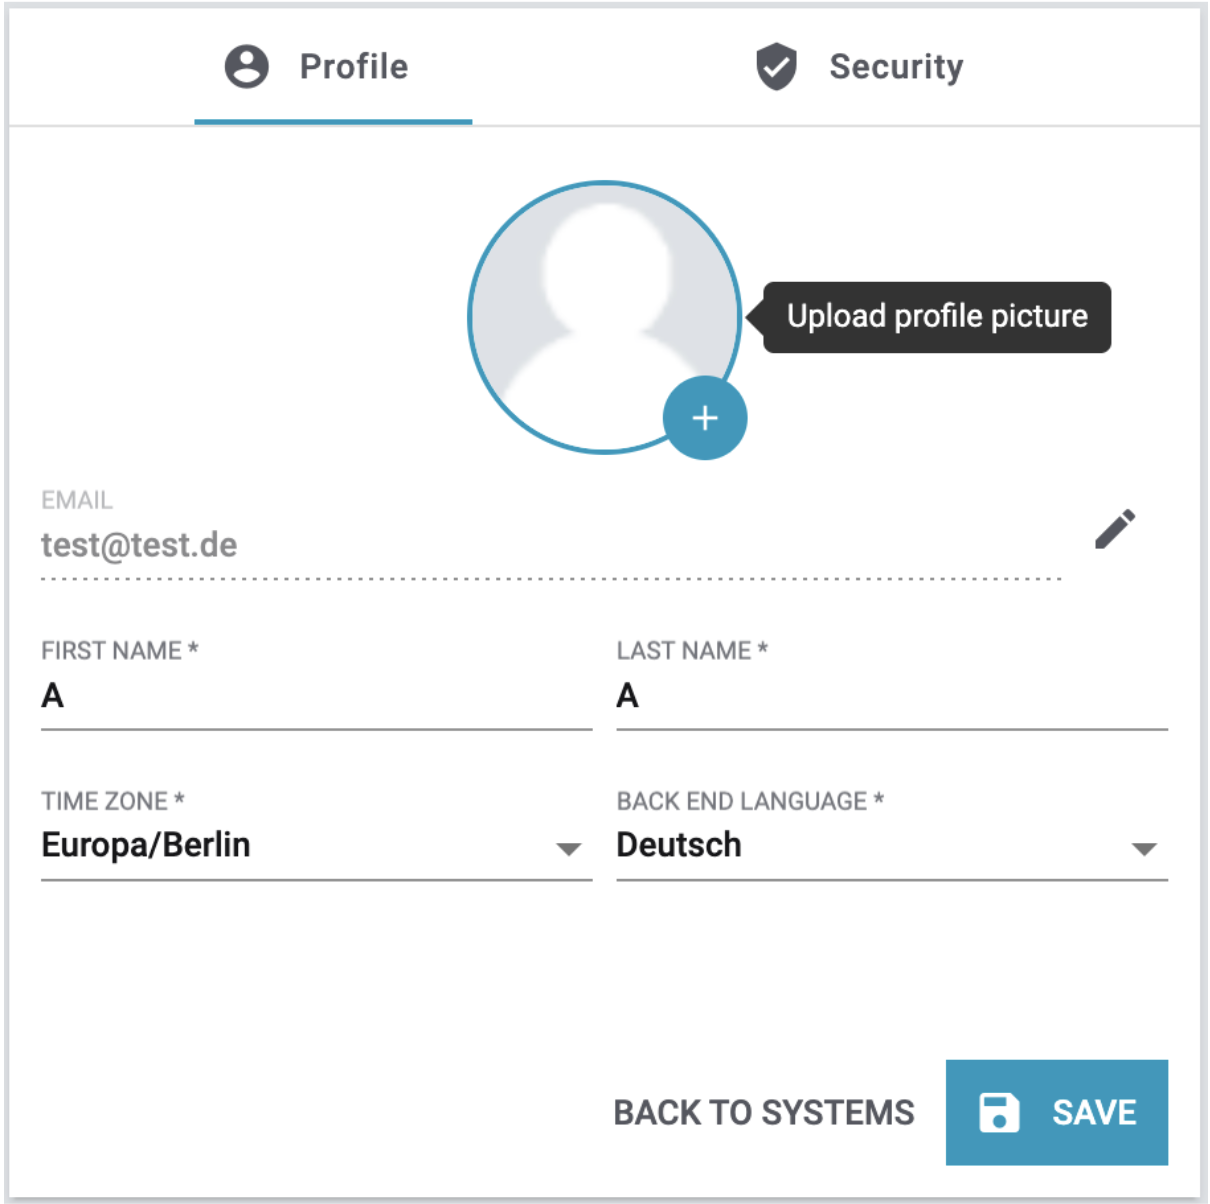
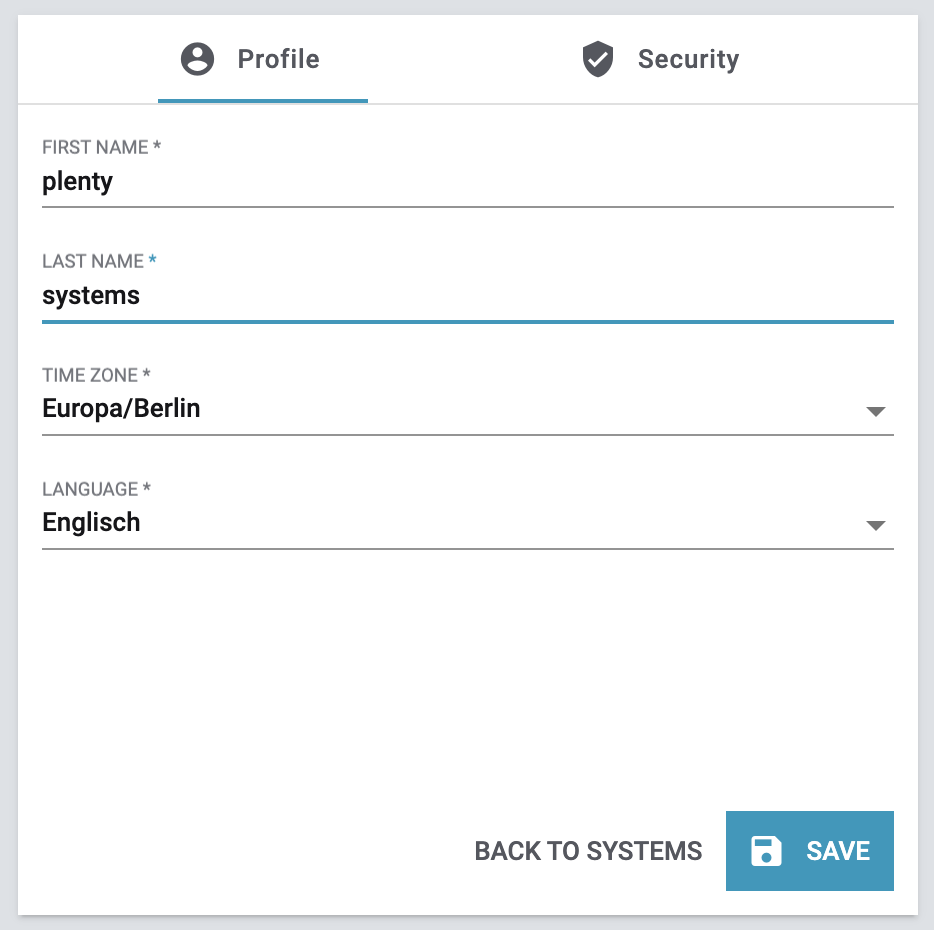
5.1. Account
In the Account settings » Account menu you enter the name and surname for your PlentyONE account, the time zone, language and email address of your PlentyONE account.
Carry out account settings from the login:
-
Open the Login » Account settings » Account menu.
-
Carry out the settings. Pay attention to the explanations given in Table 1.
-
Save (save) the settings.
|
Carry out account settings from the back end:
If you want to access the account settings from the backend you need to log out. |
| Setting | Explanation |
|---|---|
*Profile picture |
Profile picture that is shown in every connected system. |
Email address of your PlentyONE account that can be changed by edit. |
|
First name |
Real first name of the user that is displayed in every connected system. |
Last name |
Real last name of the user that is displayed in every connected system. |
Time zone |
Time zone that will be applied to every connected system. |
Language |
Language that will be used in every connected system. Your browser language will be set as the default. |
5.1.1. Changing the email address of the PlentyONE account
You can change the email address of your PlentyONE account any time. To confirm this change, a confirmation code is send to the new email address you entered. After that, you have to log in with the new email address.
Proceed as follows to change the email address of your PlentyONE account:
-
Open the Login » Account settings » Account menu.
-
Click on Change email (edit).
→ The Change email address window opens. -
Enter the new email address in the new email address field.
-
Click on Next.
→ The Confirm part opens. -
Enter the confirmation code that was send to the new email address under Confirmation code.
-
Click on Save (save).
-
Log in with the new email address in your PlentyONE account.
5.1.2. Uploading an profile picture:
In the account settings of your PlentyONE account you add and change your profile picture. The profile picture is used in every system that is linked to your account.
Proceed as follows to add profile picture to your plentsystems account:
-
Open the Login » Account settings » Account menu.
-
Open the Login » Account settings » Account menu.
→ A drop-down list opens. -
Click on Upload profile picture.
-
Choose a profile picture.
-
Click on Open.
→ Your profile picture is changed and saved automatically.
When you upload a profile picture you can zoom into the profile picture with the slider beneath it. If you click in the profile picture and hold you adjust the profile picture within the circular frame.

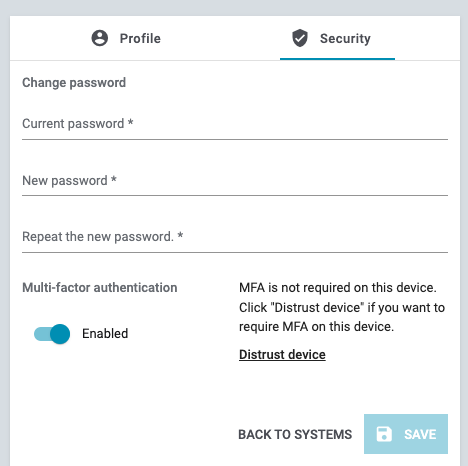
5.2. Security
In the Account settings » Security menu you change the password of your PlentyONE account and activate the multi-factor authentication.
The password minimum requirements for a PlentyONE account are:
-
at least 8 characters
-
contains at least 1 number
-
contains at least 1 special character
-
contains at least 1 uppercase letter
-
contains at least 1 lowercase letter
Proceed as follows to change the password:
-
Open the Login » Account settings » Security menu.
-
Enter your current password under Current password.
-
Enter your new password under New password
-
Repeat the new password.
-
Save (save) your settings.
5.2.1. Activating multi-factor authentication
You activate multi-factor authentication, to make your system more secure. This additional verification makes it more difficult for unauthorized persons to access your PlentyONE account and the connected systems.
You can only activate the multi-factor authentication, in the PlentyONE account. You find the multi-factor authentication in the Account settings » Security menu.
|
Activating multi-factor authentication when loging in via plenty ID and user name
You can also activate the multi-factor authentication, if you are logged in via plenty ID and user name. It is important that you logged in over, because otherwise the menu entry PlentyONE account won’t be visible. |
Proceed as follows to activate the multi-factor authentication directly in your PlentyONE account:
-
Open the Login » Account settings » Security menu.
-
Activate (material:toggle_on) the multi-factor authentication.
The QR code for the authenticator app opens. -
Scan the QR code with your authenticator app.
-
Enter the code that is displayed in your authenticator app under MFA-Code.
-
Click on Save.
When you login and the multi-factor authentication is activated you can trust the device you are on. If you trust a device, you don’t have to enter the confirmation code of the multi-factor authentication on this device. You only have to enter the confirmation code on devices you distrust. You can distrust a trusted device any time, in this case you will have to enter the confirmation code again when logging in.
Proceed as follows to trust a device:
-
Log into a system.
-
Tick the field Trust this device.
-
Enter the confirmation code of your authenticator app.
-
Click on Confirm.
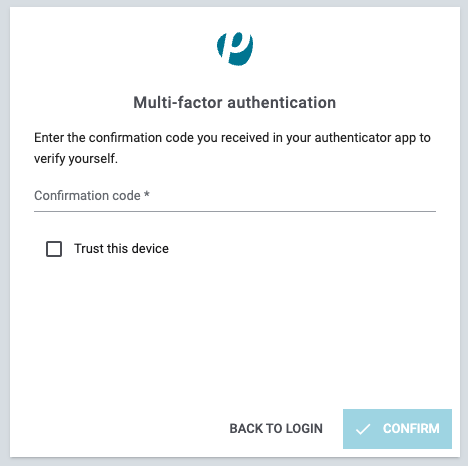
At your next login you won’t have to enter the confirmation code anymore.
Proceed as follows to distrust a device:
-
Log into a system.
-
Open the Account settings » Security menu.
-
Click on Distrust this device
-
Save (save) your settings.
6. General questions
Unresolved include directive in modules/business-decisions/pages/central-login.adoc - include::page$benutzerkonten-zugaenge.adoc[]
| Setting | Explanation |
|---|---|
App Pin |
You can enter a 4 to 12 digit PIN for employees who work with PlentyONE POS. If you save a PIN, it will be possible to quickly switch from one user account to another in the PlentyONE App. However, users can also log into PlentyONE POS with their password. |
Repeat App Pin |
Re-enter the PIN. |
Restrict IP |
Enter the IP address of the user’s computer. The user will only be allowed to log into the system with this IP address. |
User accounts access |
Select the user access for the user account. You can choose between*Administrator* and Only API user. |
Assigned roles |
Select roles for the user account. Roles have to be created beforehand so they can be selected here. |
Signature |
Text that is automatically attached to messages in the Messenger. |
You can invite a user account again as often as you want. Either in the Setup » Account management » Accounts menu or in the detail view of the user account. Proceed as follows:
-
Either open the Setup » Account management » Accounts menu or the detail view of the user account.
-
Click on More (more_vert) in the column of the user account.
-
Click on Invite user again.
Create a ticket in the Service Desk.
The login session of the PlentyONE account ends after 24 hours, meaning you will be automatically logged out after 24 hours of your login. The login session expires if you are inactive for at least six hours. The login session is tracked in all opened browser tabs. That means that you will be logged out of the system in all tabs in which the system in question is currently open no later than 24 hours after first opening the system.
The login session for the system overview of the PlentyONE account will be terminated after 24 hours.