Automations in Messenger
On this page you learn how to automate tasks with Messenger.
|
Tip: Instructions for useful automations for Messenger
On the Practical example: Setting up Messenger automations page, you can find some common examples for setting up useful automations in the Messenger. |
2. Automating events in the Messenger
You can automate certain events in the Messenger. For example, you can create an automation that automatically triggers the email template dispatch to a contact when a new message arrives. Or you set up that all subscribers of a conversation receive a message as a reminder once the conversation has a certain status. There are numerous filters, actions and triggers available.
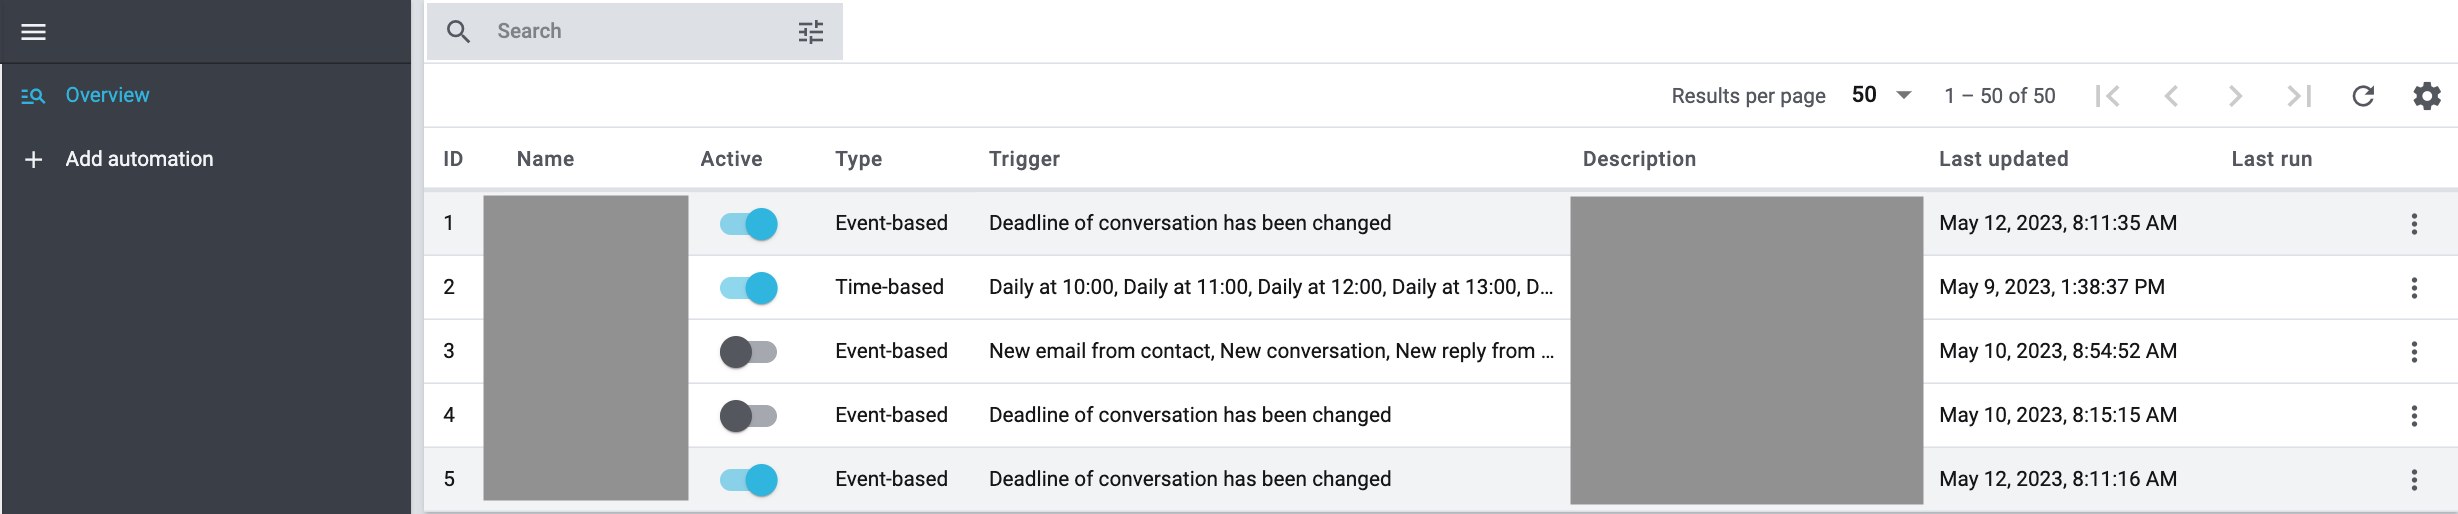
2.1. Configuring columns
Click in the overview in the top right on Configure columns (settings) and activate (check_box) the columns that you want to see in the overview. You can also deactivate (check_box_outline_blank) activated columns again. Click on drag_indicator and hold down the symbol to change the order of the columns with drag-and-drop. Find out which columns are available in the overview:
-
ID
-
Name
-
Active
-
You can directly adjust the status in the overview from Active to Inactive or vice versa.
-
-
Type
-
Shows the type of automation: Time-based or Event-based.
-
-
Trigger
-
Description
-
Last change
-
Date and time when the automation was last changed.
-
-
Last execution
-
Date and time when the automation was last executed.
-
-
Actions
2.2. Creating a new automation
Proceed as described below to create a new automation.
Creating an automation:
-
Go to Setup » CRM » Messenger » Automation.
Or: If you are already in the Messenger menu, click on the left side below the settings Settings section on auto_mode Automation. -
Click on add Add automation.
-
Carry out the settings. Note Table 1.
-
Save (save) the settings.
| Setting | Explanation |
|---|---|
Details |
|
Inactive / Active |
By default, all newly created automations are already set to Active (toggle_on). If you don’t want to activate the automation yet, set it to Inactive (toggle_off). |
Name |
Enter a name for the automation. This is a mandatory field. |
Description |
Enter a short text that summarises what the automation should trigger. This field is optional. A description might later be helpful in the overview. |
Type |
Select the type from the drop-down list. This is a mandatory field. |
Filter |
|
Adding filters |
Click on add (Add filter) to add new filters to the automation. All available filters and their explanation can be found in the Adding filters chapter. |
Trigger |
|
Add trigger |
Click on add (Add trigger) to add new triggers to this automation. All available triggers and their explanation can be found in the Adding triggers chapter. |
Procedure |
|
Add action |
Click on add (Add action) to add new actions to this automation. All available actions and their explanation can be found in the Adding actions chapter. |
2.3. Adding filters
Learn in the following two sub-chapters which event-based and time-based filters are available.
Click on add (Add filter) to add a new filter.
2.3.1. Event-based filters
Table 2 lists the filters that are available when you select the type automatisation type Event-based.
| Filter | Explanation | ||||||||||||
|---|---|---|---|---|---|---|---|---|---|---|---|---|---|
Sender email address |
Enter the exact email address of the sender. |
||||||||||||
Age of the conversation |
Select a relational operator from the drop-down list and enter a number for the age in days into the input field. Relational operators for this filter
|
||||||||||||
Order type |
Choose the order type from the list. |
||||||||||||
Subject contains |
Enter the text that is contained in the subject. Click on Add subject () to add further subject entries to the filter. Conversations are displayed if at least one of the entries matches. |
||||||||||||
Rating of the contact |
Choose a feedback in form of stars from the list. 5 yellow stars are the best rating, 5 red stars are the worst rating. |
||||||||||||
Deadline of conversation |
Select a value from the drop-down list. |
||||||||||||
Owner |
Select the owner from the list. |
||||||||||||
Done |
Select Yes or No from the list. No is selected by default. |
||||||||||||
Creator of conversation |
Select (check_box) one or multiple creators from the list. This is the person that created the first conversation. |
||||||||||||
Conversation Follow-up-Date |
Select a value from the drop-down list. |
||||||||||||
Group, type and status of the conversation |
Choose a group first. Select (check_box) one or multiple types from the list. Afterwards, choose (check_box) one or more states from the list corresponding to the type. |
||||||||||||
Referrer of the conversation |
Select (check_box) one or multiple referrers from the list. |
||||||||||||
Job position of contact |
Select (check_box) one or multiple job positions from the list. |
||||||||||||
Class of contact |
Choose (check_box) one or more classes from the list. |
||||||||||||
Conversation belongs to a guest order |
Select Yes or No from the list. No is selected by default. |
||||||||||||
Last change of the conversation |
Select a relational operator from the drop-down list and enter a number in days into the input field. Relational operators for this filter
|
||||||||||||
Last message contains |
Enter the text that is contained in the last message. |
||||||||||||
Last message is whispered |
Select Yes or No from the list. No is selected by default. |
||||||||||||
Client of the contact |
Select (check_box) one or multiple clients from the list. |
||||||||||||
Inbox of the conversation |
Select (check_box) one or multiple inboxes from the list. |
||||||||||||
Priority of the conversation |
Select a priority from the list.
|
||||||||||||
Language of the contact |
Select (check_box) one or multiple languages from the list. |
||||||||||||
Tags of the conversation |
Select (check_box) one or multiple tags from the list. |
||||||||||||
Tags of order |
Select (check_box) one or multiple tags from the list. |
||||||||||||
Tags of contact |
Select (check_box) one or multiple tags from the list. |
||||||||||||
Type of the contact |
Choose (check_box) one or more types from the list. |
2.3.2. Time-based filters
Table 3 lists the filters that are available when you select the automatisation type Time-based.
| Filter | Explanation | ||||||||||||
|---|---|---|---|---|---|---|---|---|---|---|---|---|---|
Age of the conversation |
Select a relational operator from the drop-down list and enter a number for the age in days into the input field. Relational operators for this filter
|
||||||||||||
Deadline of conversation |
Select a value from the drop-down list. |
||||||||||||
Creator of conversation |
Select (check_box) one or multiple creators from the list. This is the person that created the first conversation. |
||||||||||||
Priority of the conversation |
Select a priority from the list.
|
||||||||||||
Group, type and status of the conversation |
First, select the type and the status that belongs to the type. |
||||||||||||
Referrer of the conversation |
Select (check_box) one or multiple referrers from the list. |
||||||||||||
Inbox of the conversation |
Select (check_box) one or multiple inboxes from the list. |
||||||||||||
Last change of the conversation |
Select a relational operator from the drop-down list and enter a number in days into the input field. Relational operators for this filter
|
||||||||||||
Tags of order |
Select (check_box) one or multiple tags from the list. |
||||||||||||
Tags of the conversation |
Select (check_box) one or multiple tags from the list. |
||||||||||||
Tags of contact |
Select (check_box) one or multiple tags from the list. |
||||||||||||
Subject contains |
Enter the text that is contained in the subject. Click on Add subject () to add further subject entries to the filter. Conversations are displayed if at least one of the entries matches. |
||||||||||||
Sender email address |
Enter the exact email address of the sender. |
||||||||||||
Done |
Select Yes or No from the list. No is selected by default. |
||||||||||||
Conversation Follow-up-Date |
Select a value from the drop-down list. |
||||||||||||
Owner |
Select the owner from the list. |
2.4. Adding procedures
Learn which actions are available.
Click on add (Add action) to add a new action.
| Event | Explanation |
|---|---|
Add subscribers |
Select (check_box) one or multiple subscribers from the list to add them to the conversation. |
Mark as done |
Choose Yes or No from the list, to mark the conversation as done or not done. |
Add reply |
|
Remove from folder |
Select (check_box) one or multiple folders from the list to remove the conversation from these folders. |
Set contact rating |
Choose a feedback in form of stars from the list. 5 yellow stars are the best rating, 5 red stars are the worst rating. |
Change deadline |
Select + or - from the operator list, then enter a number in days. |
Change order status |
Select an order status from the list. |
Send email |
|
Add owner |
Select a role from the first list and the corresponding owner from the second list to add them to the conversation. |
Set group, type and status |
Select the group from the first list, the type from the second list and the corresponding status from the third list. |
Setting a priority |
Select a priority from the list.
|
Remove tags from order |
Select (check_box) one or multiple tags from the list to remove these tags from the order. |
Remove tags from contact |
Select (check_box) one or multiple tags from the list to remove these tags from the contact. |
Remove tags from conversation |
Select (check_box) one or multiple tags from the list to remove these tags from the conversation. |
Add tags to order |
Select (check_box) one or multiple tags from the list to add these tags to the order. |
Add tags to contact |
Select (check_box) one or multiple tags from the list to add these tags to the contact. |
Add tags to conversation |
Select (check_box) one or multiple tags from the list to add them to the conversation. |
Add to folder |
Select (check_box) one or multiple folders from the list to add the conversation to these folders. |
Archiving a conversation |
This action moves the conversation to the archive. |
Deleting a conversation |
This action deletes the conversation. |
2.5. Adding triggers
2.5.1. Adding event-based filters
The following lists the available event-based triggers.
|
Set up multiple triggers as OR conditions
You can add multiple triggers to an automation to create an OR condition. The automation will then be triggered as soon as at least one of the added triggers is activated. |
-
Conversation was marked as read
Triggers the automation when a conversation is marked as read. -
Deadline of conversation has been changed
Triggers the automation when the deadline of a conversation is changed. -
Done status has been changed
Triggers the automation when the done status of a conversation is changed. -
New conversation from contact
Triggers the automation when a new conversation is created by a contact. -
New conversation from user
Triggers the automation when a user starts a new conversation. -
New reply from contact
Triggers the automation when a new reply is sent by a contact. -
New reply from user
Triggers the automation when a user sends a new reply. This does not apply to newly created conversations. -
Order added as recipient
Triggers the automation when an order (or order ID) is added as a recipient to a conversation. -
Priority of conversation has been changed
Triggers the automation when the priority of a conversation is changed. -
Status of conversation has been changed
Triggers the automation when the status of a conversation is changed. -
Tag has been added to conversation
Triggers the automation when a tag is added to a conversation. -
Tag has been removed from conversation
Triggers the automation when a tag is removed from a conversation.
2.5.2. Creating time-based triggers
If you click on add (Add trigger) in a time-based automatisation, the window Create trigger opens. In the Repeat field of an interval you select Daily, Weekly or Monthly.
Depending on which interval you select, there are different options available. You find them in the following table.
| Trigger | Explanation |
|---|---|
Daily |
|
Time |
Select a time from the list. |
Weekly |
|
Weekday |
Select a weekday from the list. |
Time |
Select a time from the list. |
Monthly |
|
At |
You can select from the values: Day, first, second, third, fourth, last. |
Time |
Select a time from the list. |
2.6. Searching an automation
In the overview of the Setup » CRM » Messenger » Automation menu, you can open all automations that you created in a list or you select filters (tune) to narrow down the search results.
Searching an automation:
-
Go to Setup » CRM » Messenger » Automation.
Or: If you are already in the Messenger menu, click on the left side below the settings Settings section on auto_mode Automation.-
Option 1: Click on search to see a list of all automations.
-
Option 2: Enter the ID or the name of the automation in the search field and select the appropriate filter from the suggestion list.
-
Option 3: Click on tune to narrow down the search results with filters.
-
-
Note the explanations about the filters in Table 6.
| Filter | Explanation |
|---|---|
ID |
Enter the ID of the automation to only search for the automation with this ID. |
Active |
Select Active to only search for active automations. |
Name |
Enter a word to only search for automations containing this word in their name. |
Description |
Enter a word to only search for automations containing this word in their description. |
Type |
Select Event-based to only search for automations with this type. |
Trigger |
Select a trigger from the list to only search for automations that contain this trigger. Available triggers:
|
Filter |
Select a filter from the list to only search for automations that contain this filter. Available filters:
|
Event |
Select an action from the list to only search for automations that contain this action. Available actions:
|
replay |
Resets the selected filter criteria. |
search SEARCH |
Starts the search. The automations found are listed in the overview. |
2.7. Copying an automation
If you would like to adjust an existing automation, for example select another trigger, but keep the filters and actions, it is not necessary to create a new automation from the bottom up. Instead, you can copy an existing automation and then carry out the desired changes.
Copying an automation:
-
Go to Setup » CRM » Messenger » Automation.
-
Search for the automation by means of the filter settings. Note the explanations about the filters in the Searching an automation chapter.
-
In the overview, click in the line of the automation that you would like to copy on more_vert and then on content_copy Copy.
→ The window Copy automation "Name of automation" opens. -
Enter the name of the copy.
-
Click on Save.
→ Carry out the desired changed in the copied automation.
2.8. Deleting an automation
Proceed as described below to delete an automation.
Deleting an automation:
-
Go to Setup » CRM » Messenger » Automation.
-
Search for the automation by means of the filter settings. Note the explanations about the filters in the Searching an automation chapter.
-
In the overview, click in the line of the automation that you would like to delete on more_vert and then on delete Delete.
→ A window opens and you need to confirm your decision. -
Click on delete Delete.
→ The automation is deleted and removed from the overview.