Customising the order view
On this manual page you will learn how to customise the order overview as well as the detail view of your orders according to your needs. For this, there are different views and a variety of settings available.
1. Compact view vs. list view
In the order UI, you have the choice between the list view and the compact view, so you can decide how you want to display your orders. By default, the compact view is displayed when the Orders » Orders menu is opened. For every new login, the view that was last used will be opened.
But what is the difference between the two views? While the list view displays one order per line with the selected columns, the compact view also directly shows the selected order details in the overview in a space-saving way.
Decide for yourself which view meets your needs and switch between them as desired.
|
Switching between the views via one click
At the top right in the order overview you can use the button Switch to list view (list) or Switch to compact view (table_rows) to switch between the views at any time. In case you set any filters, these will automatically be transferred when switching views. |
1.1. Customising the compact view
You can individually design the compact view and use the editing mode to determine which information should be displayed about your orders. There are preset order types that offer a preselection of fields. You can individualise the order types by adding or removing fields or changing their order. Moreover, you can select how big the different fields of the order information should be displayed and if required, you can also add a colour highlighting to visually separate the fields.
In the following chapters you will learn how to customise the compact view according to your needs.
1.1.1. Selecting order types for the order overview:
First you select the order type that should be displayed in your overview. Select from the following order types: sales order, credit note, delivery order, return, warranty, repair, offer, advance order, multi-order, multi credit note.
To do so, proceed as follows.
Selecting order types for the order overview:
-
Go to Orders » Orders.
-
Carry out the search (search) to display orders.
-
In case your are in the list view, click on Switch to compact view (table_rows) at the top right to switch to the compact view.
-
At the top right, click on Edit view () to edit the compact view in the editing mode.
-
At the top right of the main window, click on Edit (edit).
→ The editing mode opens. -
Click Compact view.
→ The Compact view area opens. -
Click on the field Order types.
-
Select a order type from the list.
→ The preselected fields for the order type are displayed. Tip: Select further fields for the order type or remove them from the selection. search Move () the selected fields via drag-and-drop to the desired position until they are displayed in the desired order. Set which information the individual fields should contain. -
If you are satisfied with the selected fields, click on Save view (save) at the top right.
-
Enter a name for the new view and click on Create view.
→ The new view is created.
|
Do you have admin rights?
Only admin users can create and edit views. If you are not an admin:
|
| Setting | Explanation |
|---|---|
Order type |
Shows the type of the order. |
Order ID |
Displays the ID of the order. |
Lock status |
Shows whether an order is locked (lock). An order is locked as soon as an invoice has been generated. A credit note is locked as soon as a credit note document has been generated. You can unlock the order or the credit note by generating a reversal document for the respective document. |
Reference |
Shows the ID of the referenced order. By clicking on the ID the referenced order opens. |
ISO code of country of delivery |
Shows the ISO code of the delivery country in the default colour if it is the same country as your system’s delivery country. The ISO code is displayed in red if the country of delivery is not the system’s delivery country. |
| Setting | Explanation |
|---|---|
Invoice address |
Shows the invoice address. Tip: Hover over the address in order to see further details. |
Delivery address |
Shows the delivery address. Tip: Hover over the address in order to see further details. |
Contact ID |
Shows the ID of the contact. |
Main document |
In case a document has already been created for the order, the document number is displayed. By clicking on the number, the document opens. |
Tags |
Shows the tags that are assigned to this order. |
Language |
Shows the language of the order. |
Payment method |
Shows the payment method that was selected for this order. |
Payment status |
Shows the payment status of the order.
|
Status |
Shows the processing status of the order. |
Shipping profile |
Shows the shipping profile. |
Invoice total |
Shows the invoice total of the order. Depending on the order, the total is net or gross. |
Order date |
Shows the date on which the order was registered in the system. |
Client |
Shows the client that was used to create the order. |
Item amount |
Shows the amount of items in the order. |
Outgoing items booked on |
Shows the date on which the outgoing items have been booked. |
Referrer |
Shows the referrer of the order, e.g. Client (store) or Manual entry. The order referrer is the sales channel via which the order is generated. |
External order ID |
Shows the external ID of the order. |
Lock status |
Shows whether an order is locked (lock). An order is locked as soon as an invoice has been generated. A credit note is locked as soon as a credit note document has been generated. You can unlock the order or the credit note by generating a reversal document for the respective document. |
Order type |
Shows the type of the order. |
Order ID |
Displays the ID of the order. This is an optional column. |
Custom property (1-5) |
Displays the selected custom property. There are 5 fields available. |
Contact |
Shows the name of the contact. |
Contact rating |
Shows the customer rating of the contact. |
Client ID |
Shows the ID of the client. |
Flag |
Shows the desired flag. |
Location |
Shows the location of the client that was used to create the order. |
Location ID |
Shows the location ID of the client that was used to create the order. |
Net order value |
Shows the total net sum of the order in the order currency. |
VAT |
Shows the VAT that is applied for this order. |
Paid amount (%) |
Shows the amount that was paid for the order in percentage. |
Payment date |
Shows the date on which the last payment for the order was received. |
Currency |
Shows the order currency. |
Delivery country |
Shows the country to which the order will be delivered. The displayed delivery country is taken from the given delivery address. |
Delivery date |
Shows the estimated delivery date of the order. |
Source |
Shows how the order was created, e.g. manually or via REST. |
Owner |
Shows the order’s owner. |
Warehouse |
Shows the main warehouse of the order. You can choose whether the name, the ID or both should be displayed. |
Shipping costs |
Shows the shipping costs of the order. |
Weight [kg] |
Shows the total weight of the order. |
Reference |
Shows the ID of the referenced order. By clicking on the ID the referenced order opens. |
Shipping service provider |
Shows the shipping service provider. |
Package numbers |
Shows the order’s package numbers separated by comma. |
Sales representative ID |
Shows the ID of the sales representative. |
Contact (invoice address) |
Shows the contact of the invoice address. |
Contact (delivery address) |
Shows the contact of the delivery address. |
Company |
Shows the company that is saved on the order’s contact or on the invoice address (guest order). |
Loyalty program |
Shows the respective loyalty programme for Amazon Prime or eBay Plus. |
Customer class |
Shows the customer class. You can choose whether the name, the ID or both should be displayed. |
Dunning level |
Shows the dunning level of the order (if applicable). |
1.1.2. Configuring fields
For the fields you have chosen, you can make additional settings such as determining the field size, changing the title, or adding a colour highlighting. To do so, proceed as follows.
Configuring fields:
-
Go to Orders » Orders.
-
Carry out the search (search) to display orders.
-
In case your are in the list view, click on Switch to compact view (table_rows) at the top right to switch to the compact view.
-
At the top right, click on Edit view () to edit the compact view in the editing mode.
-
At the top right of the main window, click on Edit (edit).
→ The editing mode opens. -
Expand the fields (chevron_right) to configure them. Pay attention to the information given in Table 3.
-
If you are satisfied with the selected fields, click on Save view (save) at the top right.
→ The changes are saved.
Custom field name |
Here you can enter another title for the respective field if desired. |
Colour highlighting |
Optionally select a colour highlighting that will be shown on the left side of the respective field. This can help to visually separate and highlight the fields. If you don’t select a colour, a grey highlight will be displayed on the field by default. |
Field size (horizontal) |
Select how wide the field should be displayed in the overview. Select between the options small, medium and large. |
Only show icon |
Select whether only the symbol of the field (e.g. for the payment method) should be displayed. |
|
Selecting a filter
Underneath the available fields for the compact view you can see the filters. Move the desired filters via drag-and-drop from the list Available filters to the list Displayed filters. |
1.1.3. Selecting functions and filter settings
In the editing mode you can also decide which functions and filters should be displayed in the order overview. All settings listed in the following table are available in both the compact view and the list view. To adjust the settings, proceed as follows.
Selecting functions and filters:
-
Go to Orders » Orders.
-
Carry out the search (search) to display orders.
-
At the top right, click on Edit view () to edit the compact view in the editing mode.
-
At the top right of the main window, click on Edit (edit).
→ The editing mode opens. -
At the top right in the Settings section, carry out the settings for the view. Pay attention to the information given in Table 4.
-
If you are satisfied with the settings for the view, click on Save view (save) at the top right.
→ The changes are saved.
Group functions |
Select which group functions should be displayed for orders by default. All remaining group functions will be available in the context menu (more_vert) right next to it. |
Menu functions |
Select which menu functions should be displayed for orders by default. All remaining menu functions will be available in the context menu (more_vert) right next to it. |
Order items |
Select whether the order items of your orders should be collapsed or expanded by default. If you decide to collapse the order items by default, you can expand them at any time by clicking on Expand order items (). |
Rows in compact view |
Select how many rows of space an order has to display the order order information from the compact view area. If you select Auto, the amount of rows is automatically adjusted to the amount of fields displayed. This way, you have all information at display. |
Rows in items table |
Select how many rows are displayed in the item table. If less rows are displayed than there are in the table, click on show all order items, to see all rows of the table. If you select Auto, the amount of rows is automatically adjusted to the amount of order items displayed. |
Filter |
Select in how many columns the selected filters should be displayed in the filter selection. |
Autocomplete |
Select what should be automatically searched for in the quick search when an entry is made. Set a checkmark (check_box) for all desired options. |
|
Sorting by orders
In the compact view you can sort your orders by Order ID, Status, Paid on, Outgoing items booked on, Postcode, Main document and Delivery date. To do so, select one of the two options from the Sort by drop-down list and decide whether you want the orders to be displayed in Descending (arrow_downward) or in Ascending (arrow_upward) order. |
1.1.4. Configuring table columns for order items
Besides defining the fields in the order overview, you can also decide which columns should be displayed for the order items. To do so, proceed as follows.
Configuring table columns for order items:
-
Go to Orders » Orders.
-
Carry out the search (search) to display orders.
-
In case your are in the list view, click on Switch to compact view (table_rows) at the top right to switch to the compact view.
-
At the top right, click on Configure columns (settings) and select the option Order item table.
→ The available columns for the order items are displayed. -
Select (check_box) which columns should be displayed. Further information on the available columns can be found in Table 5.
Tip: Move drag_indicator the selected fields via drag-and-drop to the desired position until they are displayed in the desired order. -
Click on Confirm.
→ The settings are saved.
|
Displaying properties and characteristics
While a green flag is displayed on the left margin for the Properties of the order items, an orange one is displayed for the Characteristics. |
| Setting | Explanation |
|---|---|
Expand |
Allows you to show further information about the order items and displays the Name, the Value and the Surcharge. |
Stock |
Displays the ordered quantity of the order item. |
Article ID |
Displays the item ID of the order item. You can open the item by clicking on the ID. |
Variation number |
Shows the variation number of this order item. |
Variation name |
Displays the variation name of the order item. |
Variation ID |
Shows the variation ID of this order item. You can open the variation by clicking on the ID. |
Item name |
Shows the item name of this order item. |
Attributes |
Shows the attributes of this order item. |
Net price |
Shows the net price of this order item. |
Original net price |
Shows the regular net price of this order item. |
Original gross price |
Shows the regular gross price of the order item. |
Discount |
Displays the discount that was selected for this order item. |
Surcharge total |
Shows the sum of the surcharges of the order item. |
Total amount (gross) |
Shows the total gross amount of the order item. |
Warehouse |
Shows the warehouse of the order item. |
VAT |
Shows the VAT rate of the order item in percent. |
External item ID |
Shows the external item ID. If the order is an eBay or an Amazon order, you are directed to the marketplace when clicking on the ID. |
External order item ID |
Shows the external order item ID transferred by the market. |
Property ID |
Shows the ID of the property. |
Storage locations |
Shows the storage locations of this order item. |
Net profit margin |
Shows the net profit margin of the order item. |
Note |
Shows a note for the order item. |
Reason |
Shows the return reason of the order item in case of a return. |
Remaining item value [%] |
Shows the remaining item value in %. |
Item status |
Shows the item status of this order item. |
Reorder ID |
Shows the ID of the reorder. You can open the reorder by clicking on the ID. |
Weight |
Shows the weight of the order item |
Invoice total |
Shows the invoice amount of the order item. |
Total invoice amount |
Shows the total invoice amount of the order item. |
Property ID |
Shows the property ID of the order item. |
Shipping profile |
Shows the shipping profile of the order item. |
Length [mm] |
Shows the length in millimetres of the order item. |
Width (mm) |
Shows the width in millimetres of the order item. |
Shipped on |
Shows the shipping date of the order item. |
Referrer |
Shows the referrer of this order item. |
Profit margin (net) total |
Shows the total profit margin (net) of the order item. |
Total weight |
Shows the total weight of the order item This is an optional column. |
1.2. Customising the list view
The list view allows you to configure the overview as well as the detail view of orders according to your needs. By using the editing mode you can for example define which columns should be displayed for your orders and in which order you want them to be shown. The detail view differs depending on the order type. Thus, there is an individual overview for each type with the respectively relevant information. In the following chapters you will learn how to edit the list view and how to adjust it according to your needs.
1.2.1. Customising the toolbar
When opening an order, different functions will be available in the toolbar that depend on the order type. Decide for yourself, which buttons you want to see at first sight and which buttons should be available in the context menu (more_vert).
The default toolbar looks as follows:

Customising the toolbar:
-
Go to Orders » Orders.
-
Carry out the search (search) to display orders.
-
In case your are in the compact view, click on Switch to list view (list) at the top right to switch to the list view.
-
Open the order for which you want to adjust the toolbar.
-
At the top right, click on Edit view ().
-
In the Default toolbar buttons section on the right, select the buttons that you want to be displayed by default in the order’s detail view.
-
Save (save) the settings.
→ The toolbar is updated according to your settings.
| Element | Symbol | Explanation |
|---|---|---|
Save |
save |
Once you carried out settings for an order, this button will be activated and you can save the settings. |
Create orders |
shopping_cart |
Allows you to create child orders for an order. Different options are available depending on the order type.
|
Book outgoing items |
input |
Allows you to directly book outgoing items so the stock of a variation is reduced when stock exists. The status of the order is automatically changed to status 7. |
Book back items |
input |
Books back all items or part of the items. This option does not reset outgoing items completely. |
Email service |
Opens the Email templates window and allows you to directly send an email template to a customer or to see emails that have already been sent. |
|
Split order |
call_split |
Splits an order. |
Duplicate order |
content_copy |
Duplicates an order. Afterwards, the duplicated order is shown in the side navigation and highlighted in blue. |
Assign/detach storage locations |
shelves |
Assigns or unassigns storage locations. The assignment of a storage location is especially important for pick lists and packing lists.
|
Checkout |
visibility |
When clicking this button you are forwarded to the plentyShop LTS where the order is opened. |
Redeem coupon |
card_giftcard |
Allows you to manually redeem coupons. This is possible for PlentyONE campaigns as well as external campaigns. For further information, see the chapter redeem coupon. |
Blocked |
lock |
This order is locked and can only be edited in a limited way. Hover over the button to see further information on the lock status and on how to unlock the order. |
Delete order |
delete |
Deletes an order. Confirm the confirmation message to delete the order.
In general, orders should not be deleted. Errors can occur when orders are deleted because the orders are linked to items, shipping settings and other functions such as cancellations and returns. However, newly created orders can be deleted. In case you want to delete an order that has child orders, you need to delete the child orders first. |
Reload order |
refresh |
Updates the order and thus shows possible changes from other users that have worked on the same order simultaneously. Save your changes before reloading the order. |
Show stock |
warehouse |
You can check the current stock levels of the order items. |
New order |
add |
You have the possibility to create a new order, offer, advance order, etc.. |
Change advance order to order |
change_circle |
This is only available in an advance order. You have the possibility to change the order type from an advance order to an order. Before the change you get a notification to confirm or cancel the change. |
|
Show or hide side navigation
In the list view, you can decide in the order overview as well as in the detail view of an order whether you want to show or hide the side navigation. To do so, click on menu at the top left. |
1.2.2. Configuring columns in the overview
The table columns in the list view can be configured for both levels. When opening the Orders » Orders menu for the first time, the default view of the table is shown. By clicking on Configure columns (settings) on the right, the options Order overview table and Order item table are displayed. In the Configure columns window, you can select the columns that you want to be displayed and also define the order in which they are shown.
When you have adapted the table once, these settings are saved. You can change the layout any time. A list of the available columns can be found in Table 7 as well as Table 8. There, you’ll also find out which columns are default columns. Default columns are shown when tables are not customised. Proceed as follows to adjust the table.
Configuring columns:
-
Go to Orders » Orders.
-
Carry out the search (search) to display orders.
-
In case your are in the compact view, click on Switch to list view (list) at the top right to switch to the list view.
-
At the top right, click on Configure columns (settings).
-
Select which level of the table you want to configure.
→ The Column configuration window will open. -
Select (done) the columns you want to be displayed. Pay attention to the explanations given in Table 7 and Table 8.
-
Move (drag_indicator) the columns via drag-and-drop to the desired position until they are displayed in the desired order.
-
Add or remove columns according to your needs.
-
Click on Confirm.
→ The settings are saved.
|
Resizable table columns
For some tables in the Order UI, you have the possibility to adjust the size of the columns according to your needs. When hovering over the respective table columns, blue lines appear which allow you to adjust the size as desired. You can resize the columns of the following tables: |
1.2.2.1. Configuring table columns in the order overview
The following columns are available for the order overview in the list view.
| Setting | Explanation |
|---|---|
Expand |
Allows you to expand an order in the order overview. |
Selection |
Allows you to select orders so you can carry out actions for several orders at once. |
Lock status |
Shows whether an order is locked (lock). An order is locked as soon as an invoice has been generated. A credit note is locked as soon as a credit note document has been generated. You can unlock the order or the credit note by generating a reversal document for the respective document. |
Order type |
Shows the type of the order. |
Order ID |
Displays the ID of the order. |
Contact |
Shows the name of the contact. |
Contact ID |
Shows the ID of the contact. |
Contact rating |
Shows the customer rating of the contact. |
Client |
Shows the client that was used to create the order. |
Client ID |
Shows the ID of the client. |
Location |
Shows the location of the client that was used to create the order. |
Location ID |
Shows the location ID of the client that was used to create the order. |
Item amount |
Shows the amount of items in the order. |
Net order value |
Shows the total net sum of the order in the order currency. |
Invoice total |
Shows the invoice total of the order. Depending on the order, the total is net or gross. |
VAT |
Shows the VAT that is applied for this order. |
Status |
Shows the processing status of the order. |
Outgoing items booked on |
Shows the date on which the outgoing items have been booked. |
Order date |
Shows the date on which the order was registered in the system. |
Payment method |
Shows the payment method that was selected for this order. |
Main document |
In case a document has already been created for the order, the document number is displayed. By clicking on the number, the document opens. |
Payment status |
Shows the payment status of the order.
|
Paid amount (%) |
Shows the amount that was paid for the order in percentage. |
Payment date |
Shows the date on which the last payment for the order was received. |
Currency |
Shows the order currency. |
Delivery country |
Shows the country to which the order will be delivered. The displayed delivery country is taken from the given delivery address. |
Delivery date |
Shows the estimated delivery date of the order. |
Source |
Shows how the order was created, e.g. manually or via REST. |
Owner |
Shows the order’s owner. |
Referrer ID |
Shows the ID of the referrer that was used to create the order. |
Referrer |
Shows the referrer of the order, e.g. Client (store) or Manual entry. The order referrer is the sales channel via which the order is generated. |
Warehouse |
Shows the main warehouse of the order. |
Warehouse ID |
Shows the ID of the main warehouse. |
Shipping costs |
Shows the shipping costs of the order. |
Weight [kg] |
Shows the total weight of the order. |
Reference |
Shows the ID of the referenced order. By clicking on the ID the referenced order opens. |
Invoice address |
Shows the invoice address. |
Delivery address |
Shows the delivery address. |
Tags |
Shows the tags that are assigned to this order. |
Shipping profile |
Shows the shipping profile. |
Shipping service provider |
Shows the shipping service provider. |
Package numbers |
Shows the order’s package numbers separated by comma. |
External order ID |
Shows the external ID of the order. |
Sales representative ID |
Shows the ID of the sales representative. |
Contact (invoice address) |
Shows the contact of the invoice address. |
Contact (delivery address) |
Shows the contact of the delivery address. |
Company |
Shows the company that is saved on the order’s contact or on the invoice address (guest order). |
Loyalty program |
Shows the respective loyalty programme for Amazon Prime or eBay Plus. |
Actions |
Shows further actions (more_vert) that are available for this order. |
Dunning level |
Shows the dunning level of the order (if applicable). |
Flag |
Shows the assigned flags of the order. |
Customer class |
Shows the contact’s customer class. |
1.2.2.2. Configuring table columns for order items
Expand the second level (chevron_right) to see information about the order items. For this, the columns listed in the table below are available.
While a green flag is displayed on the left margin for the Properties of the order items, an orange one is displayed for the Characteristics.
Note: The order items are not the same for all order types.
|
Show order items for all orders by default
By default, the order items of your orders are not shown in the overview of the list view. In the editing mode of the overview, you can however define via the Order items table default setting whether to expand or collapse the order items table in the order overview by default. If you select the option Expanded, up to 5 order items are shown. By clicking on Show all order items, you are forwarded to the detail view of the order where all order items are listed. |
| Setting | Explanation |
|---|---|
Expand |
Allows you to show further information about the order items and displays the Name, the Value and the Surcharge. |
Stock |
Displays the ordered quantity of the order item. |
Article ID |
Displays the item ID of the order item. You can open the item by clicking on the ID. |
Variation number |
Shows the variation number of this order item. |
Variation name |
Displays the variation name of the order item. |
Variation ID |
Shows the variation ID of this order item. You can open the variation by clicking on the ID. |
Item name |
Shows the item name of this order item. |
Attributes |
Shows the attributes of this order item. |
Net price |
Shows the net price of this order item. |
Original net price |
Shows the regular net price of this order item. |
Gross price |
Shows the gross price of the order item. |
Discount [%] |
Displays the discount that was selected for this order item. |
Surcharge total |
Shows the sum of the surcharges of the order item. |
Total amount (net) |
Shows the total net amount of the order item. |
Total amount (gross) |
Shows the total gross amount of the order item. |
Warehouse |
Shows the warehouse of the order item. |
VAT [%] |
Shows the VAT rate of the order item in percent. |
External item ID |
Shows the external item ID. If the order is an eBay or an Amazon order, you are directed to the marketplace when clicking on the ID. |
External order item ID |
Shows the external order item ID transferred by the market. |
Property ID |
Shows the ID of the property. |
Storage locations |
Shows the storage locations of this order item. |
Net profit margin |
Shows the net profit margin of the order item. |
Note |
Shows a note for the order item. |
Return reason |
Shows the return reason of the order item in case of a return. |
Remaining item value [%] |
Shows the remaining item value in %. |
Item status |
Shows the item status of this order item. |
Reorder ID |
Shows the ID of the reorder. You can open the reorder by clicking on the ID. |
1.2.3. Display or hide order item properties
If you want to see properties of the order items, such as Name or Value, go to the line of the order and click on the arrow icon on the left (chevron_right). At first, you will see details about the order items. On this level, click on the arrow symbol (chevron_right) once again too see the properties.
Note: If you want to edit the properties of order items, open the desired order, go to the Order items area and click on Edit items (edit).
1.2.4. Using the editing mode
The editing mode allows a high degree of flexibility for positioning content and data in the Orders » Orders menu. This works by intuitively positioning elements via drag-and-drop. You can individually adjust and edit each element. Table 9 contains an overview of the functions available in the editing mode for the list view.
|
Do you have admin rights?
Only admin users can create and edit views. If you are not an admin:
|
| Element | Symbol | Explanation |
|---|---|---|
Edit view |
Opens the view for editing. |
|
Undo |
undo |
Undoes the last change, unless this change has already been saved. |
Redo |
redo |
Restores the previously undone change. |
Default view |
This area displays the view that is currently opened. Click on to switch to another view or to create a new view. |
|
Restoring the previously saved state |
restore |
Resets the view to the state that was last saved. |
Save |
save |
Saves the changes. By doing so, you can save as many different views as you like. |
Edit |
edit |
When you edit the element, you can see in the Elements area on the right side which elements have not been added yet and are therefore still available. Elements that have already been added are disabled and cannot be used again. |
Delete |
delete |
Deletes the element. |
Close |
close |
Closes the editing mode. If you haven’t saved the changes, a confirmation prompt will appear. |
1.2.4.1. Creating a new view
To create a new view, proceed as described below.
Creating a new view:
-
In the editing mode, click on the list of views ().
-
Click on add Create new view.
-
Enter a name for the view.
-
Click on Create view.
→ The new view is created and opens automatically, i.e. it is applied. It’s now possible to switch between different views.
1.2.4.2. Placing elements
Drag-and-drop the elements to intuitively place them exactly where you want them. In addition, adjust the size of the elements according to your needs.
Proceed as described below to add elements.
Placing elements:
-
Go to Orders » Orders.
-
Open the order view in which you want to place an element.
-
Click on Edit view () at the top right.
-
On the right side, select an element and put it into the right position via drag-and-drop.
Optional: Move your cursor over the border of an element and drag the element to its desired size while holding on to your cursor.
Tip: Do you want to move your elements to another position at a later point in time? You can do so by using drag-and-drop until all elements are placed correctly.
|
Provide fields as read-only
For every field of an element, you can decide whether it should only be provided as read-only. To do so, go to the field and click on Edit (edit) to activate (check_box) the option read-only. Thus, the field is only displayed but cannot be edited. |
1.2.4.3. Finalising your work
Once you carried out all settings, you can save your changes and finalise the editing mode. Check afterwards whether the view fits your needs.
Finalising your work:
-
Save the view () and close the editing mode ().
-
Check the result in the main window.
-
If necessary:
-
Click on Edit view () again and edit the view even further.
-
Allow other users to see the view.
-
1.2.5. Placing functions in the order overview
The order overview offers many different functions that are available in the context menu (more_vert) of each line by default. If you want to directly place specific functions for orders in the order overview table, you can carry out the corresponding settings in the editing mode.
Placing functions in the order overview:
-
Go to Orders » Orders.
-
Carry out the search (search) to display orders.
-
In case your are in the compact view, click on Switch to list view (list) at the top right to switch to the list view.
-
Click on Edit view () at the top right.
→ The editing mode opens. -
In the main window, click on Edit (edit).
→ The settings become visible on the right. -
In the order menu functions setting, select (check) all default menu functions from the drop-down list that should be visible by default in the order overview.
-
Save (save) the settings.
→ All selected functions are now directly available on the right in the order overview.
1.2.6. Detecting unsaved changes
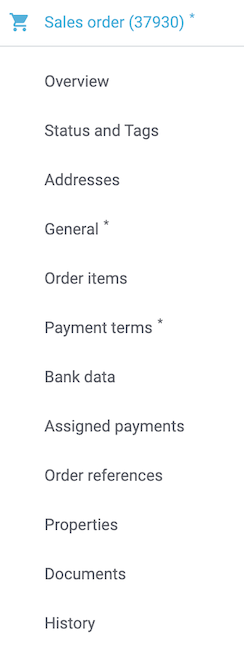
If you have made changes to an order, an asterisk (*) appears on the left side of the page navigation. This asterisk indicates areas where unsaved changes are present. As soon as you save (save) the changes or reset the changes to the previous state, the star will disappear.