EmailBuilder: Sending tracking URLs to customers
I would like to send the tracking URL to my customers once the package number is available at the order. What can I do?
Required steps (short version)
-
Set up an email template in the EmailBuilder
-
Insert the variable
Tracking URLin the template
-
-
Set up an event procedure that sends the template when the package has been registered at the service provider and a package number is available at the order.
1. Saving the tracking URL at the shipping service provider
Many shipping service providers allow customers to track their packages with tracking URLs. A functional tracking URL should include the package number and the recipient’s postcode. You can send your customers an email that contains the tracking URL. This way, your customers can see the current status of their shipments at the shipping service provider as well as the estimated time of delivery.
Therefore, first save the tracking URL at the shipping service provider. Go to Setup » Orders » Shipping » Settings and switch to the Shipping service provider tab. Enter the tracking URL in the Tracking URL field.
The DHL tracking URL is already saved in your system and looks as follows:
http://nolp.dhl.de/nextt-online-public/set_identcodes.do?lang=de&zip=[PLZ]&idc=[PaketNr].
|
You don’t know the tracking URL?
If you don’t know the tracking URL of the shipping service provider, proceed as follows:
|
2. Creating an email template with the variable for the tracking URL
Now create an email template that contains the variable for the tracking URL. You can also use one of the available default templates and adjust it afterwards.
Note: We will explain how you create a new template and not how you edit an existing template.
Creating an email template with the EmailBuilder:
-
Go to CRM » EmailBuilder.
-
In the line of the folder or sub-folder in which you want to create a template, click on more_vert.
→ A new window opens. -
Click on add Add.
-
Click on description Template.
→ The Create new template window opens. -
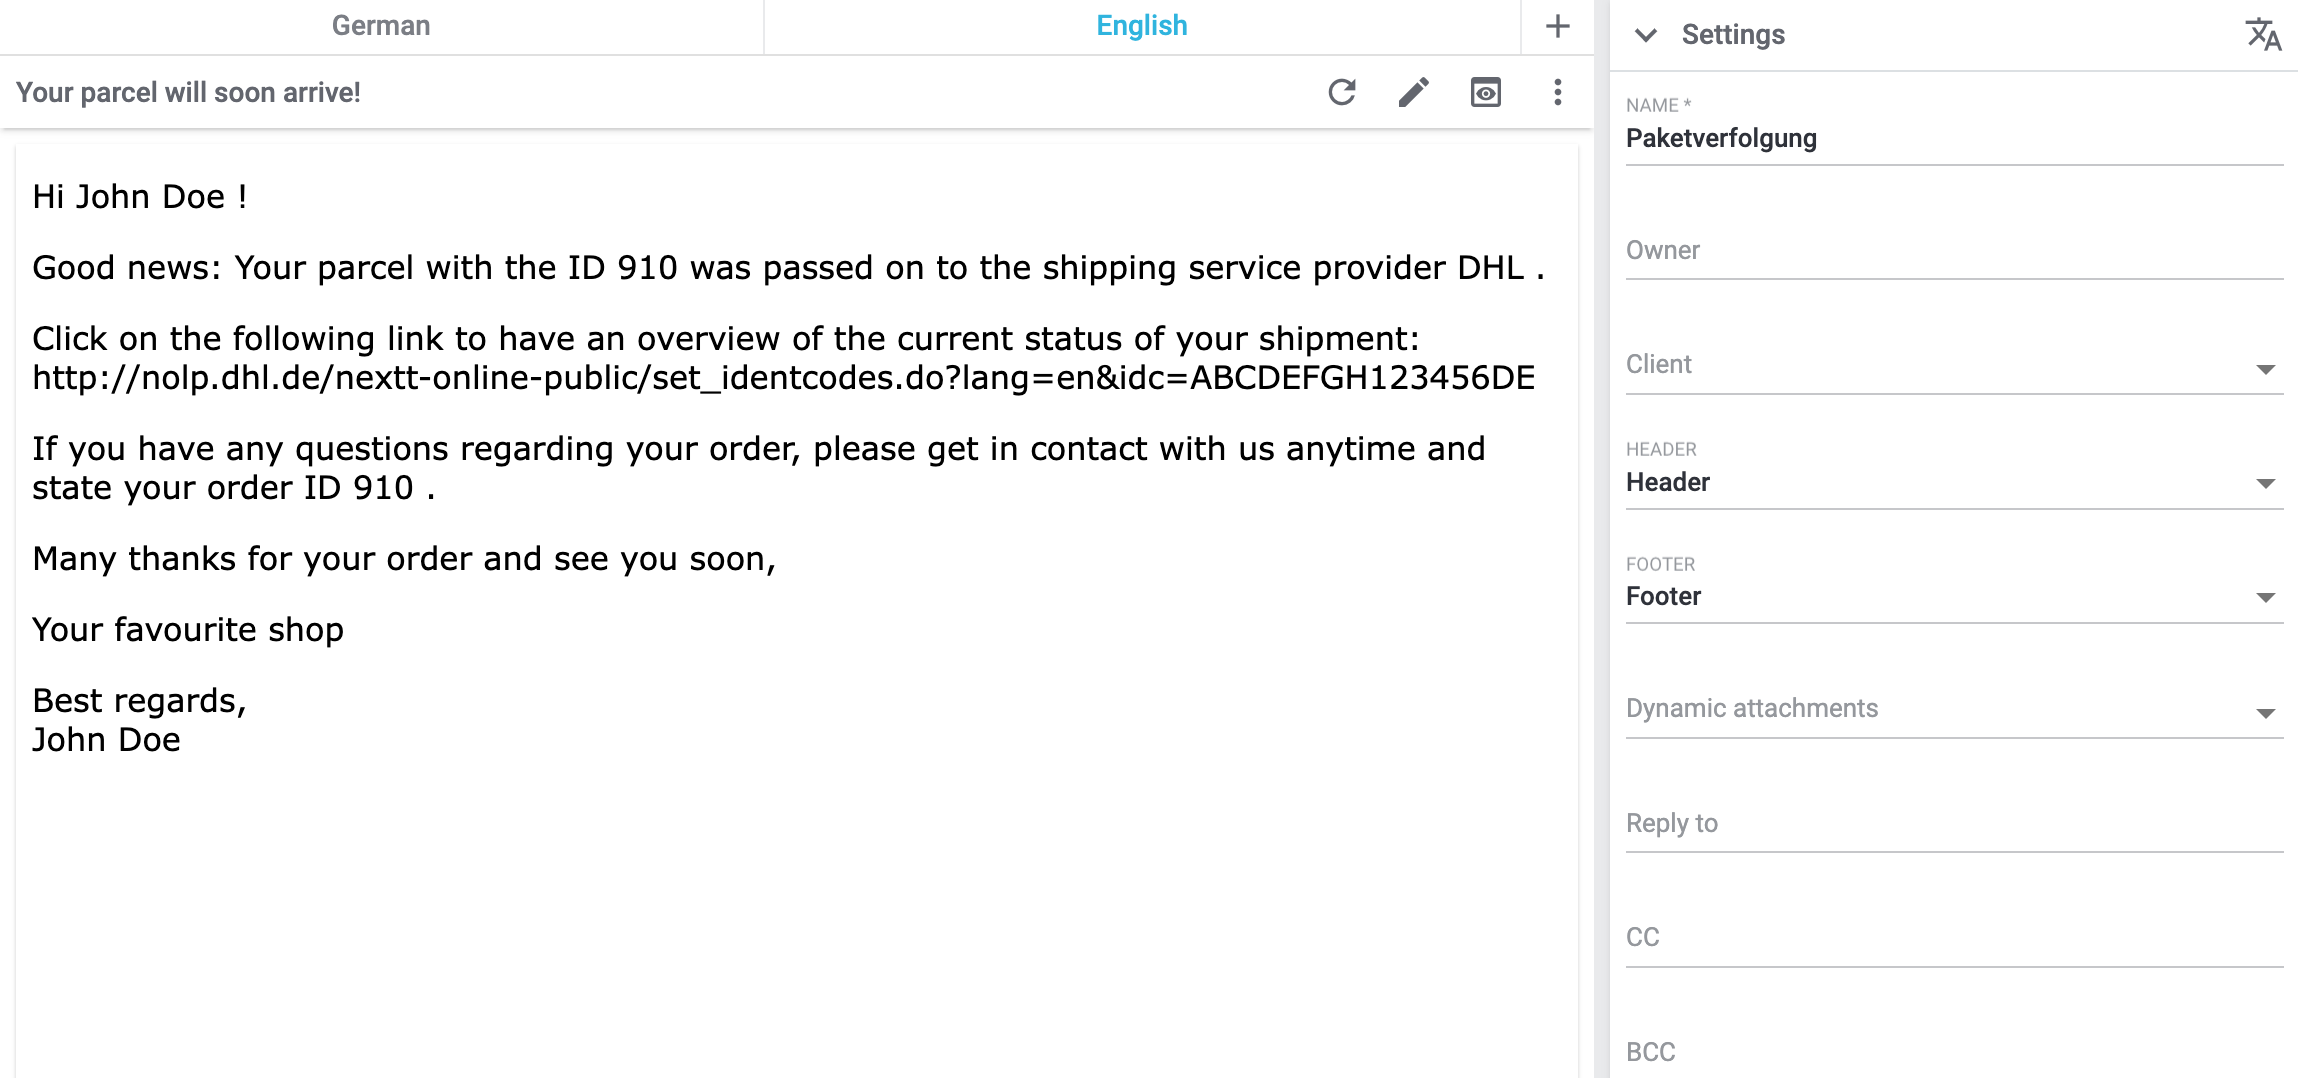
Enter a name for the template, e.g.
Package tracking. -
Select a header and footer each from the drop-down lists.
-
Click on SAVE.
→ The template is created and opened. -
In the top left, click on Add (add) to add the language for the template.
→ The Enter subject window opens. -
Enter a subject for the template, e.g.
Your parcel will arrive soon. -
Click on SAVE.
-
In the line of the subject, click on Edit (edit).
→ The editor of the template opens. -
Drag the Text widget to the shaded section.
-
Click on Edit (edit).
-
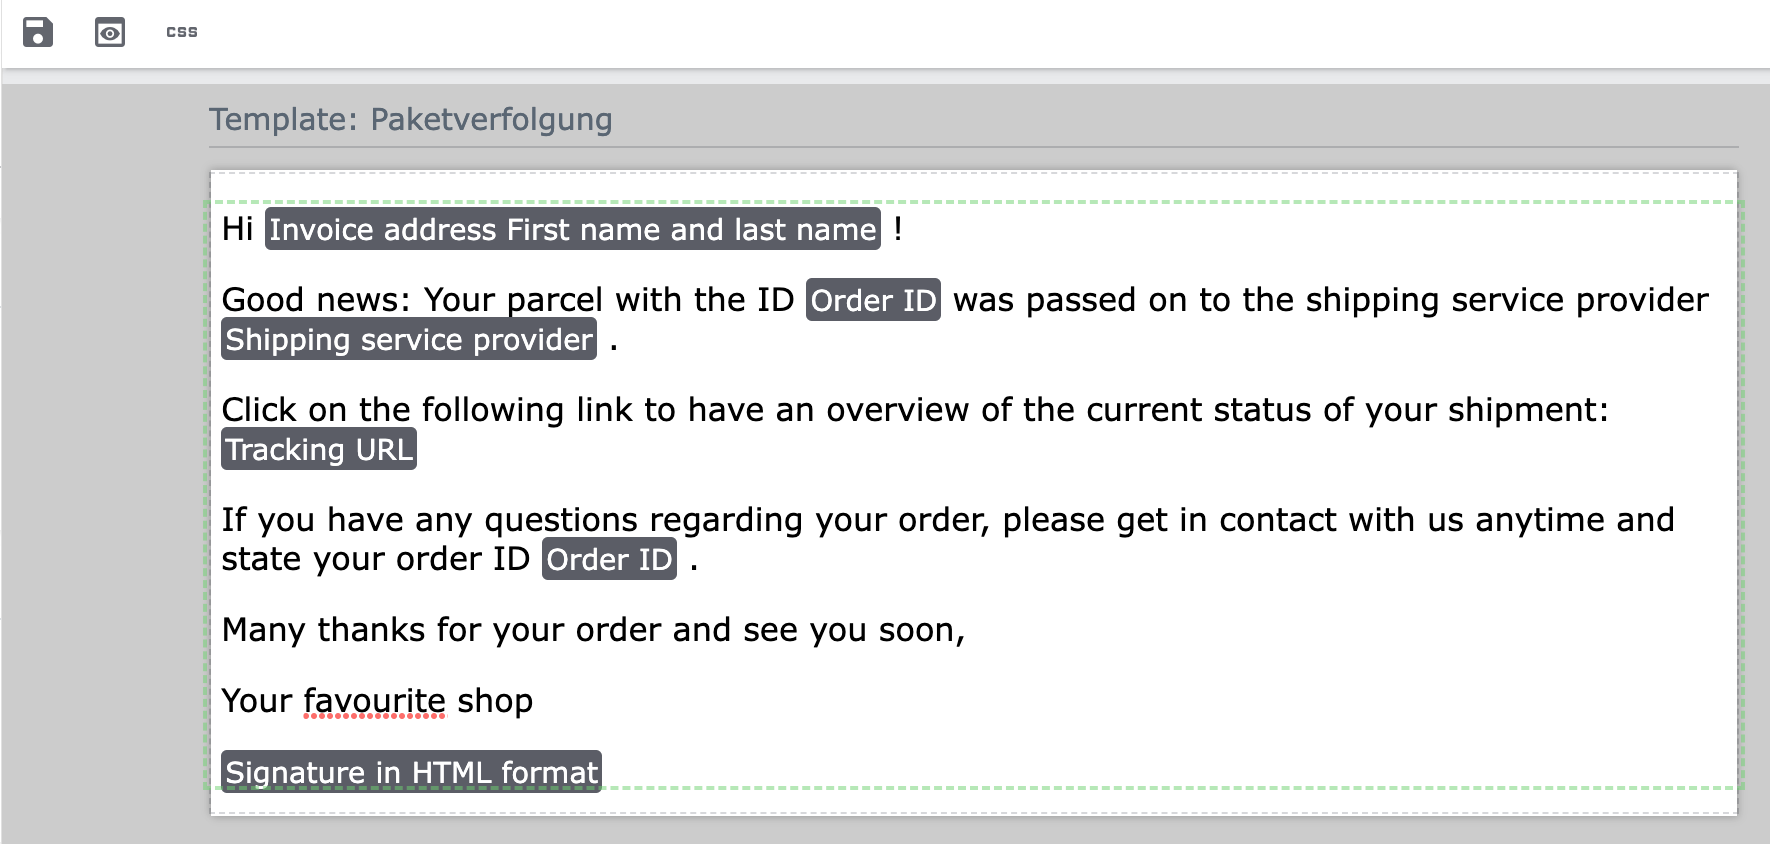
In the text field, enter the desired text and search the appropriate variables that you need by using the Search text field in the Variables column.
-
Don’t forget to insert the variable
Tracking URLto ensure that the shipment tracking link is sent in the email to your customers. -
Save (save) the settings.
Example: Template with dummy data in the preview
Example: Template with variables in the editor
This is how the template content looks in the editor after you clicked on edit:
Note: Creating email templates currently still also works using the old method, thus via the templates directly at the client.
Create the email template in the Setup » Client » [Select client] » Email » Templates menu. Enter the template variable $TrackingURL into your email template.
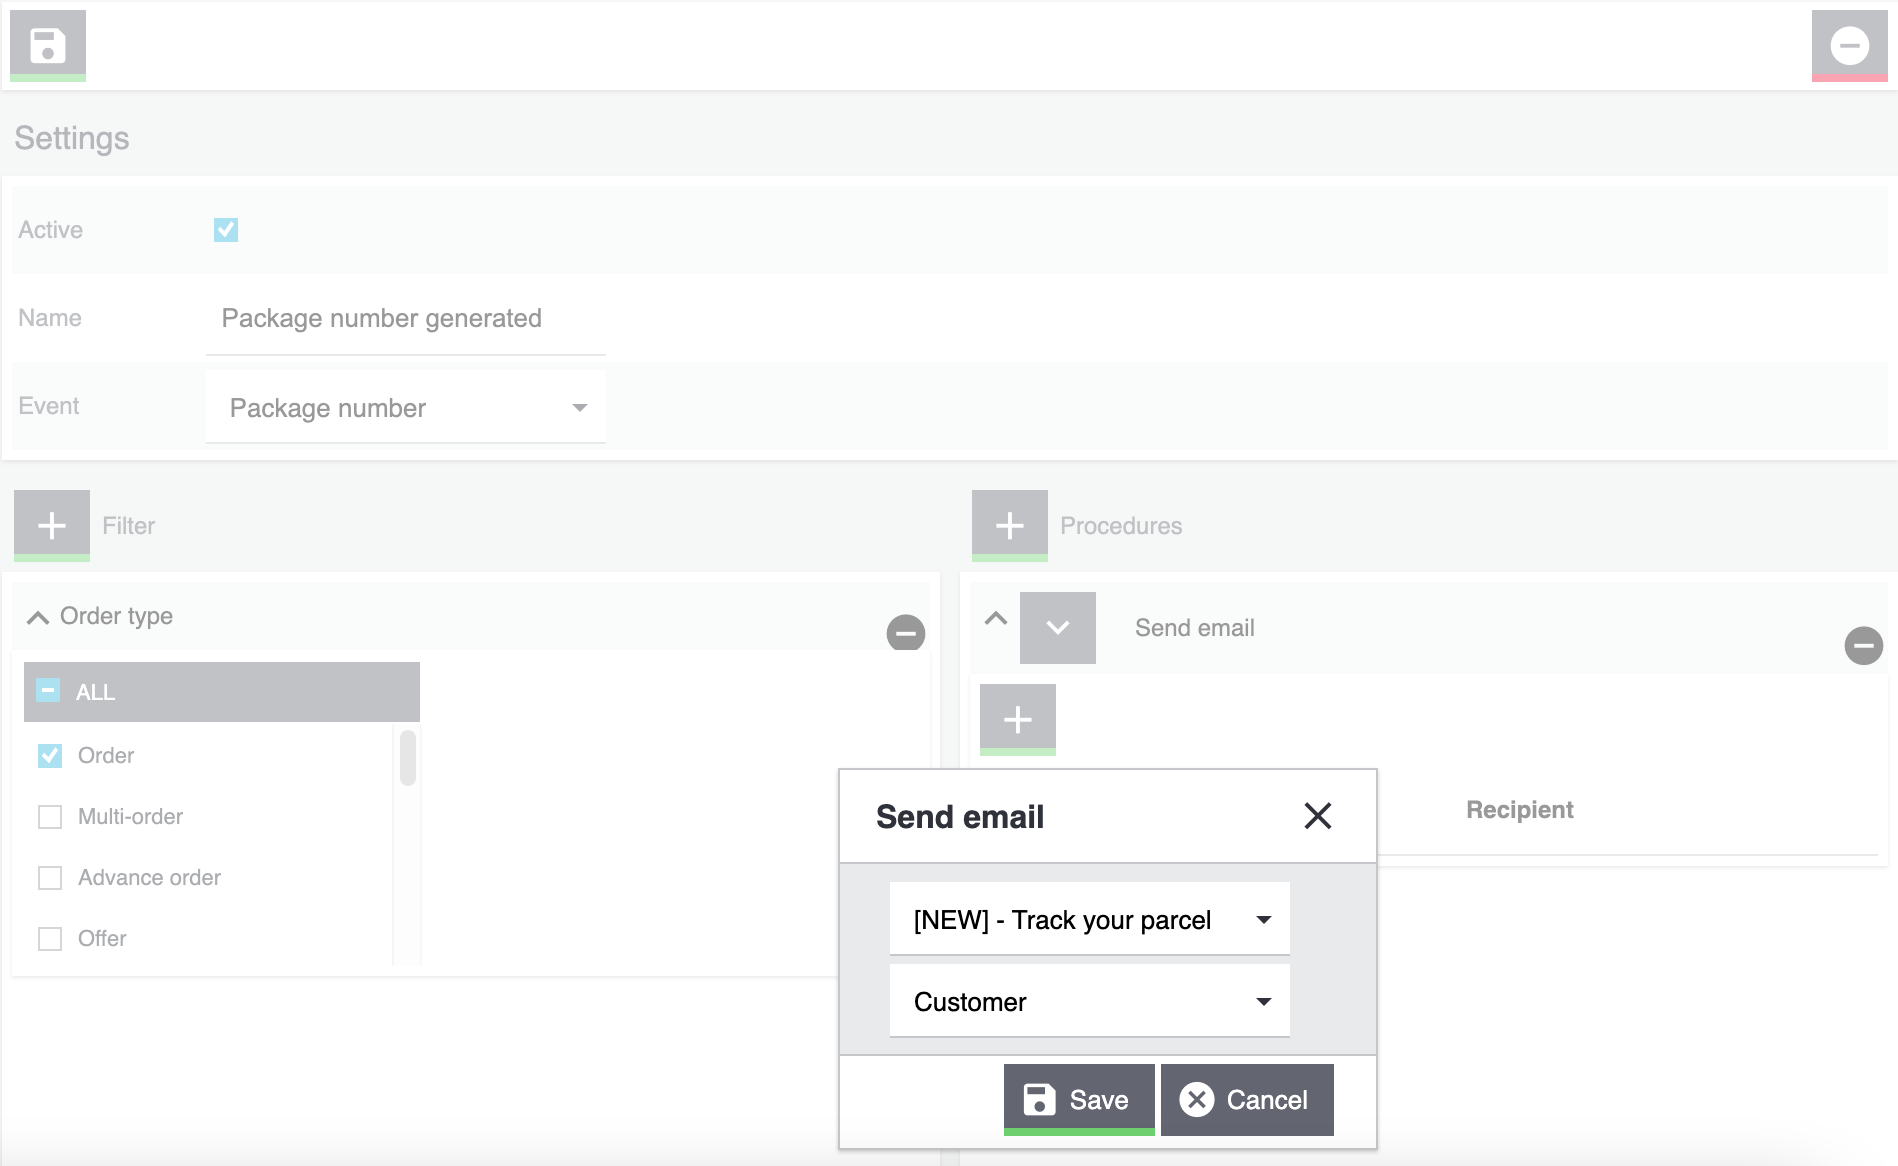
3. Setting up an event procedure
Now set up an event procedure that triggers the email template despatch for the package tracking once the package number is available at the order.
Setting up an event procedure:
-
Go to Setup » Orders » Events.
-
At the bottom left, click on Add event procedure (add).
→ The Create new event procedure window opens. -
Enter a distinct name for the event procedure, e.g.
Package number generated. -
Select the event as listed in Table 1.
-
Save () the settings.
-
Carry out the settings as listed in Table 1.
-
Activate the option Active.
-
Save () the settings.
| Setting | Option | Selection |
|---|---|---|
Event |
Order change > Package number |
|
Filter |
Order > Order type |
Order |
Procedure |
Customer > Send email |
Select as template the template for package tracking that you have just created. Select as recipient the option Customer. |