Managing payments
This page of the manual describes and explains how to manage payments. You receive payments in your system from different sources. Independent of the payment source, you can manage all incoming payments in the Orders » Payments menu.
1. Carrying out basic settings for incoming payments
First, carry out basic settings for automatically assigning payments to orders and for giving goodwill on payments. Default settings are already saved in your PlentyONE system which have been gained from experience and have proven themselves in practice. To change these settings, proceed as follows.
Changing the basic settings:
-
Go to Setup » Orders » Payment » Incoming.
-
Carry out the settings. Note Table 1.
-
Save (save) the settings.
| Setting | Explanation |
|---|---|
Match for automatic assignment |
Select a value between 0.7 (no exact match required for assignment) and 1.0 (exact match required). If this value is set to a higher value, automatic matching of payments may not work properly in your PlentyONE system. This is why the value 0.75 is the default setting. |
Goodwill on payment |
To avoid incorrect postings due to internal decimal places (starting from the third decimal place), you should enter a minimal value of 0.01 (default setting). If you select the value 0.05, for example, payments that are up to 5 cents short of the original amount are booked as complete payments. |
Import customer bank data |
Select whether or not the contact’s bank details should be imported and saved in the bank details area of the contact data record. |
Only assign incoming PayPal payment to corresponding eBay listing if attached to the payment |
Note: This functionality only applies to the old PayPal interface for Callisto online shops in PlentyONE. not for the PayPal plugin! |
Ignore WooCommerce PayPal transactions |
Note: This functionality only applies to the old PayPal interface for Callisto online shops in PlentyONE. not for the PayPal plugin! |
Exclude orders with the following payment methods from automatic assignment |
Select those payment methods for which no payments are incoming. They are then ignored for automatic payment assignment. |
Exclude orders with the following referrers form automatic assignment |
Select those referrers for which no payments are incoming. They are then ignored for automatic payment assignment. |
2. New payments in the system
Payments can either come into your system automatically or they can be booked manually. After payments are booked in PlentyONE. they are automatically assigned to orders with a fuzzy search. If the payment cannot be assigned to the order automatically, then you can still manually assign the payment to an order. Edit and manage payments in the Orders » Payments menu. Unassigned orders can be identified by the credit card symbol (credit_card). You can assign payments either directly in the payments overview or in the detail view of a payment.
In this overview, payments are displayed in your system currency. If the payment is in a different currency, this amount is displayed in brackets next to the system currency.
|
Setting up event procedures for incoming payments
The incoming payment is an important event when it comes to processing orders because items are not typically shipped until the payment was received. In most cases, the order status in PlentyONE changes from status [3] - waiting for payment to status [5] - cleared for shipping as soon as the payment was received. Create event procedures to automatically process orders and ship the items once payment is received. |
2.1. Importing bank postings
The payment method cash in advance and other transfers take the form of bank postings. With these payment methods, the payments that were booked into your bank account have to be reported to the system and then they need to be assigned to the orders. Use the import type Bank postings to import your bank postings into your PlentyONE system. You can find a best practice for the postings import on the manual page Importing new postings.
After the import, the bank postings are treated as other payments and are automatically assigned to orders. Accordingly, editing and managing of these payments is also done in the Orders » Payments menu.
2.2. PayPal import
The entry PayPal import with the PayPal icon in the navigation on the left of the Orders » Payments menu is only displayed when the PayPal plugin is installed. To use this function, you need at least version 6.0.0 of the PayPal plugin.
With the function PayPal import, you import PayPal payments from your PayPal account directly into your PlentyONE system by using the transaction numbers. In this import, only new payments are imported. Already existing payments are not updated. To import the PayPal payments, proceed as follows:
Importing PayPal payments:
-
Go to Orders » Payments.
-
Select PayPal import in the navigation on the left.
-
Select the correct PayPal account.
-
In the Transaction number(s) field, enter the transaction numbers of the payments you want to import.
→ You can enter several transaction numbers, separated by comma. -
Click on Import (import_export).
→ The payments with the entered transaction numbers are imported and added to the payments overview table.
After importing the PayPal payments, they are automatically assigned to orders, just like other payments as well. Note that the auto-assignment depends on the setting Match for automatic assignment (0.7 - 1.0) in the Setup » Orders » Payment » Incoming menu. The value 0.7 stands for a 70% match and the value 1.0 stands for a 100% match. In case a payment cannot be assigned automatically, you can still assign the payment manually.
Note: After the import, it can take up to 15 minutes until the automatic assignment is done.
3. Configuring columns
You can adjust the table in the overview of the Orders » Payments menu. This means that you can decide which information is displayed in the table columns.
Configuring columns:
-
At the top right, click on Configure columns (settings).
→ The window Configure columns opens. -
Select which columns you want to be displayed.
-
Move (drag_indicator) the columns so they are displayed in the order you need them in.
-
Click on Confirm to save your settings.
4. Searching for payments
In order to search for specific payments, enter a search term in the search fields. You can enter multiple search terms into the search fields at once. This makes your search run quicker and more accurate. You can combine different filters for the search, for example to search for unassigned payments of the last week.
Searching for a payment:
-
Go to Orders » Payments.
-
Alternative 1: Click on search (Search) to get a list of all payments.
-
Alternative 2: Enter a value in the search field and select the appropriate filter from the suggestion list. Example: If you enter a number or letters, the possible filters will be suggested to you such as for example the order ID or the variation number.
-
Alternative 3: Click on tune to narrow down the search results with filters.
-
-
Note Table 2.
Tip: You can enter multiple search terms into the search fields at one time. This makes your search run quicker and be more accurate. -
Click on search Search.
→ The payments that correspond to the search criteria entered are shown in the overview.
| Setting | Explanation |
|---|---|
Order ID |
Search for orders to which a payment has been assigned by entering the order IDs. |
Transaction ID |
The transaction ID is assigned by the payment provider so that the payment can be correctly allocated to this provider. Enter a transaction ID to search for a payment with this specific transaction ID. |
Transaction code |
The transaction code describes the transaction itself. Enter a transaction code to search for a payment with this specific code. |
Reference ID |
A reference ID links payments, e.g. a payment and a refund. Enter a reference ID to search for payments with this specific transaction ID. |
Payment ID |
Enter the payment ID to search for the exact payment with this ID. |
Payment method |
Enter a specific payment method to search for payments that were paid with this payment method. |
Reason for payment |
Enter the reason for payment, either entirely or partly, to search for payments with this designated use. |
Sender of payment |
Enter the name of the person who sent the money to search for all payments of this person. |
Credit/Debit |
Select Credit or Debit. |
Operator and Amount |
Select an operator and enter an amount. |
Mapping |
Select Assigned or Unassigned. |
Status |
Select a status to search for payments with this specific status. |
Transaction type |
Select a transaction type to search for payments that have this transaction type. |
Currency |
Select a currency to search for payments with this currency. |
Date type |
Select a date type and combine it with a date range. You can choose between Imported, Received and Assigned. Displayed are all payments which were either imported, received or assigned in the chosen date range. |
From and To |
In connection with Date type, choose a date range to search for payments which were either imported, received or assigned, depending on what you selected. |
Reset |
Resets the selected filter criteria. |
Search |
Starts the search. The payments found are listed in the overview. |
4.1. Saving the current filter
When you start a search, your selected filters are displayed at the top as chips. You can save these filters to apply them again more quickly and easily in the future.
Saving the current filter:
-
Start a search.
-
Click on Saved filters (bookmarks).
-
Click on bookmark_border Save current filter.
-
Enter a name for the filter.
-
Decide whether
-
this filter should be set as default filter (toggle_on)
-
this filter should be created for all users (toggle_on).
-
-
Click on SAVE.
→ The filter now appears under Saved filters (bookmarks).
| Use drag-and-drop to arrange the filters in a specific order by clicking on Move (drag_indicator). Click on delete to delete a filter. |
5. Setting a default filter
To make sure that you don’t have to select a filter that you use quite often from the list of your saved filters every time when opening the Orders » Payments menu, you can set a created filter as default filter. Every time when you open the Orders » Payments menu, this filter will be automatically applied.
You can set the filter as default filter directly when creating it as described in Saving the current filter or you can set the filter as default in the overview afterwards.
Click in the line of the saved filter on star_border Set as default. If you want to set another filter as default filter, deactivate the currently selected default filter by clicking on star Do not use as default.
6. Using MyView
The user interface of the detail view of payments as well as the split view of a payment are available as MyView components. This means that users can create their own views with the available elements. This way, every user can individually determine which information are needed where. Because of this customisation, working with payments is not only more comfortable but also faster.
This chapter explains how to work with MyView and how to create your own views. Managing payments such assigning, detaching or splitting payments is explained in the following chapters.
You can access the detail view of a payment from the payment overview table in the Orders » Payments menu. Click on the row of the payment you want to work with and the detail view of this payment opens.
The split view of a payment is accessed by clicking on Split payment (call_split) in the row of the payment you want to split.
If you haven’t yet created an own view in these areas, the Default view is displayed. You can use this default view when you are working with payments or you can create your own view. The views you create are saved and can then be selected together with the default view from the list of views (). Thus, you can switch between different views, if needed. The view selected last is always applied when opening a payment.
6.1. Creating a new view
-
Click on the list of views ().
-
Click on add Create new preset….
-
Enter a name.
-
Click on Create view.
→ The new view is created and opens automatically, i.e. the view is applied. It’s now possible to switch between different views.
6.2. Creating a grid
-
Click on Edit view ().
-
Add rows and columns to create a grid.
-
Click on and then on add Add row.
-
Click on add Add column.
-
Drag the columns to make them larger or smaller.
-
6.3. Placing elements
-
Add elements via drag-and-drop.
-
Click on edit and edit the element’s settings.
-
Change the name.
-
Decide which data fields the element should contain.
-
Use drag-and-drop to arrange the data fields in a specific order.
-
-
Click on
| Symbol | Explanation |
|---|---|
Leads down one level. |
|
Deletes the element. |
|
Leads up one level. |
|
Can I add elements multiple times?
The number in the grey circle indicates how many times you can use the element. Most elements can only be added once. |
6.4. Finalising your work
-
Save the view () and close the editing mode ().
-
Check the result in the main window.
-
If necessary:
-
Click on Edit view () to further edit the view.
-
Allow other users to see the view.
-
6.4.1. Functions in the editing mode
| Symbol | Explanation |
|---|---|
Undoes the last change, unless this change has already been saved. |
|
Restores the previously undone change. |
|
A list of views. You see the name of whichever view is currently open. Click on to switch to another view or create a new view. |
|
Resets the view to the state that was last saved. |
|
Saves the changes made to the view. |
|
Closes the editing mode. In case of unsaved changes, a dialogue is displayed. |
6.4.2. Granting rights
Which users or roles should be allowed to see the view? You can grant or limit access to every single view.
-
Click on Edit view ().
-
Click on Rights management.
-
Select User if you want to grant access to a specific user account.
→ The menu Setup » Settings » User » Rights » User opens in a new tab. -
Search for (search) and open the appropriate user account.
-
Click on Views.
-
Expand the entries () and select (check_box) the views that the user should have access to.
-
Save () the settings.
Further information about user accounts and access rights can be found here.
-
Click on Edit view ().
-
Click on Rights management.
-
Select Roles if you want to grant access to an entire user role.
→ The menu Setup » Settings » User » Rights » Roles opens in a new tab. -
Search for (search) and open the appropriate user role.
-
Click on Views.
-
Expand the entries () and select (check_box) the views that the user role should have access to.
-
Save () the settings.
Further information about user accounts and access rights can be found here.
7. Assigning payments
There are several ways to assign unassigned payments to an order. In the Orders » Payments menu, you can either assign payments directly in the overview or you open the detail view of a payment and assign it from there.
|
Recommendation: Sort out unassigned payments once a week
At least once a week, you should edit and sort out the unassigned payments so that you don’t lose track of them in your day-to-day business. |
Assigning payments in the overview is done by entering the corresponding order ID. This is an easy and fast way to assign payments when you
-
already know the order the payment is to be assigned to
-
do not need any further information about the payment
-
and have the order ID ready.
Proceed as follows to assign a payment in the overview.
Assigning a payment in the overview with the order ID:
-
Go to Orders » Payments.
-
Search (search) the desired payment as described in the Searching for payments chapter.
-
Enter the order ID of the order to which the payment is to be assigned in the Order ID field in the row of the unassigned payment.
-
Press Enter to save it.
→ The payment is assigned and the overview is updated.
If a fast assignment in the overview is not possible and you need more information about a payment, open the detail view of a payment. To do so, click into the row of the payment in the overview table or directly click on the payment ID. You can also click on the action Assign payment (credit_card) in the overview table to open the detail view of a payment. To assign a payment in the detail view, proceed as follows.
Assigning a payment in the detail view:
-
Go to Orders » Payments.
-
Search (search) the desired payment as described in the Searching for payments chapter.
-
Open the payment by clicking either into the row of the unassigned payment you want to assign, on the payment ID or on Assign payment (credit_card).
→ You are redirected to the Assignment portlet of the payment.
→ The orders with the highest matching rates are displayed there. -
Select the appropriate order and click on Assign payment (credit_card).
→ The payment is assigned to the selected order. Only the selected assignment is shown.
The matching between payments and orders are checked on the basis of a background matrix. This check is initiated as soon as you open the Assignment table in the detail view of a payment. A maximum of 10 orders with the highest matching rates are displayed in descending order.
As soon as you assigned the payment only the selected match will be displayed in this table. Only when the payment is detached from the order, will the matchings with the highest rates be displayed again.
In case no matchings are shown in the assignment table, you have other options how to proceed. You can select the following options via the context menu (more_vert):
-
Assign order ID: When you select this option, an editing window opens. Here, you can directly enter the order ID to which you want to assign this payment. Click on Assign to assign the payment to the entered order ID.
-
Search orders: When you select this option, you are redirected to the order search. In the order search, the filters Contact name, Amount and Unpaid and partially paid are preselected. This way, possible appropriate orders are already displayed. You can adapt the order search to find the required order. Afterwards, you can enter the order ID in the assignment table and assign the payment.
Several payments can be assigned to the same order. This can happen, for instance, if the first payment did not cover the whole order amount. If one or several payments are already assigned to an order and you want to assign another one, you have to confirm this assignment.
The table is customisable. This means that you can decide which table columns are displayed in which order. When opening the menu, the following table columns are displayed by default:
-
Matching rate
-
Order ID
-
Amount
-
Action
The following table columns can be displayed but are not shown by default:
-
Contact ID
-
Contact name
-
Invoice number
Adapt the table according to your requirements and your workflow. When you have adapted the table, these settings are saved and applied every time you open this menu. The table remains editable, you can change it any time.
Customising the table:
-
Click on Configure columns (settings).
→ The window Configure columns opens. -
Select which columns you want to be displayed.
-
Move (drag_indicator) the columns so they are displayed in the order you need them in.
-
Click on Confirm to save your settings.
→ Your settings are saved and applied.
7.1. Booking a payment manually in an order
In order to manually book a payment or partial payment in the order, e.g. because the customer picked up the item and paid the item in cash or because a payment cannot be found in the overview, proceed as follows.
Booking a payment:
-
Go to Orders » Edit orders.
-
Open the order for which you want to book a payment.
→ The Overview tab opens. -
Open the Payment tab.
-
Click on Book payment.
→ The Book payment window opens. -
Carry out the settings. Note Table 3.
-
Click on Book payment.
→ The payment is booked and displayed in the payment overview.
| Setting | Explanation |
|---|---|
Amount |
Enter the full or partial amount that you want to book. |
Credit/Debit |
Select Credit or Debit. The selection depends on the open amount. Credit is selected by default. Debit is selected for negative pending amounts, e.g. overpaid payments. This selection can be changed if needed. |
Currency |
Select the currency in which the payment should be made. |
Exchange rate |
If needed, enter a different exchange rate than what is currently configured in the system. |
Designated use |
The order ID is entered by default. The entry can be changed. |
Incoming payment |
Select the date of the incoming payment. The current date is set by default. |
You can recognise manually booked payments by the extension Manual booking icon.
8. Detaching payments
There are 2 ways to detach a payment from an order. In the Orders » Payments menu, you can either detach payments directly in the overview or you open the detail view of a payment and detach it from there.
8.1. Detaching a payment in the overview
Detaching a payment in the overview:
-
Go to Orders » Payments.
-
Search (search) the desired payment as described in the Searching for payments chapter.
-
Click on the context menu (more_vert) and then on Detach payment (money_off) in the row of the payment you want to detach from an order.
→ The payment is detached from the order and is displayed again as an unassigned payment.
8.2. Detaching a payment in the detail view
A payment can also be detached from the detail view. To do so, proceed as follows.
Detaching a payment in the detail view:
-
Go to Orders » Payments.
-
Search (search) the desired payment as described in the Searching for payments chapter.
-
Click in the row of the payment you want to detach and open it.
→ The detail view of the payment opens. -
Open the Assignment table.
→ When the table opens, the existing order assignment is shown. -
Click on Detach payment (money_off).
→ The payment is detached from the order. The highest matching rates for this payment are once again shown.
|
Note when detaching payments
Detaching a payment from an order is technically possible at all times, even when order processing has advanced or is completed. Detaching a payment should only be done cautiously and with good reason because errors, for example that a payment no longer covers an open order amount, are likely to occur when a payment is detached and assigned repeatedly. Also note that detaching a payment also causes changes to the order it was detached from, for example a recalculation of the payment of an order or a status change. |
9. Splitting payments
Manually booked incoming payments, imported bank postings as well as EBICS payments can be split in the Orders » Payments menu. This means that the amount of a payment can be split and assigned to several orders. Note that Provisional postings cannot be split. To split payments, proceed as follows.
Splitting a payment:
-
Go to Orders » Payments.
-
Search (search) the desired payment as described in the Searching for payments chapter.
-
Click on Split payment (call_split) in the row of the payment you want to split.
→ You are redirected to another view to proceed with splitting the payment. -
Search (search) for the required orders with the search filters Order ID, Invoice number, External order ID, Contact ID and Name. You can enter several IDs/numbers by separating them with a comma.
-
Select the orders between which you want to split the payment from the search results.
-
Click on Save (save).
→ The payment is split and assigned to the selected orders in the order in which they are shown in the table, from the top down and you are redirected to the payments overview. Here, the created partial payments can be edited in the same way as the other payments.
When splitting a payment, the amount of the payment is reduced by the corresponding amounts of the orders that were selected during the division of the payment. Both the original total amount of the payment as well as the remaining amount are displayed in this view. When a remaining amount is created by splitting a payment, this amount could be split again.
Example: Imagine you want to split a payment with the amount of 120 Euros into order A, which has an open amount of 80 Euros, and into order B, which has an open amount of 20 Euros. By splitting the payment and selecting these two orders, order A is assigned 80 Euros and order B 20 Euros. The payments created by splitting the original payment are automatically assigned to the selected orders. An amount of 20 Euros is left from the original payment. You can now assign this leftover amount to another order or, if required, can split it again.
|
Splitting a payment cannot be reversed
Once you split a payment, this cannot be reversed. In order to restore the original payment, delete all partial payments. When a partial payment is deleted, the amount is added again to the original payment. Before deleting a partial payment, it has to be detached from the order because only unassigned payments can be deleted. |
In the split view of a payment, info boxes provide a quick overview of the most important information:
-
Amount
-
Received on
-
Sender of payment
-
Reason for payment
-
Remaining amount
Optionally, you can go to Edit view () and remove or rearrange info boxes by positioning them via drag-and-drop. The names of the info boxes can also be adjusted. Moreover, determine in the Settings of the portlet how many cards (info boxes) are displayed per row.
The search table is customisable. By default, all available columns are displayed:
-
Order ID
-
Contact ID
-
Name
-
Invoice number
-
Referrer
-
Order date
-
Open amount
By using the Configure columns function (settings), you can determine which columns are displayed in which order.
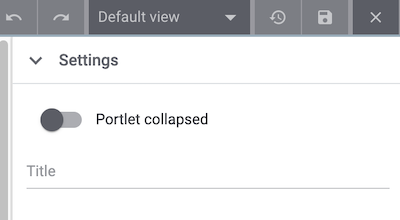
Optional: Go to Edit view () and determine in the Settings of the Search portlet whether by default it should be collapsed or not when opening the Split payment view. To do so, use the Portlet collapsed option.
Do you want to change the portlet name? Enter the desired name in the Title field.
10. Deleting payments
You can only delete a payment when it is not assigned to an order and no child payments (partial payments) resulting from splitting a payment exist. Deleting a payment can be carried out either directly in the overview table or in the detail view of a payment.
10.1. Deleting a payment in the overview
Deleting a payment in the overview:
-
Go to Orders » Payments.
-
Click on the context menu (more_vert) and then on Detach payment (delete) in the row of the payment you want to detach from an order.
→ The query Delete payment opens. -
Click on Yes.
→ The payment is deleted and the overview updated.
You can only delete payments when they are not assigned to an order and no child payments (partial payments) resulting from splitting a payment exist. If something of this applies, the Delete payment function (delete) is not available. If you still want to delete the payment, you have to make sure that the payment is not assigned and no child payments exist. To do so, proceed as follows:
-
Payment is assigned to an order: Detach the payment from the order. Before doing so, carefully check whether detaching the payment from the order can safely be carried out.
→ The payment can now be deleted. -
Payment was split and partial payments exist: First, you have to delete the partial payments. This is only possible if the payment is not assigned to an order. If the partial payments are assigned, you first have to detach the payment from the respective order. Before doing so, carefully check whether detaching the payment from the order can safely be carried out. Afterwards, delete the partial payments.
→ The original payment can now be deleted.
10.2. Deleting a payment in the detail view
Deleting a payment in the detail view:
-
Go to Orders » Payments.
-
In the row of the payment, click on the payment that you want to delete.
→ The detail view of the payment opens. -
Above the payment details, click on Delete payment (delete).
→ The query Delete payment opens. -
Click on Yes.
→ The payment is deleted and you are redirected to the updated overview.
You can only delete payments when they are not assigned to an order and no child payments (partial payments) resulting from splitting a payment exist. If something of this applies, the Delete payment function (delete) is not available. If you still want to delete the payment, you have to make sure that the payment is not assigned and no child payments exist. To do so, proceed as follows:
-
Payment is assigned to an order: Detach the payment from the order. Before doing so, carefully check whether detaching the payment from the order can safely be carried out.
→ The payment can now be deleted. -
Payment was split and partial payments exist: First, you have to delete the partial payments. This is only possible if the payment is not assigned to an order. If the partial payments are assigned, you first have to detach the payment from the respective order. Before doing so, carefully check whether detaching the payment from the order can safely be carried out. Afterwards, delete the partial payments.
→ The original payment can now be deleted.
11. Carrying out the group function
Using the group function, you can edit several payments at the same time. To use the group function, at least one payment has to be selected. Use the search to filter the desired payments. After selecting the payments you can either auto-assign them all at the same time or delete them all at the same time. Remember that only unassigned payments can be deleted.
Proceed as follows to either assign or delete payments by using the group function.
Editing payments by using the group function:
-
Go to Orders » Payments.
-
Select the incoming payments (check_box) that you want to assign or delete.
-
Above the overview table, click either on Delete payments (delete) or on Auto-assign payments (credit_card).
→ You have to confirm or deny the deletion or the assignment of the payments. -
After having carried out this function, it is displayed how many of the selected payments could be auto-assigned or deleted.
|
Payment that are assigned to an order cannot be deleted
Sometimes, not the whole selection can be edited. For example, one or several of the selected payments that you want to delete could be assigned to an order. In this case, payments cannot be deleted. If you need further information why a payment could not be auto-assigned or deleted, you can refer to the log. For this, go to the Data » Log menu. |
Note that the auto-assignment depends on the setting Match for automatic assignment (0.7 - 1.0) in the Setup » Orders » Payment » Incoming menu. The value 0.7 stands for a 70% match and the value 1.0 stands for a 100% match. If at least two orders are found with the same matching rate while auto-assigning payments via the group function, the payment cannot be assigned. This also means that a payment can only be auto-assigned when just one order with the corresponding matching rate was found.
12. Detail view of a payment
Besides the functionalities assigning payments, detaching payments and deleting payments, the detail view offers an overview over all information connected to a payment in different portlets. By using the MyView, you can configure and arrange the elements of the detail view according to your needs.
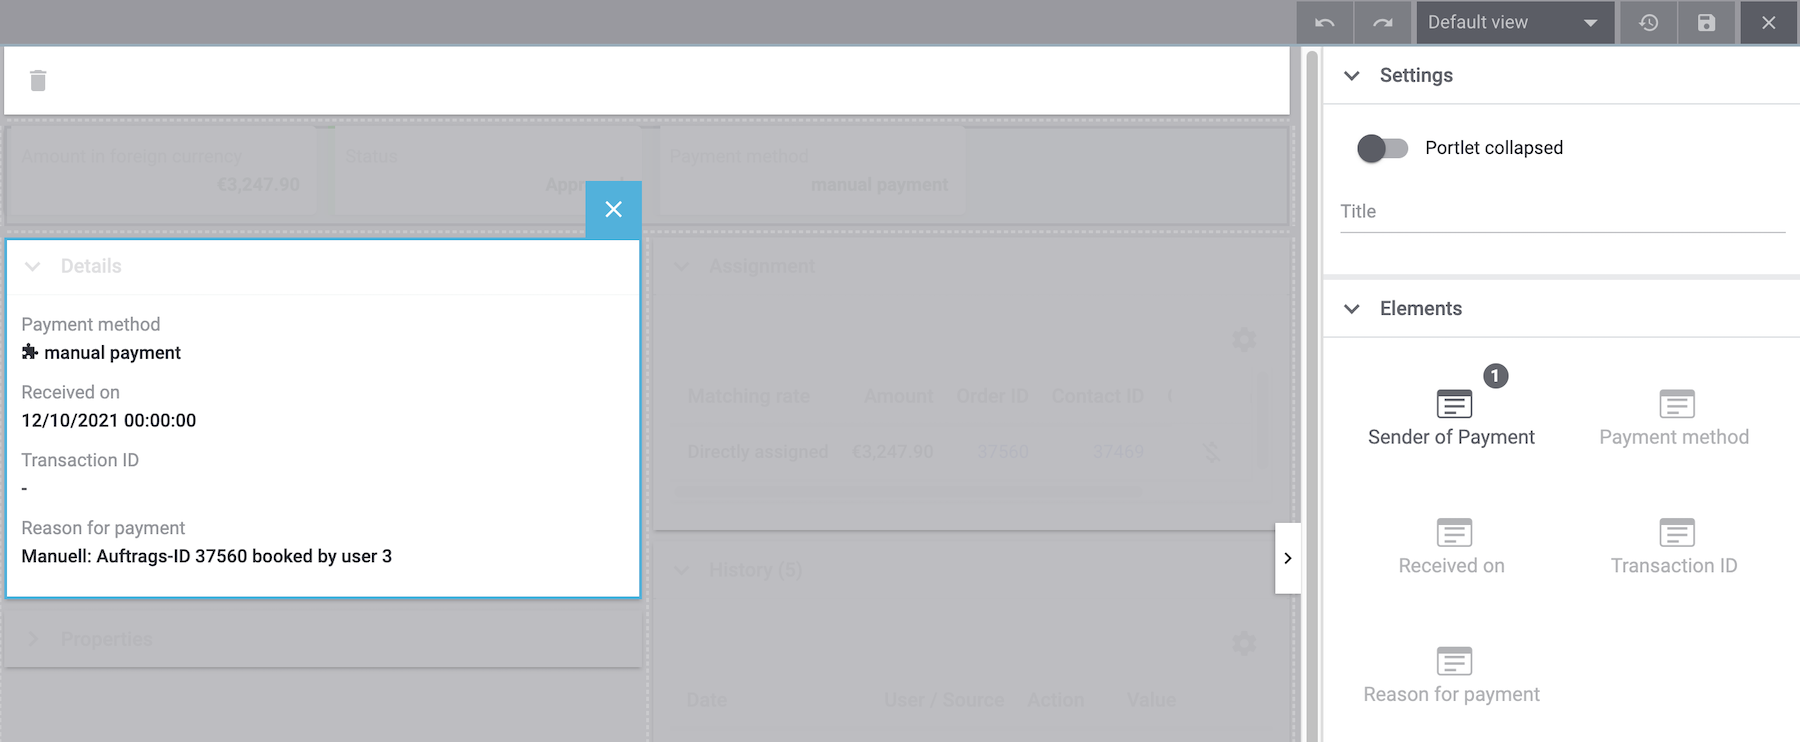
12.1. Details
In the default view, the following basic information are displayed in the Details portlet:
-
Payment method
-
Received on
-
Transaction ID
-
Reason for payment
Optional: Go to Edit view () and additionally add the element Sender of payment or remove other elements. Rearrange the elements of the portlet by positioning them via drag-and-drop.
Moreover, determine in the Settings of the portlet whether by default it should be collapsed or not when opening the detail view of a payment. To do so, use the Portlet collapsed option.
Do you want to change the portlet name? Enter the desired name in the Title field.
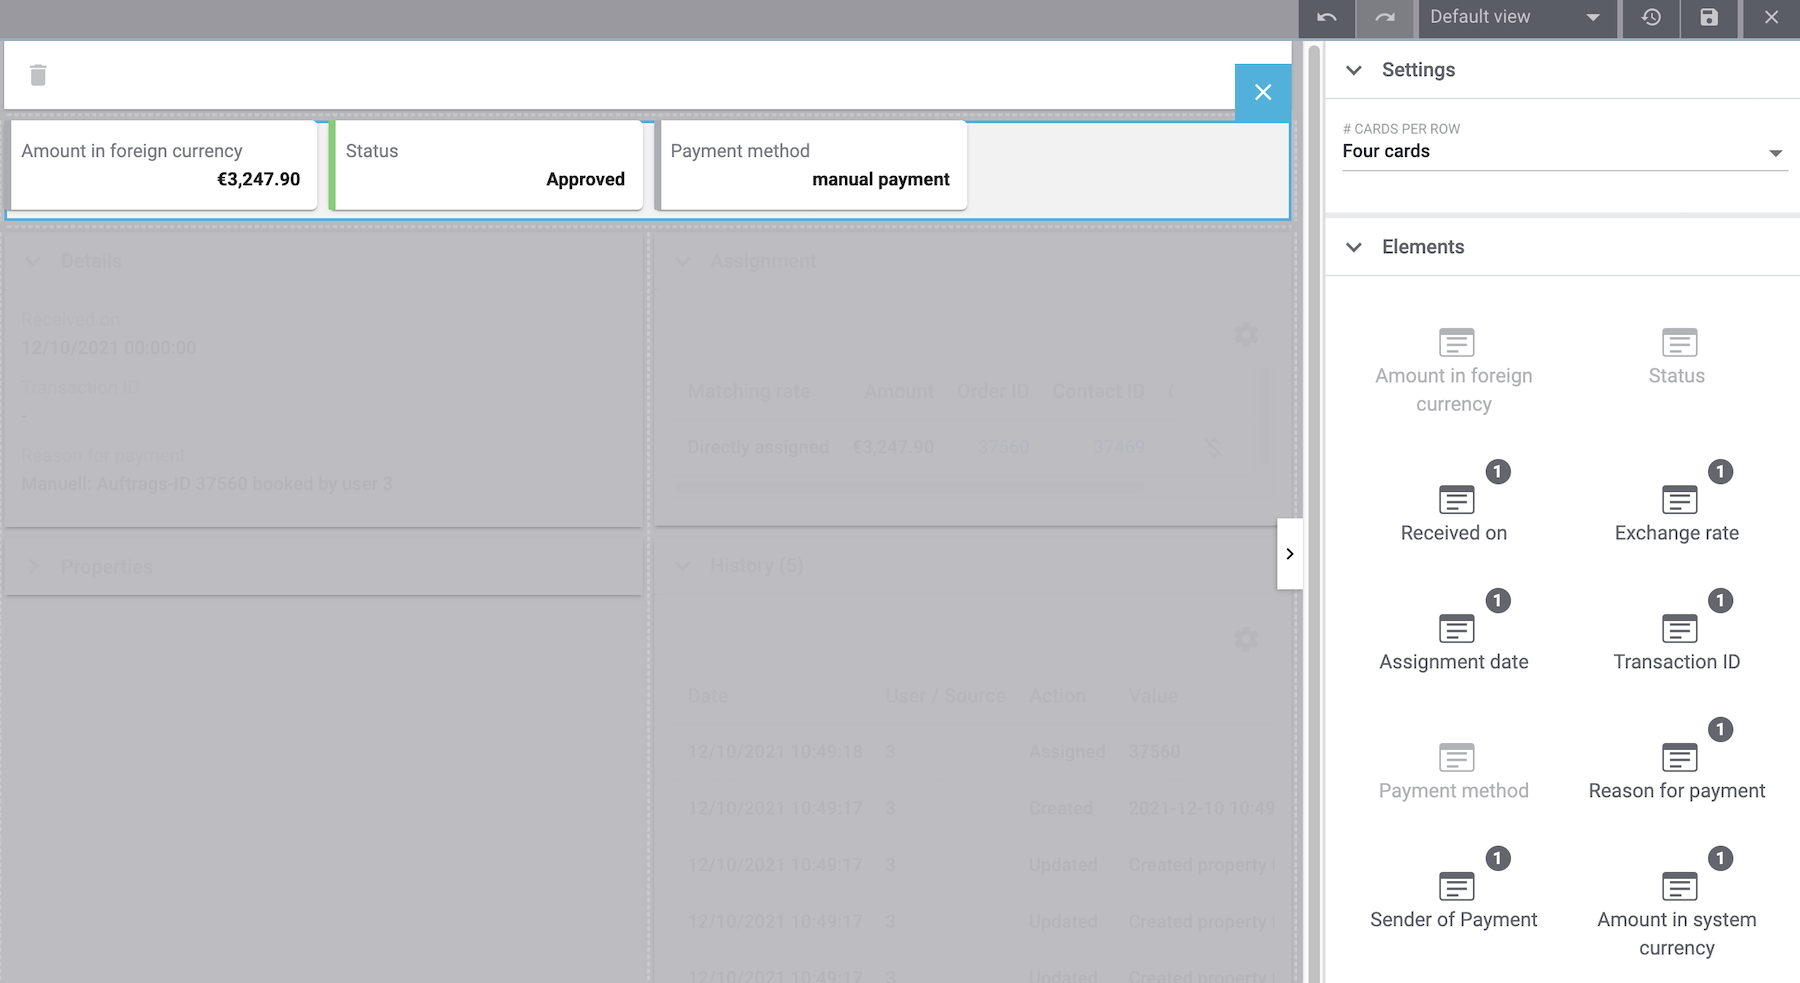
12.2. Info boxes
Info boxes provide a quick overview of important payment information. In the default view, the info boxes Amount in foreign currency (the currency in which the payment was made), Status and Payment method are displayed.
The payment status is additionally shown by the coloured status bar of the Status info box.
-
Green = The payment was processed. This either means approved, captured or refunded.
-
Orange = The payment is being processed. This either means waiting for renewal, waiting for approval or partially captured.
-
Red = The payment was not processed. This either means refused, cancelled or expired.
Optionally, you can go to Edit view () and remove elements or additionally add the following info boxes as elements to this portlet:
-
Received on
-
Exchange rate
-
Assignment date
-
Transaction ID
-
Reason for payment
-
Sender of payment
-
Amount in system currency
Rearrange the elements of the portlet by positioning them via drag-and-drop. Moreover, determine in the Settings of the portlet how many cards (info boxes) are displayed per row.
12.3. Assignment
The Assignment portlet offers a list of the orders with the highest matching rate for an unassigned payment. If a payment is already assigned, only the order which it is assigned to is displayed here. Only when the payment is detached from the order, will the matchings with the highest rates be displayed again.
The matching between payments and orders are checked on the basis of a background matrix. This check is initiated as soon as you open the Assignment area. A maximum of 10 orders with the highest matching rates are displayed in descending order.
Moreover, you can detach an assigned payment in the assignment table. Click on Detach payment (money_off). But take into account that detaching payments should not be done without good reason.
The assignment table is customisable. By default, all available columns are displayed:
-
Matching rate
-
Order ID
-
Amount
-
Contact ID
-
Contact name
By using the Configure columns function (settings), you can determine which columns are displayed in which order.
Optional: Go to Edit view () and determine in the Settings of the Assignment portlet whether by default it should be collapsed or not when opening the detail view of a payment. To do so, use the Portlet collapsed option.
Do you want to change the portlet name? Enter the desired name in the Title field.
12.4. Payment history
The History portlet offers an overview over all actions executed for this payment. It is also shown who or what (e.g. a plugin) initiated an action at what time so that transparency is always ensured.
You see at a glance when (date) who (user or other sources, e.g. a plugin) did what (action and value, e.g. Assigned | Order ID xy) with the payment. The following entries can be seen in the payment history, for example:
-
Import date of a payment
-
Information about the assignment of a payment to an order
-
Information about the detachment of a payment from an order
-
Currency changes
-
Exchange rates
-
Changes in amounts
-
Status changes
-
Creation/change of properties
The table is customisable. By default, the columns Date, User / Source, Action and Value which are all the available columns, are displayed.
Note that the entries in the column Value are always in English because this data is taken directly from the database. By using the Configure columns function (settings), you can determine which columns are displayed in which order.
Optional: Go to Edit view () and determine in the Settings of the History portlet whether by default it should be collapsed or not when opening the detail view of a payment. To do so, use the Portlet collapsed option.
Do you want to change the portlet name? Enter the desired name in the Title field.
12.5. Properties
The portlet Properties shows all information belonging to the payment. These information usually exceed the information given in the details. Which information are shown in the Properties depends on the payment itself, for example which payment method was used or which information a payment provider transfers.
Optional: Go to Edit view () and determine in the Settings of the Properties portlet whether by default it should be collapsed or not when opening the detail view of a payment. To do so, use the Portlet collapsed option.
Do you want to change the portlet name? Enter the desired name in the Title field.
13. Displaying incoming payments on the dashboard
You can add the element Payments to the dashboard of your PlentyONE back end. This element displays information about unassigned payments as well as about all incoming payments from yesterday and today. If you don’t want to use this element on your dashboard, you can get the same results by going to Orders » Payments and using the search filters.
It is recommended that you take a look at the unassigned payments before editing orders. You should see whether incoming cash in advance payments are among them, which can usually be assigned to an order without a doubt thanks to the amount and the booking text. This saves your customers long waiting times and it saves you unpleasant complaints.
|
Recommendation: Sort out unassigned payments once a week
At least once a week, you should edit and sort out the unassigned payments so that you don’t lose track of them in your day-to-day business. For further information about assigning unassigned payments and bookings to orders, refer to the Assigning payments chapter. |
|
Payments from Sofortbanking payments
Sofortbanking payments will be confirmed via an interface immediately after the payment process. They will then appear again in the system as bank postings. You can delete these bank postings from the list of unassigned payments without concern because the orders in question have already been assigned to the payment. |