Directory of data fields (new item UI)

This page serves purely as a reference. It explains the various elements and data fields within an item data record. Links direct you to further information and step-by-step instructions for using the individual data fields in a larger context.

Basic information about managing items

This page serves as a reference and assumes that you are already familiar with the following topics:
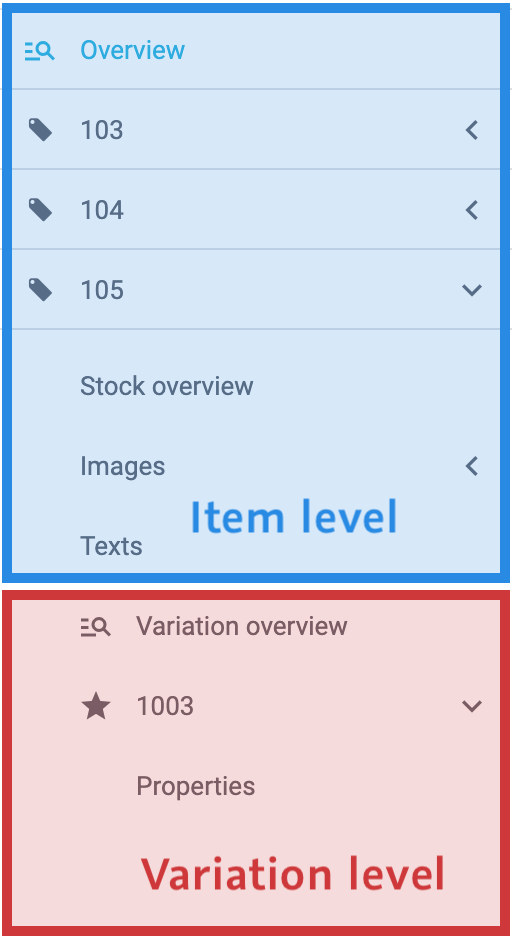
1. Item level

This chapter explains the elements and data fields that are available on the item level.

item variation levels

1.1. Toolbar

The toolbar is customisable. In other words, you can decide which information and buttons it should include.

item toolbar
Setting Explanation

Saves your changes to the data record.

Tip: While configuring the toolbar, you can decide whether users should be required to confirm their changes. Further information.

Information

Here you can see information about the item, e.g the name, ID and timestamp. If you move your cursor over the item name or item ID, then the cursor changes its shape (). Click on the name or the ID to copy it to the clipboard.

Tip: While configuring the toolbar, you can decide which item information should be displayed. Further information.


Flag 1 and 2 of the item. Which symbols are displayed in your own system depends on which flags were set for the item. Click on a symbol to select a different flag from the drop-down list. Further information about flags.

Reloads the item data record.

Click on the three dots to access additional functions.

format_align_left

Opens a pop-up window where you can generate labels. Further information about labels.

open_in_new

Opens the product in the plentyShop or on Amazon. Further information about the preview.

content_copy

Opens a pop-up window where you can copy the item. What exactly is copied?

delete

Opens a pop-up window where you will need to confirm the deletion.

123

Opens a pop-up window where you can manually enter serial numbers for the item. Further information about serial numbers.

playlist_add

A pop-up window opens, where you can create a new listing for the item on eBay.

Step: Select template

Templates help you create listings faster:

  • The templates include your regularly used listing settings.

  • If you select a listing template here, then its settings will be pre-selected in the next steps.

  • You save time because you don’t have to choose every setting separately.

Note: This drop-down list only includes the listing templates that you’ve already created.

Step: Settings
  • Type = What type of listing do you want to create? Select the type from the drop-down list.

  • Number per lot = Enter the item quantity that should be offered in the listing. The listing price applies to the entire quantity.

  • Stock dependence = Should your listing only be visible if there is sufficient stock? Further information about the setting.

  • Transfer as item number = Which information should be transmitted to eBay as the item number?

  • Contents = The drop-down list contains the combinations of content and unit that are available for the individual variations. Select whichever combination of content and unit should be used for the entire listing. The combination of content and unit from the main variation is pre-selected.

  • Tie to item price = Select this option () if you want to tie the listing’s price to the price of the item in PlentyONE.

    • Listing type fixed price: When the price changes in PlentyONE, it is not automatically changed on the market. You have to update the price manually or carry out a stock synchronisation. The price on the market can also change after the stock is synchronised if the exchange rate changed.

    • Listing type auction: The item price is used as the price for the "buy it now" option.

Step: Select market

Select one or more marketplaces for the listing.

Step: Summary

Here you can see a summary of the settings that you selected. Click on Create listing if you are satisfied with the settings.

subject

Opens the menu Sales Channels » Edit listings. The item ID is automatically entered into the search field. This directly shows you all of the listings for the item.

playlist_add_check

Opens the menu Sales Channels » Active listings. The item ID is automatically entered into the search field. This directly shows you all of the active listings for the item.

Expands and collapses the elements in this view.

1.2. Stock

Here you see an overview of the item’s stock. In other words, you’ll see how many copies of each variation are in stock. Click on the three dots () to correct the stock level or redistribute the stock.

Setting Explanation

Variation ID;
Variation name;
Variation number;
Barcode;
Attributes

The overview indicates how many copies of each variation are in stock. The variation ID, name, number, barcode and attributes tell you which variation the stock information applies to.

Warehouse;
Availability;
Bundle

Here you see general information about the variation. You can see which warehouse the item is stored in, which availability level it has and whether it is an item bundle.

Purchase price

The variation’s purchase price.

Note: In the menu Setup » Stock » Stock » Search, you can decide whether the average purchase price should be displayed here or the purchase price that is currently saved in the variation data record.

Value of goods

The value is calculated by multiplying the purchase price with the physical stock.

Example:

  • Purchase price = 20 EUR

  • Physical stock = 100 copies

  • Value of items = 20 x 100 = 2,000 EUR

Physical stock

Indicates how many copies of the item are physically in the warehouse.

Reserved stock

Indicates how many copies of the item are currently reserved.

  • Stock is reserved when there is a pending order or a warranty.

  • The stock stays reserved until the outgoing items are booked or until the order / warranty is cancelled.

  • The reserved stock is part of the physical stock because the reserved stock is still present in the warehouse.

Reserved stock for listings

Indicates how many copies of the item are currently in an auction on eBay and thus reserved.

Background info: In legal terms, listings are binding offers to potential customers. Therefore, it makes sense to be careful and to reserve those items offered in listings, even before they have a concrete order. Otherwise you might sell more variations than you have in stock.

You can decide whether or not you want items from active listings to be registered as reserved stock in PlentyONE.

  1. When you create a market listing, select limited (with reservation) for the stock dependence. This will reserve the listed quantity.

  2. As soon as a listing was successfully completed, the setting is no longer active. However, the sold item is now reserved within the order.

Reserved stock for bundles

Indicates how many item bundles are currently included in pending orders and thus reserved. The quantity of a variation that is reserved by an item bundle is also included in the quantity displayed in the Reserved stock column.

Reorder level

You can think of this value as a target value. In other words, how many copies of the item should ideally be in the warehouse.

Reorder level Δ

The difference to the reorder level. This value indicates how many copies need to be sold or reordered before you will get back to the reorder level.

Example 1:

  • Reorder level = 30 copies

  • Physical stock = 10 copies

  • Reorder level Δ = 20 copies

In this example, we want to have 30 copies of the item. Currently, there are only 10 copies in the warehouse. Therefore, we need to reorder 20 copies to get back to the target value.


Example 2:

  • Reorder level = 10 copies

  • Physical stock = 40 copies

  • Reorder level Δ = -30 copies

In this example, we want to have 10 copies of the item. Currently, there are only 40 copies in the warehouse. Therefore, we still need to sell 30 copies to get back to the target value.

Net stock

Indicates how many copies of the item are currently available for sale. The net stock is a subset of the physical stock. Substract all reserved quantities from the physical stock and you will get the net stock.

Supply

Here you see how many copies of the item are on their way to the warehouse. This replenishment value indicates how many units are currently being delivered to your warehouse.

history Stock correction

A pop-up window opens. Here you can enter the new physical stock level and choose a reason for the correction.

swap_horiz Redistribution

A pop-up window opens. Here you can move the stock from one storage location to another.

1.3. Images

Here you see a preview of all the images for this item. If necessary, you can upload additional images, save information about the images or delete specific images.

Example workflow

Imagine you sell a t-shirt in the colours red, green and blue. You want customers e.g. to automatically see an image of the green t-shirt when they select the colour green in your plentyShop. To do so:

  1. Upload all of the product images (i.e. images of the red, green and blue t-shirt variations).

  2. Save details about the individual images.

  3. Assign the images to the appropriate variations. For example, assign the green t-shirt image to the green t-shirt variation.


Uploading images

Option 1: Images element
  1. Go to Item » Items » [Open item] » Element: Images.

  2. Drag and drop the images into the appropriate area or select the images from where they are located on your computer.

Option 2: Left navigation
  1. Go to Item » Items » [Open item] » Left navigation: Images » Details.

  2. Drag and drop the images into the appropriate area or select the images from where they are located on your computer.

Technical specifications

File formats

The file formats supported for images are: PNG, JPG, GIF, SVG

File names

Image file names may contain the following characters:

  • Letters (a-z, A-Z) excluding umlauts

  • Numbers (0-9)

  • Underscores (_)

  • Hyphens (-)

Spaces and special characters such as umlauts are not permitted. When you upload images, spaces and special characters are replaced by hyphens (-).

Image sizes

Every time an item image is uploaded, PlentyONE creates the following versions:

  • High-resolution item image

  • Medium-sized item image

  • Item attribute image

  • Two preview images

Since PlentyONE does not scale up images, the source image must have at least the size and quality specified in the Sizes area. Larger images will be scaled down to the specified size.

Original images

Original images are no longer accessible after they have been uploaded. When you upload an image, PlentyONE uses it to generate the image sizes that are accessible via URL. The original image will no longer be accessible - also not via URL.


Saving details

Option 1: Images element
  1. Go to Item » Items » [Open item] » Element: Images.

  2. Within the element, click on and then on Details.
    → A window opens with item details.

  3. Customise the settings as needed.

  4. Save () the settings.

Option 2: Left navigation
  1. Go to Item » Items » [Open item] » Left navigation: Images » Details.

  2. Customise the settings as needed.

  3. Save () the settings.

Setting Explanation

URL

Here you see the image’s URL. The URL can be copied.

  1. Move your cursor over the URL.
    → The cursor’s shape changes ().

  2. Click on the URL to copy it to the clipboard.

Position

Enter a position number. This specifies which image should be displayed in the plentyShop first, second, third etc.

Name - EN

Enter a name for the image. The name is relevant for SEO, i.e. it helps search engines better index the item. Use appropriate keywords in the image names to make the images more relevant to search engines. This also increases traffic on the page, for example if the image is found with the Google image search.

Note: The image name is limited to 256 characters.

Alternative text - EN

Enter an alternative text for the image. If the image can’t be displayed (e.g. because of browser settings, firewall, etc), then the customer will see the alternative text instead. The alternative text is not relevant for SEO. It is simply displayed as an alternative to the image.

Note: The alternative text is limited to 256 characters.

Availability

Which sales channels should this image appear on? Select () the appropriate clients and/or markets.

Market attribute link

Select an attribute value to link the item image for marketplaces with this attribute value. The image will only be transferred to marketplaces where item variations have this attribute value.

Note: This option is only displayed if:

Size

Displays the image size in pixels and kilo bytes.


Translating image name and texts

Option 1: Images element
  1. Go to Item » Items » [Open item] » Element: Images.

  2. Within the element, click on and then on Translations.
    → A window for translations opens.

  3. Select languages from the drop-down lists on the left and right. Example: the source language on the left and the target language on the right.

  4. Enter the image name and alternative text in the selected languages.

  5. Save () the settings.

Option 2: Left navigation
  1. Go to Item » Items » [Open item] » Left navigation: Images » Translations.

  2. Select languages from the drop-down lists on the left and right. Example: the source language on the left and the target language on the right.

  3. Enter the image name and alternative text in the selected languages.

  4. Save () the settings.


Linking images with variations

Linking images to a single variation
  1. Go to Item » Items » [Open variation] » Element: Images.

  2. Select the images () that you want to link.

  3. Save () the settings.

Linking images to multiple variations
  1. Go to Item » Items » [Open item] » Variation overview.

  2. Choose which variations () should be linked to images.

  3. Click on .
    → A pop-up window will open.

  4. Select the images () that you want to link.

  5. Save () the settings.

This method only adds new image links. Previously existing links will not be changed.
You can move your cursor over an image in the pop-up window to enlarge it.
You can enter text or numbers into the search field in the pop-up window. Example: part of an image URL or an image ID. This narrows down the list of displayed images.

1.4. Texts

Here you’ll save item texts like a preview text, technical data and keywords.

Would you rather save variation-specific texts?

The texts here apply to the entire item. In other words, the texts apply to all of the variations. It’s also possible to save variation-specific texts.

  1. First, you’ll create properties of the type Text or HTML.

  2. Then you’ll link these properties with the appropriate variations.

Character counter

There is a character counter in the lower right corner of the data fields. Here you can see the maximum number of characters permitted. Example: the item name is limited to 240 characters.

Setting Explanation

Language

Which language do you want to write the texts in? Select languages from the drop-down lists on the left and right.

Note: By default, this is a bilingual view with German and English. But you can customise the view and specify which languages you need, i.e. choose different languages or create a single-language view. Further information can be found in the practical example below.

Name 1

Enter a name for the item. This is the item’s default name, which is used in the plentyShop and on marketplaces.

Note: The item name is used to create the item URL. Open the plentyShop LTS assistant and navigate to the step SEO if you want to decide whether name 1, 2 or 3 should be used for the meta title and the item URL.

Name 2

Enter a name for the item. This is an alternative item name that can be used for example for markets.

Note: The item name is used to create the item URL. Open the plentyShop LTS assistant and navigate to the step SEO if you want to decide whether name 1, 2 or 3 should be used for the meta title and the item URL.

Name 3

Enter a name for the item. This is an alternative item name that can be used for example for markets.

Note: The item name is used to create the item URL. Open the plentyShop LTS assistant and navigate to the step SEO if you want to decide whether name 1, 2 or 3 should be used for the meta title and the item URL.

Preview text

Enter a preview text for the item. The preview text can be entered in HTML format or as plain text.

Note: The preview text is a short text which can be displayed in item lists.

Item text

Enter an item text. The item text is a detailed description, which is displayed in the item layout in the plentyShop.

Note: Click on the drop-down list in the upper right corner and select your preferred editor for entering text or HTML.

Technical data

Enter technical data for the item.

Note: Click on the drop-down list in the upper right corner and select your preferred editor for entering text or HTML.

URL path

The item’s URL path in the plentyShop. By default, the URL path consists of the categories and the item name. PlentyONE automatically assigns the path when the item is created. The path is displayed as part of the URL when the item is viewed in the plentyShop.

HTML title for online shop

You can enter a custom HTML <title> attribute for each item. If this field is not filled in, the HTML title of the item is output as Item name | Shop name. This setting applies to both PlentyONE Shop and its predecessor plentyShop LTS. A customised HTML title can have a positive effect on your SEO ranking.

Meta description

Enter a meta description for the item.

Note: The meta description makes it easier for search engines to find the item.

Meta keywords

Enter keywords for the item.

Note: The meta keywords make it easier for search engines to find the item.

Practical example: creating a single-language or multi-language view

By default, this is a bilingual view with German and English. But while you customise the view, you can decide which languages you need and which order they should be displayed in. For example, you could create a monolingual view. Or you could choose different languages and thus create a customised translation view.

  1. Add the element Translations panel as many times as needed.

  2. Open the portlet’s settings ().

  3. Click on Configure languages.

  4. Which languages should be displayed together? Select one or more languages ().

  5. Which language should be displayed first, second, third, etc?

    1. Move your cursor over a language with the symbol drag_indicator.
      → Your mouse cursor changes shape ().

    2. Drag the language to the appropriate position.

  6. Save () the view.

Imagine your product texts are translated from English into German, French, Spanish and Italian. The view would be very cluttered if you displayed all of the languages together. Instead, only select the first language pair, e.g. English and German. Then add the translation panel a second time and select the next language pair, e.g. English and French. Repeat the process as many times as necessary. The translation panels are displayed one underneath the other. They can be expanded or collapsed as needed ().

1.5. Settings

This element includes basic item options.

Setting Explanation

Subscription

Is a subscription available for the item? Select the appropriate answer from the drop-down list.

Note: Subscriptions are set up in the scheduler. The scheduler is an individual module in PlentyONE that allows an item to be shipped in regular intervals. The scheduler menu is only visible in PlentyONE if you’ve booked the module.

Age restriction

Select the appropriate age rating from the drop-down list.

Note: Items with an 18+ age rating must be linked to a shipping profile for which the PostIdent option was activated.

Condition

Select the item’s condition from the drop-down list. New is set by default.

Condition for API

Select the item’s API condition from the drop-down list. New is set by default.

Note: The API condition is used for the market Amazon.

Promotional coupon/POS discount

Should it be possible to redeem promotional coupons for this item? Select the appropriate answer from the drop-down list.

  • Permitted = Customers can redeem promotional codes when they buy a variation of this item. Cashiers can grant discounts while selling the item with PlentyONE POS. Customer class discounts are applied automatically.

  • Not permitted = Customers cannot redeem promotional codes when they buy a variation of this item. Cashiers cannot grant discounts while selling the item with PlentyONE POS. Customer class discounts are not applied.

  • Purchasable with coupon only = The item variation can only be purchased if a promotional code was entered.

Serial number

Should it be possible to scan this item’s serial number during a process? Select the appropriate answer from the drop-down list.

Shipping package

Do you want to use shipping packages for this item? Select the appropriate answer from the drop-down list.

Note: Shipping packages have specific dimensions. If you enter dimensions for your variations, then the appropriate shipping package will automatically be assigned.

Manufacturer

Who makes this item? Select the appropriate manufacturer from the drop-down list.

Note: This list only includes the manufacturer data records that you’ve already saved in PlentyONE.

Max. order quantity

Enter a value to limit how many copies of the item can be bought at once.

  • 0 = The maximum order quantity applies per variation. This quantity is saved in the variation’s tab Settings under the option Max. order quantity.

  • Value greater than 0 = Customers cannot order more than this total quantity. This limit applies to all of the item’s variations. Decimal values are possible, e.g. allowing customers to order products by weight or length. This value takes priority over the maximum order quantity saved within the individual variations.

Manufacturing country

Which country was the item manufactured in? Select the appropriate country from the drop-down list.

Revenue account

Enter up to 11 digits for the revenue account.

Stock type

Select the appropriate stock type from the drop-down list.

Stock type Explanation

Stocked item;
Production item;
Special order item

These types do not have a pre-defined function. However, they are well-suited for differentiating between various types of products.

Example of use: Imagine you sell mass-produced items and custom-made items. Orders that include custom-made items need to be processed differently. In this case, you could designate your mass-produced items as "Stocked items" and your custom-made items as "Special order items". Then you could set up an event procedure, which automatically switches orders containing custom-made items to a particular status.

Colli

Select if the item is to be shipped in several packages. For additional packages, individual items with the stock type Colli must be created in PlentyONE, but these items should not be activated for the plentyShop.

Note: You are limited to these four stock types. It is not possible to create additional stock types.

1.6. Multi-Channel

These settings relate to listing templates. The basic idea is simple. Rather than individually configuring the settings for every single eBay offer, you create a template, which includes the typical offer settings.

Setting Explanation

Listing template

Choose a previously created listing template to link it with this item.

eBay category 1;
eBay category 2

Enter the eBay category IDs for this item.

Use case: in the first step, you’ll create listing templates that apply to all categories. Then in the second step, you’ll specify the category ID for each individual item.

Store category 1;
Store category 2

Enter the eBay store category for this item.

Use case: in the first step, you’ll create listing templates that apply to all store categories. Then in the second step, you’ll specify the store category for each individual item.

1.7. Amazon

Use the settings in this element to prepare your items for being sold on Amazon.

Setting Explanation

FBA Fulfillment

Should the item be sold via FBA? If so, then select the appropriate Amazon marketplace from the drop-down list.

  • AMAZON_EU = Europe

  • AMAZON_FE = Far East

  • AMAZON_NA = North America

Product type (Deprecated)

Select the appropriate Amazon product type from the drop-down list. You can think of the product type as the Amazon category under which this item should appear. When you transmit your items to Amazon, you’ll transmit one product type at a time, i.e. one category at a time.

Note: You can download an overview of Amazon product types here. The table lists the product types and their corresponding IDs.

Product type

Select the appropriate Amazon product type from the drop-down list. The product type is the Amazon category under which this item should appear. These product types are used for the new connection to Amazon.
Product types cannot be imported, because they come directly from Amazon. You have the option to import values that are assigned to items.

Note: There are only active values in the drop down list. In the Setup » Markets » Amazon » Add catalogue templates menu you can activate and deactivate values.

Amazon FBA

Should the item be sold via FBA? If so, then select this option ().

Note: By doing so, the FBA stock of this item can be imported into PlentyONE and Amazon Multi-Channel orders that are shipped with FBA can be booked.

1.8. Shipping profiles

Setting Explanation

Shipping profiles

Select () at least one shipping profile per item. Otherwise the shipping costs may not be calculated correctly. No shipping profile is selected by default. If an order contains items without a shipping profile, then the items will be given the default shipping profile for the default online store. If no default shipping profile was specified, then the shipping profile with the highest priority will be used.

1.9. Webshop

Setting Explanation

Webshop

Should this item be highlighted with a store special? If so, then select the appropriate type of store special from the drop-down list. In other words, decide whether you want to call this item a special offer, a new item or a top item.

1.10. Ebay titles

Setting Explanation

eBay-title 1 - 9

Enter the eBay listing’s title here. This links the listing title to the item.

Background info: Listings are retrieved on an hourly basis. While being retrieved, the listing is assigned to an item. The listings and items are matched smoothly if the listing was created with PlentyONE or if the item has the same name as the listing title.

If the item name differs, you can enter the listing title. This improves the matching accuracy. This link also makes it possible to import listings that were set up with other tools into PlentyONE and have them automatically assigned to the correct item.

1.11. Cross Selling

In cross-selling, you subtly encourage customers to spend more money. This is done by offering additional products that relate to the purchased product. For example, you could link a guitar to a pack of replacement strings, a song book and a guitar strap.

Here you see the item’s cross-selling links. If necessary, you can link the item to any number of other products from your portfolio.

  1. Go to Item » Items » [Open item] » Element: Cross Selling.

  2. Click on Add cross selling item ().
    → A pop-up window will open.

  3. Select all the cross-sellers () that should be linked to the main item, e.g. select the replacement strings, the song book and the guitar strap.

  4. Click on Apply.
    → The data will be displayed as a table.

  5. Select the appropriate relationship from the drop-down list.

  6. Save () the settings.

1.12. Custom portlet

The custom portlet differs from pre-configured portlets in two important ways. The custom portlet:

  • can be added any number of times.

  • includes all of the data fields and not just a subset, as is the case with pre-configured portlets.

Thanks to custom portlets, you are not limited to the pre-defined settings. Rather, you can decide which exact settings a portlet should include.

Example: Imagine you’re not satisfied with how the global settings are arranged by default. You would rather have separate groups for the manufacturer settings and the conditions. Such a scenario can be accomplished with custom portlets.

  1. Add any number of custom portlets.

  2. Give the portlets meaningful names.

  3. Add the appropriate item data fields to the portlets.

details custom portlets

2. Variation level

This chapter explains the elements and data fields that are available on the variation level.

item variation levels

2.1. Toolbar

The toolbar is customisable. In other words, you can decide which information and buttons it should include.

variation toolbar
Setting Explanation

Saves your changes to the data record.

Tip: While configuring the toolbar, you can decide whether users should be required to confirm their changes. Further information.

Information

Here you can see information about the variation, e.g the name, ID and timestamp. If you move your cursor over the name or ID, then the cursor changes its shape (). Click on the name or the ID to copy it to the clipboard.

Tip: While configuring the toolbar, you can decide which information should be displayed. Further information.

Opens the inheritance settings.

  1. Decide which settings should be inherited:

    1. Select the settings that should be inherited ().

    2. Deselect the settings that should not be inherited ().

  2. Click on Execute.

  3. Change the non-inherited settings as needed.

  4. Save () the settings.

Note: This button is greyed out in the main variation. You can only click on the button in a sub-variation.

Reloads the item data record.

Click on the three dots to access additional functions.

format_align_left

Opens a pop-up window where you can generate labels. Further information about labels.

open_in_new

Opens the product in the plentyShop or on Amazon. Further information about the preview.

delete

Opens a pop-up window where you will need to confirm the deletion.

star

Opens a pop-up window where you can turn the sub-variation into the main variation. Further information.

Expands and collapses the elements in this view.

2.2. Properties

Here you can see the variation’s properties. If needed, you can manually link further properties with the variation.

Requirement

This assumes that you’ve already configured the necessary properties in PlentyONE.

Character counter

There is a character counter in the lower right corner of the data fields. Here you can see the maximum number of characters permitted. Example: properties of the type text and HTML are limited to 65535 characters.

Linking a single property to the variation
  1. Go to Item » Items » [Open variation] » Left navigation: Properties.

  2. Click on and then on Link property.
    → A pop-up window will open.

  3. Select the properties that you want to link ().

  4. Click on Apply.
    → The data will be displayed as a table.

  5. Depending on the type of property, you might need to enter additional information. For example, if the property is something like a weight or a length, then it will be necessary to enter a numeric value. You can find further information in the following table.

  6. Save () the settings.

Linking multiple properties via the group function
  1. Go to Item » Items.

  2. Set search filters as needed and start the search.

  3. Select () the variations to be edited.

  4. In the toolbar, click on layers » layers Variation group function.
    → The Variation group function window opens.

  5. Select the action Add properties from the drop-down list ().
    → The action will be added to the lower part of the window.

  6. Select the properties that should be linked to the variations.

  7. Execute the group function.
    → Depending on the type of property, you might need to enter additional information in the menu Item » Items » [Open variation] » Left navigation: Properties. For example, if the property is something like a weight or a length, then it will be necessary to enter a numeric value. You can find further information in the following table.

  8. Save () the settings.

Linking a property group
  1. Go to Item » Items » [Open variation] » Left navigation: Properties.

  2. Click on and then on Link property groups.
    → A pop-up window will open.

  3. Select the groups that you want to link ().

  4. Click on Apply.
    → The data will be displayed as a table.

  5. Depending on the type of property, you might need to enter additional information. For example, if the property is something like a weight or a length, then it will be necessary to enter a numeric value. You can find further information in the following table.

  6. Save () the settings.

Type Explanation

Storage location properties

Select a value and a group from the drop down menu.

Click on Delete property (delete), to delete the property.

None

No further action is necessary.

Whole number

Enter the numerical value as a whole number, e.g. 350 centimetres.

Decimal number

Enter the numerical value as a decimal number, e.g. 3.5 metres.

Selection

Select the appropriate option from the drop-down list.

Multi selection

Check all of the appropriate options ().

Date

Enter the date or click on today and select the date from the calendar.

File

  1. Click on and then on Upload file.

  2. Select the file from where it is saved on your computer.

  3. The file will not become available until you have saved the changes.

Note: Click on and then on Delete file if you want to remove the file again, e.g. and replace it with a new file.

Character string

Enter an alphanumeric character string.

HTML

Enter text with HTML formatting.

Note: In the portlet’s settings, you can specify which language should be displayed on the left and right side. You can also select a different language from the drop-down list.

Text

Enter plain text.

Note: In the portlet’s settings, you can specify which language should be displayed on the left and right side. You can also select a different language from the drop-down list.

Practical example: sorting properties by type

While you customise the view, you can add the properties element multiple times. One possible application is displaying every type of property as a separate portlet.

  1. Add the elements Properties and Text properties as many times as needed.

  2. Open the portlet’s settings ().

  3. Customise the settings as needed.

  4. Save () the view.

Setting Explanation

Name

Give the portlet a meaningful name.

Table columns

Decide which information should be displayed.

Types

Decide which property types the portlet should include.

1. Language;
2. Language

Only for text properties. Decide which language should be displayed on the left and right side.

Practical example: order properties
  • In PlentyONE, personalised items are sold with the help of order properties. Example: Your customers should be able to upload a photo that is printed on a t-shirt.

  • Order properties are a special type of properties. Customers can choose them in the plentyShop and order them along with the product.

2.3. Settings

This element includes basic options for the variation.

Setting Explanation

Variation name

Enter a name for the variation.

Variation number

Enter a number for the variation.

Recommendation: If you leave this field blank, then PlentyONE will automatically assign the next available variation number. The number will be assigned according to the pattern saved in the menu Setup » Item » Settings.

External ID

Enter an external variation ID.

Use case: The external variation number facilitates importing items and variations from an external system.

Model

Enter a model name for the variation.

Position

Enter a position number for the variation.

Variations can be sorted by their position number in the back end and front end.

Back end: Search for items in the menu Item » Edit items. Move your mouse cursor over the column header Position. Click on the small triangle () to display the items in ascending or descending order by their position number.

Front end: Select the appropriate sorting option in the plentyShop LTS assistant.

Note: Open the plentyShop LTS assistant and navigate to Pagination and sorting » Additional sorting options. If the option Calculate the variation position based on monthly sales is set to Yes, then manually entered position numbers will be overwritten.

2.4. Content/Dimensions

Setting Explanation

Quantity

Enter a number into the field on the left.

Unit

Select a unit from the drop-down list on the right.

Height in mm;
Length in mm;
Width in mm

Enter the variation’s dimensions. Make sure you enter the dimensions in millimetres.

Gross weight in grams

Enter the variation’s gross weight in grams or kilograms.

Background info: For individually packaged variations, the gross weight is the weight of the variation including packaging. The value is used to calculate shipping packages and weight-based shipping costs.

Net weight in grams

Enter the variation’s net weight in grams or kilograms.

Background info: The net weight is the weight of the variation without packaging.

Units contained

Units contained describes several sales units combined in one package. Default setting: 1.

Note: This value does not influence how the unit price is calculated.

Show unit price

Select this option () if you want the unit price to be displayed in the plentyShop.

Background info: The unit price tells you how much the item costs per pound, litre or other unit of measure. It’s calculated based on the item’s unit, content and price. The unit price allows consumers to compare prices. In some countries, the unit price must be specified for products that are sold by weight, volume, length or surface area.

2.5. Costs

Price calculation

This information feeds into the price calculation of your sales prices.

Setting Explanation

VAT

Select the variation’s VAT rate from the drop-down list.

Net purchase price

Enter the net purchase price.

Note: The purchase price is either calculated automatically or managed manually depending on how the settings were saved in the menu Setup » Stock » Stock » Incoming items.

Item bundles: the net purchase price can automatically be calculated based on the bundle components.

Net moving average purchase price

Enter the net moving average purchase price.

Note: It is recalculated every time stock is booked in. It is calculated from the purchase prices of all stocks that are available for the variation in the warehouse. Go to Setup » Stock » Stock » Incoming items and see which warehouses were activated with the setting Warehouse for moving average price. The moving average purchase price only takes items into account that were booked into one of these warehouses. If no warehouse is active, then no moving average purchase price is calculated.

Item bundles: the moving average purchase price can automatically be calculated based on the bundle components.

Transportation costs

Enter the net transportation costs for the variation.

Note: This value is used for price calculations and for calculating the acquisition price.

Storage costs

Enter the net storage costs for the variation.

Customs in %

Enter the customs value as a percentage.

Customs tariff number

Note: In PlentyONE, it’s possible to save a different customs tariff number for each variation.

Example: In some countries, children’s clothing is taxed differently depending on the size. In this case, it makes sense to save the customs tariff number separately for each variation.

Inheritance: The customs tariff number is automatically passed down from the main variation to the sub-variations. This means:

  • you don’t need to enter customs tariff numbers for your sub-variations if you want them to have the same customs tariff number as the main variation.

  • you’ll need to enter a different customs tariff number for all of the sub-variations that should differ from the main variation.

Operating costs in %

Enter the operating costs as a percentage.

2.6. Shipping

Setting Explanation

Main warehouse

Select the variation’s main warehouse from the drop-down list.

Order picking

Select the type of picking from the drop-down list. Or select the empty option if you do not want to specify the order picking type.

  • Single order picking possible = Currently not in use.

  • Single order picking not possible = Currently not in use.

  • Exclude from pick list = This option is well-suited, e.g. for variations that do not have barcodes and thus can not be processed with normal pick lists.
    Relationship to other settings: Do you use the plugin Filter for shippable items? Then take a look at the plugin’s filter descriptions. Some filters only apply to variations that are excluded/not excluded from the pick list.

Pallet type

Select the pallet type from the drop-down list.

Packing quantity

Select the number of packing units from the drop-down list if the item consists of multiple packages.

Note: The value 0 means that an item should always be shipped in a single package, regardless of the quantity. This setting also applies to various items. This means that all items of an order that have the value 0 will be packed into one package.

Packing unit

Select the type of packaging from the drop-down list if the item consists of multiple packages.

Extra shipping charge 1;
Extra shipping charge 2

Enter a fee that should be charged in addition to the normal shipping costs. Such extra shipping charges are useful for large or bulky items that are particularly expensive to ship.

  • Extra shipping charge 1 applies to the first item.

  • Extra shipping charge 2 applies to each additional item.

Additional settings: In each of your shipping profiles, specify whether these extra charges should be added to the basic shipping costs.

Note: The manual also includes several example calculations for extra shipping charges.

2.7. Tags

Setting Explanation

Tags

Here you can link the variation to any number of tags.

  1. Click in the text field.

  2. Select the tag from the drop-down list or enter the first few letters of the tag’s name and then use the auto-complete function.

  3. The tags are displayed as so-called “chips”.

Note: The drop-down list only includes those tags that are available for variations.

2.8. Availability and visibility

The settings in this element control when the variation should be visible and purchasable.

Setting Explanation

Active

Activate the variation () when you’re ready for it to go live.

Background info: Variations only become visible in the plentyShop or on marketplaces once they have been activated. In other words, you can work on inactive variations without your customers noticing.

Displayed delivery time

How long is the variation’s delivery time? Select () the appropriate availability level (1-10).

Note: The availability levels are configured in the menu Setup » Item » Availability. There you can find the availability IDs, texts, symbols and average delivery times in days.

Note: The availability is a static setting. In other words, the selected availability level does not change, regardless of the actual stock levels. The setting is only relevant if stock availability is not set automatically.

Client automatic availability

Should customers be able to buy the product in the online shop if it is in stock?

Note: Both functions complement each other and are only applied if the Limitation option is set to To net stock.

Deliverable if net stock is positive

Select this option () if the variation should automatically be available and purchasable in the plentyShop when it is in stock.

Not deliverable if net stock is negative

Select this option () if the variation should automatically be unavailable when it is out of stock.

Client automatic visibility

Should customers be able to see the product in the online shop if it is in stock?

Note: Both functions complement each other and are only applied if the Limitation option is set to To net stock.

Visible if net stock is positive

Select this option () if the variation should automatically be visible in the plentyShop when it is in stock.

Not visible if net stock is negative

Select this option () if the variation should automatically be invisible when it is out of stock. When this happens, customers will not be able to access the variation with a direct URL either.

Relationship to other settings: These options take priority over the item list options further below. We recommend that you either control the visibility with the “client” option or the “item list” option. They should not be combined.

List automatic visibility

Should customers only be able to access the product via the direct URL? Or should customers be able to see the product in your shop’s categories, search results and item lists if it is in stock?

Always invisible in item list

Select this option () if the variation should only be accessible via the direct URL. If the option is activated, then the variation will always be invisible in your plentyShop item lists. This means, the variation will not appear in the categories, search results, store specials, cross-selling lists and lists of last seen items.

Visible in item list if net stock is positive

Select this option () if the variation should be visible in plentyShop item lists when it is in stock. This means, the variation will appear in the categories, search results, store specials, cross-selling lists and lists of last seen items.

Note: The functions Visible automatically if net stock is positive and Invisible automatically if net stock is 0 or negative complement each other and are only applied if the Limitation option is set to To net stock.

Not visible in item list if net stock is negative

Select this option () if the variation should be invisible in plentyShop item lists when it is out of stock. When this happens, the variation can only be accessed using the direct URL. The variation will not appear in the categories, search results, store specials, cross-selling lists and lists of last seen items.

Note: The functions Visible automatically if net stock is positive and Invisible automatically if net stock is 0 or negative complement each other and are only applied if the Limitation option is set to To net stock.

Relationship to other settings: Both of the client visibility options take priority over the "item list" options. We recommend that you either control the visibility with the “client” option or the “item list” option. They should not be combined.

Stock limitation

Should PlentyONE monitor this product’s stock levels?

None

The stock is not limited. The variation’s availability is not automatically monitored.

To net stock

The stock is limited to the net stock. The variation’s availability is automatically monitored.

Do not administer stock for this variation

If this setting is selected, then the variation’s Stock tab will not include the sub-tabs Correction, Stock, Supply and Item movement.

Maximum order quantity

Enter a number. This is the maximum quantity that is permitted per order.

Note: Decimal values are possible, e.g. allowing customers to order products by weight or length.

Note: You can use the maximum order quantity in combination with pre-orders, for example to prevent competitors from completely buying out the variation at a reduced price.

Minimum order quantity

Enter a number. This is the minimum quantity that is permitted per order.

Note: Decimal values are possible, e.g. allowing customers to order products by weight or length.

Interval order quantity

Enter a number. This specifies which quantity intervals the variation can be ordered in.

Note: Decimal values are possible, e.g. allowing customers to order products by weight or length.

Release date

When should the variation become available? Select the date from the calendar.

If you would rather directly enter the date into the field, then use the following format: DD.MM.YYYY

Note: The variation can be visible in the plentyShop before this date, e.g. for Advance orders.

Available until

When is the last day that the variation should be available? Select the date from the calendar.

If you would rather directly enter the date into the field, then use the following format: DD.MM.YYYY

Availability in supply

2.9. ASIN/ePID/MOIN

Here you see the variation’s ASIN, ePID or MOIN. If needed, you can manually link another ASIN, ePID or MOIN with the variation.

  1. Go to Item » Items » [Open variation] » Element: ASIN/ePID/MOIN.

  2. Click on Add ASIN/ePID/MOIN ().
    → A pop-up window will open.

  3. Select ASIN, ePID or MOIN from the Type drop-down list.

  4. Select the country platform from the Country drop-down list.

  5. Click on Apply.
    → The data will be displayed as a table.

  6. Enter the ASIN, ePID or MOIN into the Value column.

  7. Save () the settings.

Setting Explanation

ASIN

The "Amazon Standard Identification Number" is a 10-digit, alphanumeric product identification that is provided by Amazon. The ASIN and ISBN are identical for books. The ASIN can be found on Amazon’s product page.

ePID

The "eBay Product ID" is a product identification that is provided by eBay.

MOIN

The "My OTTO Identification Number" is an alphanumeric product identification that is provided by OTTO Market. Since August 11th, 2021, every product on OTTO Market must have a MOIN.

Note: The MOIN is assigned by OTTO Market. You do not create it yourself. If you sell a product on OTTO Market and it’s also available through other sellers, then all of the offers will have the same MOIN.

2.10. SKU

Here you can see the variation’s marketplace-specific SKUs. If needed, you can manually add another SKU to the variation.

  1. Go to Item » Items » [Open variation] » Element: SKU.

  2. Click on .
    → A pop-up window will open.

  3. Select the Referrer from the drop-down list.

  4. Select the Account from the drop-down list.
    Note: Not every marketplace has an account. In this case, you will only see the option Do not use account assignment.

  5. Click on Apply.
    → The data will be displayed as a table.

  6. Enter the SKU and parent SKU.

  7. Save () the settings.

What’s the difference between the SKU and parent SKU?

The parent SKU is only necessary if you work with variation items.

  • The parent SKU is for the main variation.

  • The SKU is for the sub-variations.

You only need the SKU for items without variations.

2.11. Barcodes

Barcodes such as GTIN, ISBN, UPC and QR are used to identify products in PlentyONE. Here you can see the barcodes that have already been linked to the variation. If needed, you can add another barcode to the variation.

Manually entering a code
This assumes that you’ve already configured the necessary barcode types in PlentyONE.
  1. Go to Item » Items » [Open variation] » Element: Barcodes.

  2. Click on .
    → A pop-up window will open.

  3. Select a previously configured barcode type from the Name drop-down list.

  4. Click on Apply.
    → The data will be displayed as a table.

  5. Enter the code into the Code field.

  6. Save () the settings.

Automatically assigning a code

If you bought a range of GTIN 13 barcodes, then PlentyONE can automatically assign the next available barcode to your variation.

This assumes that you’ve already configured the necessary barcode types in PlentyONE and that you’ve bought a range of GTIN 13 barcodes.
  1. Go to Item » Items » [Open variation] » Element: Barcodes.

  2. Click on .
    → A pop-up window will open.

  3. Select a previously saved barcode configuration from the Name drop-down list.

  4. Click on Apply.
    → The data will be displayed as a table.

  5. Within the element, click on and then on Generate barcode.

  6. Save () the settings.

2.12. Categories

Each variation must belong to at least one category. Here you’ll see the categories that the variation already belongs to. If needed, you can manually link additional categories to the variation or you can modify existing links.

Linking additional categories
This assumes that you’ve already created the necessary categories in PlentyONE.
  1. Go to Item » Items » [Open variation] » Element: Categories.

  2. Within the element, click on and then on Pick categories.
    → A pop-up window will open.

  3. Select the categories that you want to link ().

  4. Click on Apply.
    → The data will be displayed as a table.

  5. Save () the settings.

Choosing the default category

Products can belong to multiple categories. The default category indicates which of the linked categories is the most appropriate. When you look at a product in the plentyShop, the breadcrumbs path is the default category path.

Note: Since this setting relates to the plentyShop and some sellers use PlentyONE to manage more than one client, you can specify the default category for each client.

This assumes that you’ve already created the necessary categories in PlentyONE.
  1. Go to Item » Items » [Open variation] » Element: Categories.

  2. Within the element, click on and then on link Link default category.
    → A pop-up window will open.

  3. Use the drop-down list to select a default category for each client.

  4. Click on Save.
    → The data will be displayed as a table.

  5. Save () the settings.

Setting Explanation

ID

The linked category’s ID. Learn how to link a category in the instructions above.

Category

The linked category’s name. If it is a sub-category, then you can see the complete breadcrumb path. Learn how to link a category in the instructions above.

Default category for clients

  • What is a default category?: Products can belong to multiple categories. The default category indicates which of the linked categories is the most appropriate. When you look at a product in the plentyShop, the breadcrumbs path is the default category path.

  • What does that have to do with clients?: Since this setting relates to the plentyShop and some sellers use PlentyONE to manage more than one client, the default category is specified for each client.

  • What does this column do?: This column indicates which of the linked categories is the client’s default category. Learn how to specify a default category in the instructions above.

delete

Deletes the link between the category and the variation. Only the link will be deleted. This button neither deletes the category nor the variation.

Note: This button is greyed out if the variation is only linked to one category. This is because each variation must belong to at least one category.

2.13. Sales channels

Which marketplaces do you want to sell the variation on? Here you can see which sales channels were already activated for the variation. If needed, you can manually add further sales channels.

  1. Go to Item » Items » [Open variation] » Element: Sales channels.

  2. Click on Add sales channels ().
    → A pop-up window will open.

  3. Select the marketplaces that you want to link ().

  4. Click on Apply.
    → The data will be displayed as a table.

  5. Save () the settings.

The sales channels do not affect the online shop.

The markets control the visibility on the marketplaces themselves. They do not affect the visibility in the plentyShop. There are a few different settings that control the visibility of an item in the plentyShop. You can learn more about these settings in our checklist for item visibility in the plentyShop.

2.14. Client (store)

PlentyONE is a multitenant application. In other words, you can manage several different areas of business with just one system.

Example: Imagine you sell medications. To better reach your target groups, you’ve split your product line among two webshops. One shop specialises in natural products and alternative medicine. The other shop sells traditional medicine. Your webshops have different names and designs, and your end customers don’t know that they are actually the same company. Nonetheless, you can use just one system to fulfil all of your orders and manage both business divisions.

Linking a client to the variation:

  1. Go to Item » Items » [Open variation] » Element: Client (store).

  2. Choose whichever store () the variation should appear in.

  3. Save () the settings.

Setting has a blue info-box? Check the stock level!

PlentyONE can automatically remove items from the plentyShop if they are no longer in stock. This automatic function is controlled by the settings in the menu Item » Items » [Open variation » Element: Availability and visibility]. More specifically, it’s controlled by the settings Client automatic availability: Not deliverable if net stock is negative and Client automatic visibility: Not visible if net stock is negative.

If one of these options is activated and the variation is no longer in stock, then a blue info-box will appear here. Reorder the variation to get it back in stock. Alternatively, click on Temporarily make available if you want to manually make the variation visible in the plentyShop despite the fact that it’s not in stock.

This setting remains valid until new stock is booked for the variation. Once net stock for the variation becomes positive, the availability and visibility settings if net stock is 0 or negative take effect again.

2.15. Suppliers

Who supplies you with your products? Here you can assign each of your products to one or more suppliers. This is useful so that you can:

Have you already saved contact information for your suppliers?

Before you can specify who delivers which product, you first have to create the necessary contact data records for your suppliers. This page teaches you how it’s done.

Adding a supplier:

  1. Go to Item » Items » [Open variation] » Element: Suppliers.

  2. Click on Add supplier ().
    → A pop-up window will open.

  3. Select the suppliers that you want to link.

  4. Click on Apply.
    → The data will be displayed as a table.

  5. Save () the settings.

Setting Explanation

ID

The ID of the link between variation and supplier. This ID is automatically generated by PlentyONE.

Supplier name

The supplier’s first and last name, as it was saved in the contact data record.

Purchase price from account

Is your supplier located in a different country and uses a different currency? Enter the variation’s purchase price in your supplier’s currency.

Note: Which currency is displayed here depends on which currency was saved in the contact data record. This currency will be used for reorders if it’s available.

Purchase price system currency

Enter the variation’s purchase price in your own currency.

Note: Depending on how the settings were configured in the menu Setup » Stock » Stock » Incoming items, this price may be overwritten when goods are received.

Minimum purchase

The minimum quantity that you have to order from the supplier.

Note: This value also serves as the minimum suggested reorder quantity.

Supplier item No.

Enter the number under which your supplier manages the variation.

Note: You can use this number to search for incoming items in the menu Stock » New incoming items.

Supplier item name

Enter the name under which your supplier manages the variation.

Last price query

Select the date from the calendar when you last queried the price from your supplier. This date helps you plan price negotiations.

Delivery time in days

Enter the number of days that your supplier usually needs to deliver reordered variations.

Note: The delivery time can affect the suggested reorder quantity and the delivery date for the reorder.

Discount

Enter the discount as a percentage if the supplier gives you a discount on the variation. When reordering items, the discount will only be taken into consideration if you selected the option Discountable ().

Discountable

Select this option () to activate the discount that was entered into the Discount column. The discount entered will not be used in reorders if this check mark is not saved.

Packaging unit

Do you and your supplier use different packaging units? Enter the supplier’s packaging unit if it differs from the number of “units contained” in the item settings.

2.16. Warehouse

Where is the variation stored? Assign your variations to the appropriate storage locations. This is useful so that you can:

Have you already saved warehouse information?

Before you can link variations to storage locations, you’ll need to tell PlentyONE a little bit about your warehouse. How many zones, racks, shelves and storage locations are there in your warehouse? Set up your warehouse before you continue.

Adding a warehouse:

  1. Go to Item » Items » [Open variation] » Element: Warehouse.

  2. Click on Add warehouse ().
    → A pop-up window will open.

  3. Select the warehouse that you want to link.

  4. Click on Apply.
    → The data will be displayed as a table.

  5. Save () the settings.

Setting Explanation

Warehouse

Here you see the warehouse that was selected. This is purely informative and cannot be changed.

Storage location type

Select the storage location type according to the size of the variation.

Zone

Select a zone if you have set up zones for this warehouse.

Reorder level

Enter the quantity at which the variation should be reordered. If the variation’s stock level sinks down to this reorder level, then PlentyONE will automatically suggest that you reorder it. This means that the variation is only reordered once it has reached the reorder level.

Note: If the difference between the current stock level and the reorder level is calculated dynamically, then you can only save the value 0 here.

Maximum stock

Enter the maximum stock level for the warehouse. PlentyONE takes the maximum stock level into consideration when suggesting how many copies of an item should be reordered. The suggested reorder quantity will not exceed the maximum stock level entered here.

Stock turnover (in days)

Enter the number of days that the stock should suffice until the next reorder. This value is relevant for calculating the reorder quantity.

Note: If no value is entered here, then the stock turnover (in days) is not taken into consideration when calculating a reorder date.

Practical example: A standard value that could be used for the stock turnover is 14 days. Once the item has reached the reorder level, the 14 days will be used to calculate how many copies of the item need to be reordered. In other words, the suggested reorder quantity would be sufficient for the following 14 days.

Stock buffer

Enter a stock buffer. This causes the stock to be reduced by this value for certain markets.

Note: The values entered here are only used for the markets Amazon and Shopgate. The buffer entered here takes priority over the buffer values entered for the particular market. For markets which are not listed here, the stock buffer settings of the specific market take priority over this setting.

Example: There are 50 copies of an item in stock. You want to keep 10 copies of the item as a buffer, so that the item cannot be sold out completely on the market. This is done by entering 10 as the stock buffer. As a result, 40 copies of the item are transmitted to the marketplace.

Batch

Select this option if the batch number should be saved for this variation and warehouse.

Note: Once stock has been booked into the warehouse, you will no longer be able to deactivate this option. If the stock level for the warehouse is 0, then it will be possible to activate or deactivate the option.

BBD

Select this option if the best before date should be saved for this variation and warehouse.

Note: Once stock has been booked into the warehouse, you will no longer be able to deactivate this option. If the stock level for the warehouse is 0, then it will be possible to activate or deactivate the option.

Suggested storage location

Select a storage location that should automatically be suggested when the variation is reordered.

Note: The standard storage location serves as a placeholder. It means that you haven’t chosen a specific storage location yet.

2.17. Stock

Here you see an overview of the stock. In other words, you’ll see how many copies of each variation are in stock. Click on the three dots () to correct the stock level or redistribute the stock.

Setting Explanation

Variation name;
Variation number;
Barcode;
Attributes

The overview indicates how many copies of each variation are in stock. The variation ID, name, number, barcode and attributes tell you which variation the stock information applies to.

Warehouse;
Availability;
Bundle

Here you see general information about the variation. You can see which warehouse the item is stored in, which availability level it has and whether it is an item bundle.

Purchase price

The variation’s purchase price.

Note: In the menu Setup » Stock » Stock » Search, you can decide whether the average purchase price should be displayed here or the purchase price that is currently saved in the variation data record.

Value of goods

The value is calculated by multiplying the purchase price with the physical stock.

Example:

  • Purchase price = 20 EUR

  • Physical stock = 100 copies

  • Value of items = 20 x 100 = 2,000 EUR

Physical stock

Indicates how many copies of the item are physically in the warehouse.

Reserved stock

Indicates how many copies of the item are currently reserved.

  • Stock is reserved when there is a pending order or a warranty.

  • The stock stays reserved until the outgoing items are booked or until the order / warranty is cancelled.

  • The reserved stock is part of the physical stock because the reserved stock is still present in the warehouse.

Reserved stock for listings

Indicates how many copies of the item are currently in an auction on eBay and thus reserved.

Background info: In legal terms, listings are binding offers to potential customers. Therefore, it makes sense to be careful and to reserve those items offered in listings, even before they have a concrete order. Otherwise you might sell more variations than you have in stock.

You can decide whether or not you want items from active listings to be registered as reserved stock in PlentyONE.

  1. When you create a market listing, select limited (with reservation) for the stock dependence. This will reserve the listed quantity.

  2. As soon as a listing was successfully completed, the setting is no longer active. However, the sold item is now reserved within the order.

Reserved stock for bundles

Indicates how many item bundles are currently included in pending orders and thus reserved. The quantity of a variation that is reserved by an item bundle is also included in the quantity displayed in the Reserved stock column.

Reorder level

You can think of this value as a target value. In other words, how many copies of the item should ideally be in the warehouse.

Reorder level Δ

The difference to the reorder level. This value indicates how many copies need to be sold or reordered before you will get back to the reorder level.

Example 1:

  • Reorder level = 30 copies

  • Physical stock = 10 copies

  • Reorder level Δ = 20 copies

In this example, we want to have 30 copies of the item. Currently, there are only 10 copies in the warehouse. Therefore, we need to reorder 20 copies to get back to the target value.


Example 2:

  • Reorder level = 10 copies

  • Physical stock = 40 copies

  • Reorder level Δ = -30 copies

In this example, we want to have 10 copies of the item. Currently, there are only 40 copies in the warehouse. Therefore, we still need to sell 30 copies to get back to the target value.

Net stock

Indicates how many copies of the item are currently available for sale. The net stock is a subset of the physical stock. Substract all reserved quantities from the physical stock and you will get the net stock.

Supply

Here you see how many copies of the item are on their way to the warehouse. This replenishment value indicates how many units are currently being delivered to your warehouse.

receipt Stock receipt

A pop-up window opens. Here you can receive goods.

history Stock correction

A pop-up window opens. Here you can enter the new physical stock level and choose a reason for the correction.

swap_horiz Redistribution

A pop-up window opens. Here you can move the stock from one storage location to another.

2.18. Images

Here you see a preview of all the images for this item. If necessary, you can upload additional images, save information about the images or delete specific images.

Example workflow

Imagine you sell a t-shirt in the colours red, green and blue. You want customers e.g. to automatically see an image of the green t-shirt when they select the colour green in your plentyShop. To do so:

  1. Upload all of the product images (i.e. images of the red, green and blue t-shirt variations).

  2. Save details about the individual images.

  3. Assign the images to the appropriate variations. For example, assign the green t-shirt image to the green t-shirt variation.


Uploading images

Option 1: Images element
  1. Go to Item » Items » [Open item] » Element: Images.

  2. Drag and drop the images into the appropriate area or select the images from where they are located on your computer.

Option 2: Left navigation
  1. Go to Item » Items » [Open item] » Left navigation: Images » Details.

  2. Drag and drop the images into the appropriate area or select the images from where they are located on your computer.

Technical specifications

File formats

The file formats supported for images are: PNG, JPG, GIF, SVG

File names

Image file names may contain the following characters:

  • Letters (a-z, A-Z) excluding umlauts

  • Numbers (0-9)

  • Underscores (_)

  • Hyphens (-)

Spaces and special characters such as umlauts are not permitted. When you upload images, spaces and special characters are replaced by hyphens (-).

Image sizes

Every time an item image is uploaded, PlentyONE creates the following versions:

  • High-resolution item image

  • Medium-sized item image

  • Item attribute image

  • Two preview images

Since PlentyONE does not scale up images, the source image must have at least the size and quality specified in the Sizes area. Larger images will be scaled down to the specified size.

Original images

Original images are no longer accessible after they have been uploaded. When you upload an image, PlentyONE uses it to generate the image sizes that are accessible via URL. The original image will no longer be accessible - also not via URL.


Saving details

Option 1: Images element
  1. Go to Item » Items » [Open item] » Element: Images.

  2. Within the element, click on and then on Details.
    → A window opens with item details.

  3. Customise the settings as needed.

  4. Save () the settings.

Option 2: Left navigation
  1. Go to Item » Items » [Open item] » Left navigation: Images » Details.

  2. Customise the settings as needed.

  3. Save () the settings.

Setting Explanation

URL

Here you see the image’s URL. The URL can be copied.

  1. Move your cursor over the URL.
    → The cursor’s shape changes ().

  2. Click on the URL to copy it to the clipboard.

Position

Enter a position number. This specifies which image should be displayed in the plentyShop first, second, third etc.

Name - EN

Enter a name for the image. The name is relevant for SEO, i.e. it helps search engines better index the item. Use appropriate keywords in the image names to make the images more relevant to search engines. This also increases traffic on the page, for example if the image is found with the Google image search.

Note: The image name is limited to 256 characters.

Alternative text - EN

Enter an alternative text for the image. If the image can’t be displayed (e.g. because of browser settings, firewall, etc), then the customer will see the alternative text instead. The alternative text is not relevant for SEO. It is simply displayed as an alternative to the image.

Note: The alternative text is limited to 256 characters.

Availability

Which sales channels should this image appear on? Select () the appropriate clients and/or markets.

Market attribute link

Select an attribute value to link the item image for marketplaces with this attribute value. The image will only be transferred to marketplaces where item variations have this attribute value.

Note: This option is only displayed if:

Size

Displays the image size in pixels and kilo bytes.


Translating image name and texts

Option 1: Images element
  1. Go to Item » Items » [Open item] » Element: Images.

  2. Within the element, click on and then on Translations.
    → A window for translations opens.

  3. Select languages from the drop-down lists on the left and right. Example: the source language on the left and the target language on the right.

  4. Enter the image name and alternative text in the selected languages.

  5. Save () the settings.

Option 2: Left navigation
  1. Go to Item » Items » [Open item] » Left navigation: Images » Translations.

  2. Select languages from the drop-down lists on the left and right. Example: the source language on the left and the target language on the right.

  3. Enter the image name and alternative text in the selected languages.

  4. Save () the settings.


Linking images with variations

Linking images to a single variation
  1. Go to Item » Items » [Open variation] » Element: Images.

  2. Select the images () that you want to link.

  3. Save () the settings.

Linking images to multiple variations
  1. Go to Item » Items » [Open item] » Variation overview.

  2. Choose which variations () should be linked to images.

  3. Click on .
    → A pop-up window will open.

  4. Select the images () that you want to link.

  5. Save () the settings.

This method only adds new image links. Previously existing links will not be changed.
You can move your cursor over an image in the pop-up window to enlarge it.
You can enter text or numbers into the search field in the pop-up window. Example: part of an image URL or an image ID. This narrows down the list of displayed images.

2.19. Sales prices

Here you can see the sales prices that have already been linked to the variation. If needed, you can add further sales prices and enter the monetary amounts. The monetary prices can be:

  • manually entered for the variation.

  • automatically calculated with the help of a price calculation.

Manual entry
This assumes that you have already created the necessary sales prices.
  1. Go to Item » Items » [Open variation] » Element: Sales prices.

  2. Click on .
    → A pop-up window will open.

  3. Select the sales prices () that should be linked to the variation.

  4. Click on Apply.
    → The data will be displayed as a table.

  5. Enter the monetary price.

  6. Save () the settings.

Price calculation
This assumes that you have already created the necessary sales prices and price calculations.
  1. Go to Item » Items » [Open variation] » Element: Sales prices.

  2. Select a previously created price calculation from the drop-down list.

  3. Save () the settings.

  4. Reload the data record if needed. To do so, click on and then on refresh Reload.
    → The sales prices and automatically calculated monetary amounts will be displayed as a table.

PlentyONE works with gross prices

Behind the scenes, PlentyONE works with gross prices. In the element’s settings, you can decide whether you want to see gross or net prices in the item data record. But this only affects how the prices are displayed. Only gross prices are saved internally in the database.

Setting Explanation

Price calculation

You can have your prices calculated automatically with the help of a price calculation.

  • Learn how to create a new price calculation here.

  • Learn how to link a category in the instructions above.

Sales price ID

The linked sales price’s ID. Learn how to manually link a sales price and enter the monetary amount in the instructions above.

Sales price

The linked sales price’s name. Learn how to manually link a sales price and enter the monetary amount in the instructions above.

Price (Gross)

The gross monetary amount.

Note: In the element, you can work with gross or net prices. But this only affects how the prices are displayed. Only gross prices are saved internally in the database.

Price (Net)

The net monetary amount.

Note: In the element, you can work with gross or net prices. But this only affects how the prices are displayed. Only gross prices are saved internally in the database.

Currencies

The currencies that apply to the sales price.

Note: The currencies are activated in the sales price’s settings.

Lowest price during the last 30 days

Here you see the variation’s lowest price within the last 30 days. The practical example below teaches you how to use this field.

Background info: A new regulation on specifying prices went into effect on May 28th, 2022. In these regulations, § 11 (1) specifies how prices must be displayed when products are discounted.

Practical example: Lowest price of the last 30 days

Background info

A new regulation on specifying prices went into effect on May 28th, 2022. In these regulations, § 11 (1) specifies how prices must be displayed when products are discounted.


How do I save the price in the back end?

The lowest price can manually be entered into PlentyONE, imported or automatically detected.

This value is displayed in the webshop starting from plentyShop LTS version 5.0.51. Instructions for displaying the value in your plentyShop are found further below.

Manual entry:

  1. Go to Item » Items » [Open variation] » Element: Sales prices.

  2. In a line, click on and then on sell Lowest price » Set manually.
    → The column becomes editable and the gross price is automatically entered into it.

  3. Enter a different value into the column if needed.

  4. Save () the settings.


Automatic detection:

  1. Go to Item » Items » [Open variation] » Element: Sales prices.

  2. In a line, click on and then on sell Lowest price » Enable automatic detection.
    → The lowest price of the last 30 days is automatically entered into the column. This value is detected with the help of the change history. If you have not yet activated the change history, then you will see a pop-up window, which informs you of the costs that will be incurred. You will have to confirm your decision to activate the change history.

  3. Save () the settings.

The lowest price will automatically be detected approximately 90 seconds after you have activated and saved the setting for the first time. Afterwards, it will automatically be detected every night.

Import:

  1. Go to Data » Import.

  2. Create a new import of the type Item.

  3. Use the mapping fields Sales prices / Lowest price of the last 30 days and Sales prices / Calculate lowest price automatically to control the settings via import.


How do I display the price in my plentyShop?

  1. Go to Plugins » Plugin set overview » [Open plugin set].

    • Make sure that the plugin plentyShop LTS uses version 5.0.51 or higher. Update the plugin if necessary.

  2. Go to Shop » ShopBuilder » [Open content] » [Open widget "Item / Item price"].

    • Make sure that the option Display strikethrough price is activated.

  3. Go to Item » Items » [Open variation] » Element: Sales prices.

    • Make sure that a value is entered into the column Lowest price during the last 30 days.

If these conditions are met, then the lowest price of the last 30 days will automatically be displayed in the plentyShop. It will appear underneath the price.

2.20. Bundle

An item bundle consists of multiple products. For example, a beard care kit consisting of scissors, a brush, beard oil and beard wax.

In this element:

  • you can see the bundle components. If needed, you can add further components.

  • you can activate the settings that automatically calculate the weight and purchase price for item bundles.

Adding components to the bundle
  1. Go to Item » Items » [Open variation] » Element: Bundle.

  2. Within the element, click on and then on Add bundle component.
    → A pop-up window will open.

  3. Choose which variations () should be added to the bundle.

  4. Click on Apply.
    → The data will be displayed as a table.

  5. Enter the quantity.

  6. Save () the settings.

Automatically calculating the weight and price

An item bundle is made up of various components. Each component has its own key figures, such as a weight and a purchase price. But how do these key figures come together for the entire bundle? You could enter a weight and purchase price for the entire bundle as a whole. But there’s also a way to have PlentyONE automatically calculate these figures for you.

  1. Go to Item » Items » [Open variation] » Element: Bundle.

  2. Within the element, click on and then on Configure bundle automatics.
    → A pop-up window will open.

  3. Select the automatic functions as needed ().

  4. Click on Apply.

Setting Explanation

Bundle gross weight: Automatically calculate from bundle components

The gross weight is automatically calculated based on the individual components. That means, the field Gross weight in grams will be greyed out within the element Content / Dimensions.

Bundle net weight: Automatically calculate from bundle components

The net weight is automatically calculated based on the individual components. That means, the field Net weight in grams will be greyed out within the element Content / Dimensions.

Bundle net purchase price: Automatically calculate from bundle components

The net purchase price is automatically calculated based on the individual components. That means, the field Net purchase price will be greyed out within the element Costs.

Bundle moving average purchase price (net): Automatically calculate from bundle components

The moving net purchase price is automatically calculated based on the individual components. That means, the field Net moving average purchase price will be greyed out within the element Costs.

Using automatic calculation by default

Do you only have a few items that should be excluded from the automatic calculation? No problem! You can activate the automatic calculation by default.

  1. Go to Setup » Item » Settings.

  2. Decide which key figures should be calculated by default. Use the following options:

    • Bundle automatic for gross weight

    • Bundle automatic for net weight

    • Bundle automatic for purchase prices

    • Bundle automatic for moving average purchase prices

2.21. Comments

Sometimes it can be helpful to save a note for a product. For example, a note indicating that a specific variation should never be sold for a discounted price.

Here you can see the notes that have already been saved for the variation. If needed, you can add further notes here.

  1. Go to Item » Items » [Open variation] » Element: Comments.

  2. Click on .
    → A pop-up window will open.

  3. Enter the note and format the text as needed.

  4. Click on Save.
    → The notes are sorted by how current they are. The newest note is at the top and the oldest note is at the bottom.

  5. Save () the settings.

Character counter

In the lower right corner, you can see how many characters have already been entered and how many characters are still available.

  • The character counter turns red if you exceed the maximum number of characters. Any characters that you enter beyond this limit will not be saved.

  • HTML characters will also be counted. That means, if you use the WYSIWYG mode and you only enter one character, the counter will automatically jump to a larger number. This is because the HTML characters, which surround the letters and are visible in the syntax mode, are also counted.

2.22. Custom portlet

The custom portlet differs from pre-configured portlets in two important ways. The custom portlet:

  • can be added any number of times.

  • includes all of the data fields and not just a subset, as is the case with pre-configured portlets.

Thanks to custom portlets, you are not limited to the pre-defined settings. Rather, you can decide which exact settings a portlet should include.

Example: Imagine you’re not satisfied with how the global settings are arranged by default. You would rather have separate groups for the manufacturer settings and the conditions. Such a scenario can be accomplished with custom portlets.

  1. Add any number of custom portlets.

  2. Give the portlets meaningful names.

  3. Add the appropriate item data fields to the portlets.

details custom portlets

3. Saving changes

3.1. Asterisk

When you make changes to an item or variation, an asterisk appears in the left navigation bar.

  • The asterisk indicates unsaved changes.

  • Where the asterisk appears tells you which level the changes were made on. For example, whether a change was made on the item level or variation level.

  • If you have several items open at once, then the asterisk also tells you which items were changed.

  • The asterisk disappears when you save your changes or when you reset the settings to their original values.

details asterisk

3.2. Pop-up window

By default, when you click on the save button, a pop-up window appears, where you have to confirm your changes. The pop-up window lists which exact settings were changed. If you changed multiple settings, then they will all be listed.

Tip: You can deactivate the pop-up window if you want the changes to be saved directly, i.e. without additional confirmation.

details pop up

4. FAQ

This page mentions an element or a data field that I don’t see in my own system. Why?

You can customise the product view to meet your needs. That means, you can decide which data fields are needed and how they should be arranged. This page serves purely as a reference and explains all of the elements and data fields that can be included in a product view. You own system may differ depending on how the layout was configured. Further information about the layout.

I want to customise the product view, i.e. decide which data fields it includes. How do I do that?

You can customise the product view to meet your needs. That means, you can decide which data fields are needed and how they should be arranged. Further information about the layout.

What access rights will my employees need to work with the item UI?

Access rights are defined separately for each role. For example, you can only grant the content department access to the item data.

Step 1: Which rights should the role have?
  1. An administrator opens the menu Setup » Account management » Roles.

  2. Then he opens the role, e.g. content employee, or he creates a new role.

  3. Rights: The administrator activates the necessary rights ().

    • Tip: Which exact rights need to be activated depends on what exactly the employee should do.

    • Tip: Before you grant employees rights across the board, test the configuration in a user account without admin rights.

  4. Role-defined views: The administrator expands the entries () and selects the views () that the user should have access to.

  5. The administrator saves the role ().

Step 2: Which employees belong to the role?
  1. An administrator opens the menu Setup » Account management » Accounts.

  2. Then he opens the user account.

  3. The administrator selects the appropriate role from the drop-down list Assigned roles and saves the settings ().


Rights for designing a view

Only admin users can create and edit views. If you are not an admin:

  1. Turn to someone with admin rights.

  2. Ask them to create the necessary views and assign them to your user account.

Can I save multiple items at once?

Not yet. A global save button is planned for the future. However, we cannot yet estimate when this function will be available.

What’s the difference between "Save", "Do not save" and "Cancel"?
  • Save = The changes will be saved and the item will close.

  • Do not save = The changes will be discarded and the item will close.

  • Cancel = Only the pop-up window will close. The item data record remains open.