Importing new categories
Categories help you group your products. For example, they determine how items are structured in your plentyShop.
Generally speaking, there are two different ways to create or update categories:
-
If you only want to create or modify a few categories, then we would recommend doing this manually.
-
If you want to create or modify a lot of categories, then it will probably be quicker to import your category data. That’s what this page is all about.
|
Requirements
This page assumes that you’ve already thought up a meaningful category structure and that you have a basic understanding of the import tool. |
1. Practical example: Initial situation
Imagine you sell clothing in your online store. You’re new to PlentyONE and you want to import all of your category data at once. You want to structure your categories like so:
|
|
|
2. Setting up the CSV file
Category structure
First, transfer this category structure into a CSV file. This is the file that you’ll import into PlentyONE later. In this example, the categories would look like this in the CSV file:
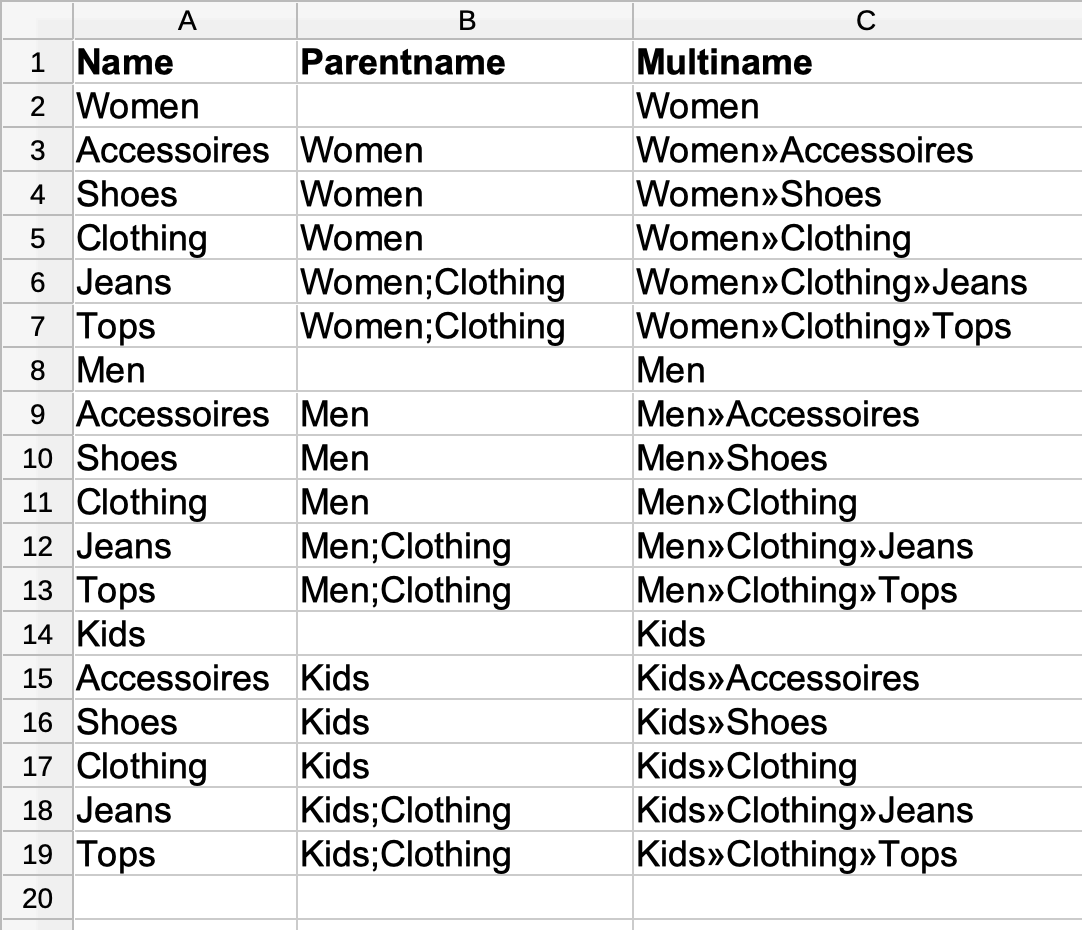
You are free to choose any names for the column headers. In this example, I’ve put the following category information in the columns:
-
Name = The name of the category.
-
Parentname = If you want this to be a main category, i.e. a top-level category, then leave this field blank. If you want this to be a sub-category, then enter the path of whichever category is directly above it. Use semicolons (
;) to separate the individual category levels. -
Multiname = The complete category path, i.e. the Parentname and the Name. Decide which separator you want to use to separate the individual category levels. In my example, I used the separator
». In a later step, you’ll select this separator in the matching settings. Therefore, only the following separators are permitted:;,->.»/
Further category info
You probably want to create much more than just a bare-bones category structure. Perhaps you want to add descriptive texts or SEO-relevant meta data. Add a few more columns to your CSV file and use them to specify the additional category information. For example, like this:
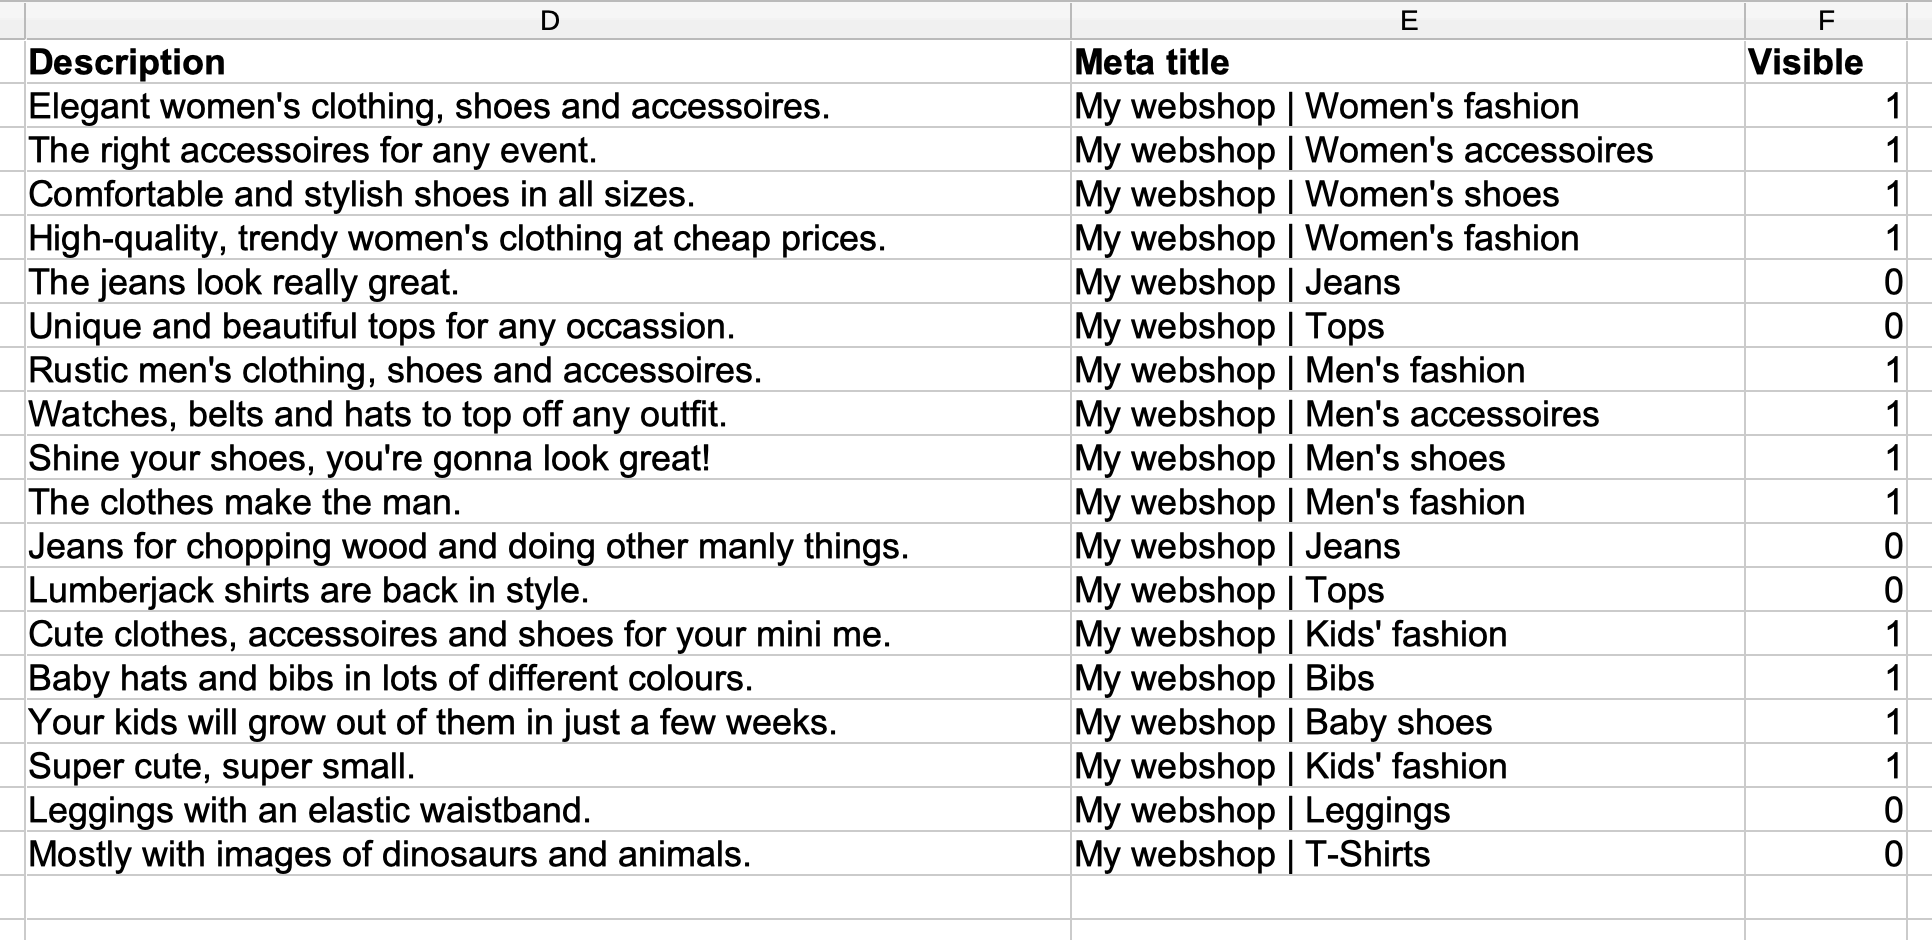
You are free to choose any names for the column headers. You can add any or all of the category information listed here. In this example, I’ve decided to add the following information:
-
Description = A description of each category.
-
Meta title = A text that should be displayed as the tab title in the web browser and in the search engine results.
-
Visible = Should the category be included in the sitemap?
1 = Yes, the category should be included in the sitemap.
0 = No, the category should not be included in the sitemap.In my example, I only want the first two category levels to be included in the sitemap. So I insert the numbers 1 and 0 accordingly.
3. Choosing the import settings
Create a new import. Most of the settings can be chosen freely. However, since you want to import category data, make sure you’ve set the Type to Categories.
4. Choosing the matching settings
Configure the settings as follows:
| Setting | Explanation |
|---|---|
Combined category name |
Which column of your CSV file contains the complete category path?
|
Import options |
Since you’ll be importing new categories, choose the option Only import new data or Import new, update existing data. |
5. Choosing the mapping settings
Your CSV file is filled with a bunch of category information. Now you’ll decide where in PlentyONE each piece of information should appear when you import the file. Take a look at this page while you map the columns of your CSV file to the fields in PlentyONE. In this example, I’ve configured the settings as follows.
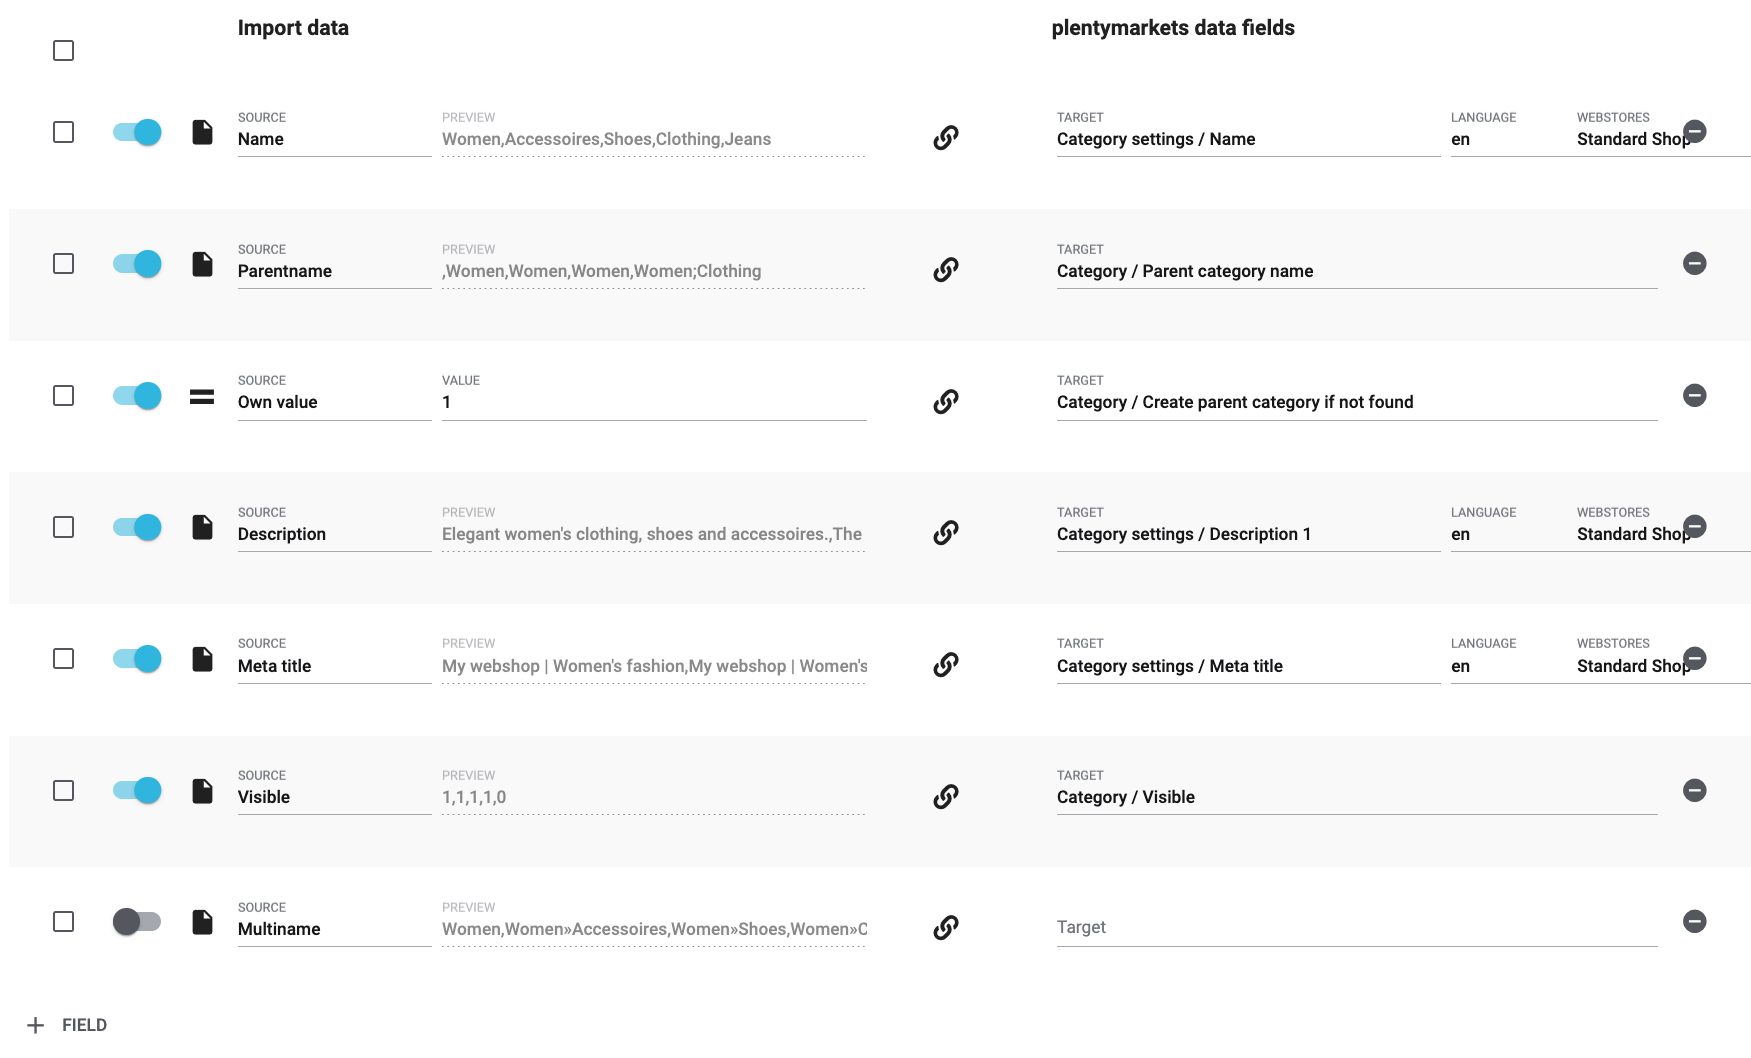
I created the bare-bones category structure by:
-
mapping the Name column of my CSV file with the Category settings / Name data field in PlentyONE.
-
mapping the Parentname column of my CSV file with the Category / Parent category name data field in PlentyONE.
-
using the Own value option and entering 1 for the data field Category / Create parent category if not found. In other words, by deciding to create the superior category if it doesn’t already exist.
I added extra category information by:
-
mapping the Description column of my CSV file with the Category settings / Description 1 data field in PlentyONE.
-
mapping the Meta title column of my CSV file with the Category settings / Meta title data field in PlentyONE.
-
mapping the Visible column of my CSV file with the Category / Visible data field in PlentyONE.
6. Did it work?
Ready to import your categories? Start the import and make sure the data was correctly imported into PlentyONE.
Starting the import and checking the result:
-
Activate the lines that should be imported ().
-
Test the import () or start the import ().
Note: This can take a few minutes. -
Go to Item » Category.
-
Check whether the categories were correctly structured.
Note: Click on a category’s folder icon () on the far left. This displays the subcategories within. -
Open a few categories and check their settings.
|
Do a trial run
We recommend testing the import () before you start it for the first time. This imports the first 10 rows of the file and bypasses the cache. It gives you time to check whether the import works correctly. If the import does not perform as expected, you can correct it before importing the entire file. |
|
Resetting the cache
Directly within the import, you’ll find the button Reset cache (). This button allows you to reset the import cache in order to reimport a file that does not contain any changes. |