Order items
1. Preparing the import file
Before we explain the process of importing and updating order items, we provide you with important information regarding the import of data into your PlentyONE system in this chapter.
Your PlentyONE system obtains the necessary data on the order items from an import file in CSV format. This import file has to contain the following columns, as you can see from this sample set up from the dynamic export:

Make sure that the CSV file required for the next step is saved locally on your computer.
2. Importing and updating order items
This chapter describes how to use the import tool to import and update order items. Order items are items included in an order.
Carrying out the basic settings:
-
Go to Data » Import.
-
Click on Add import ().
-
Enter a distinct name for the import in the area Basic data.
-
Select the option Orders from the drop-down list Type.
-
In the area Import, you can leave the settings as they are.
-
In the area Source, select the option HTTP.
→ Three further rows are displayed. -
In the drop-down list HTTP options, select the options Data upload.
-
In the row URL, click on the button with the three dots (Select file).
→ A new window opens. -
Click on Upload file, select the CSV file containing the data belonging to the order items that you wish to import, and click on Open.
-
Place a check mark in the row of the file and click once in the line of the file.
→ Important The row must be clicked a second time. Only when the row is displayed in blue can you upload it by clicking on Select.
→ The URL – i.e. the path from that you uploaded the CSV file – is now displayed in grey in the field URL. -
Save () the settings.
You have uploaded the CSV file successfully. In the following, carry out the matching settings.
Carrying out the matching settings:
-
Click on Matching on the left side.
-
In the Matching area, select the following data fields to update the order items:
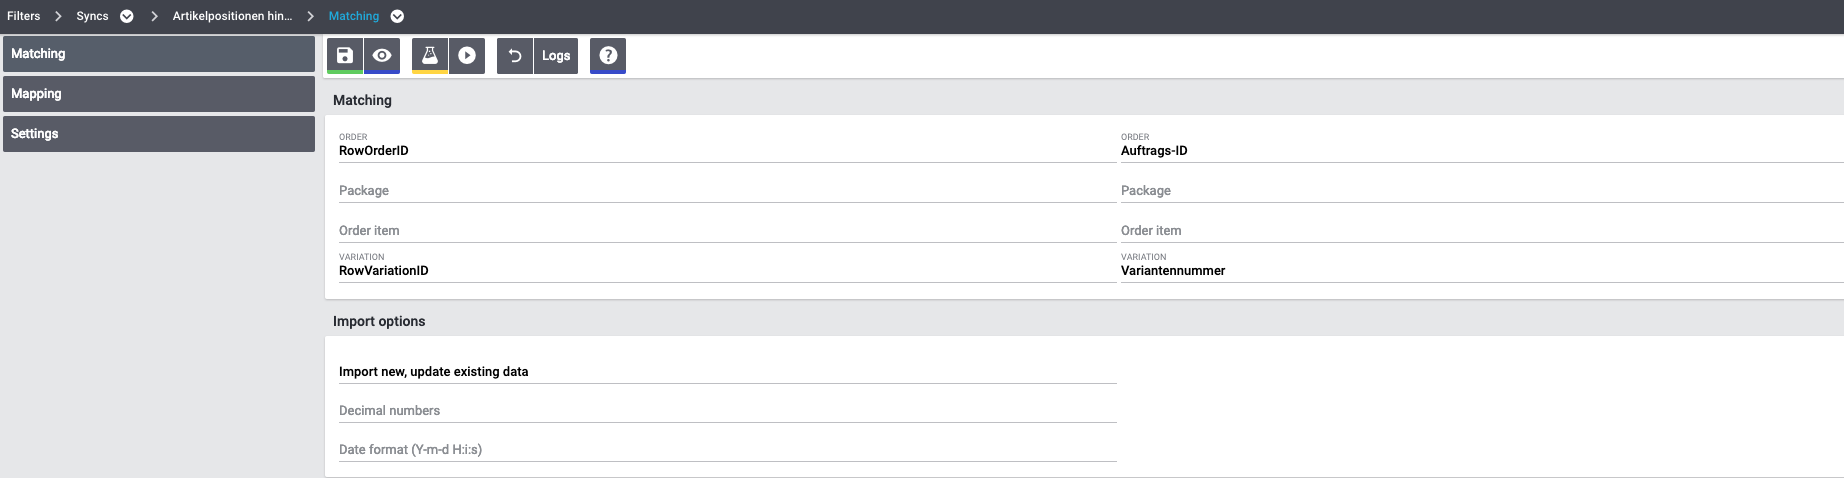
|
Functionality of the matching
The matching fields selected here and all the available fields of the import type Orders are generally linked by an AND-condition. This means that if the fields Order ID and Variation ID are selected, only data rows containing values for both these data columns are imported. |
Next, you carry out the mapping settings.
Carrying out the mapping settings:
-
Click on Mapping on the left side.
-
Click on Add mapping ().
-
Enter a name.
-
In the field Position, enter the number 1.
-
Save () the settings.
→ The area Import data / PlentyONE data fields opens.
In this area, you assign the fields from your CSV file to the data fields in PlentyONE. Assign the fields displayed to the left to the PlentyONE data fields as shown below:
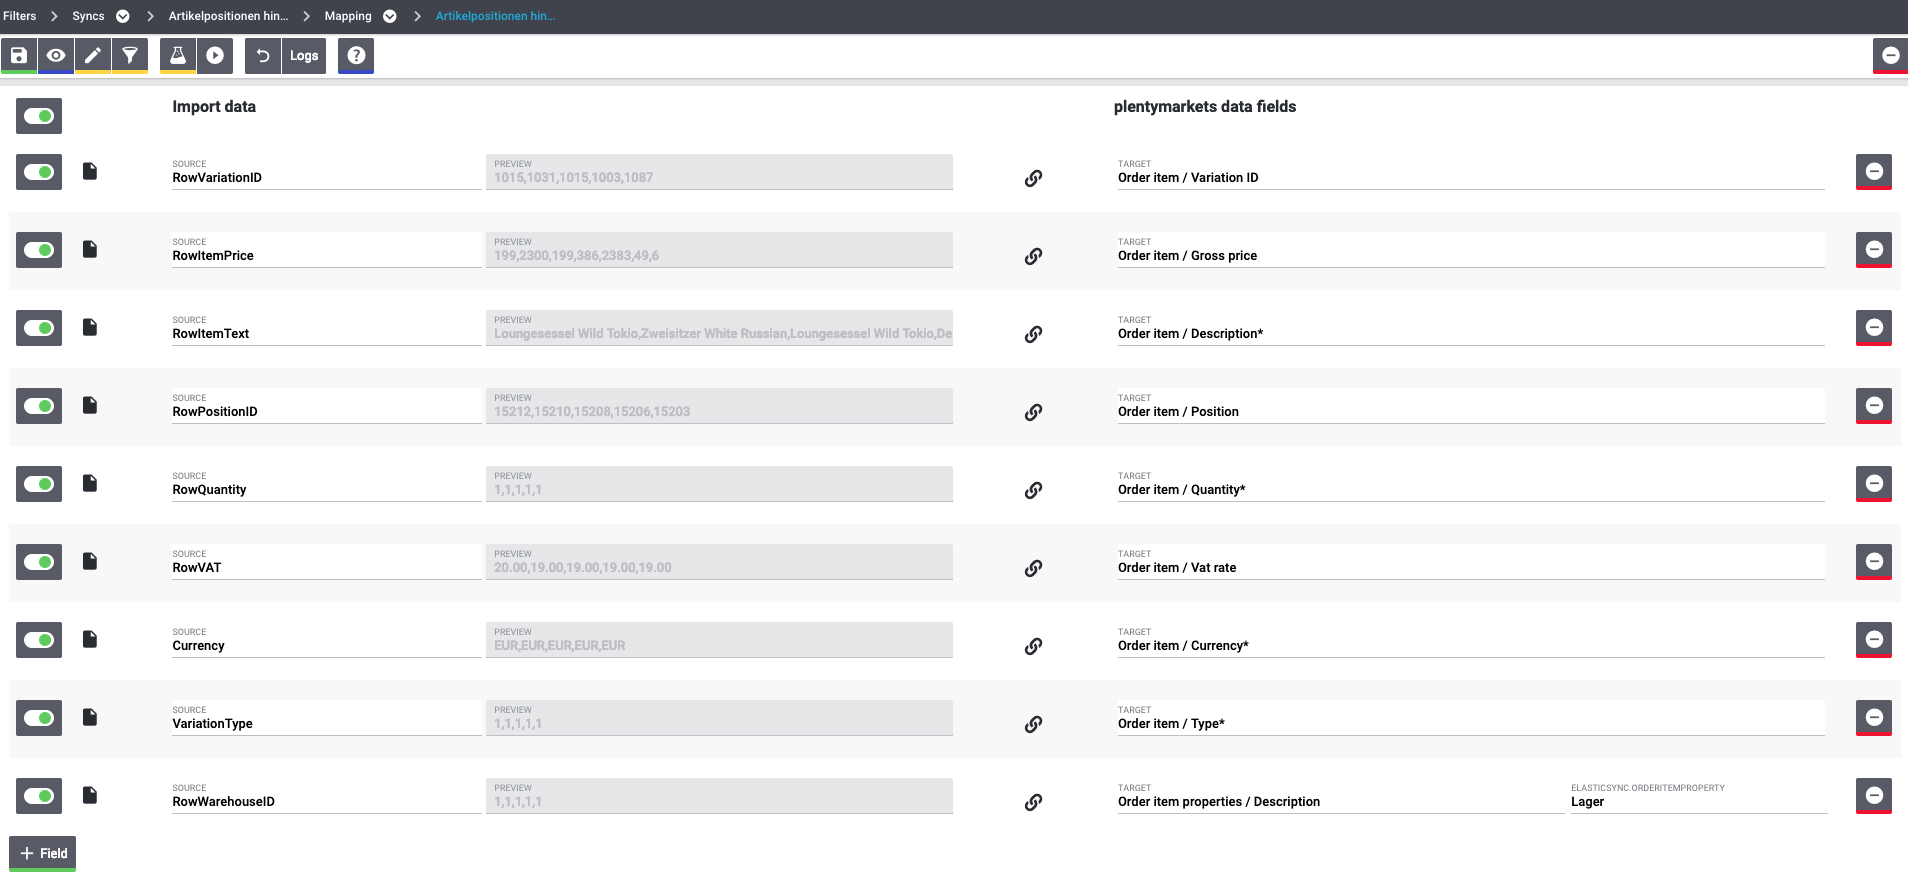
|
Mandatory fields for mapping
Please pay attention to the fact that the PlentyONE fields Order item / Description, Order item / Quantity, Order item / Currency and Order item / Type are mandatory fields. You can only import and update order items at the same time if you carry out the mapping settings as shown above. |
3. Testing and carrying out the import
After having carried out the settings described above, you should test the import using the button Test import.
The first 10 lines of your CSV file are used for the test, and no cache is used. After running the test, check the log for error messages by clicking on the Log button or open the tested orders manually. We recommend that you only start running the import after the test import has been completed without error messages.