Code examples
On this page, you will find code examples for the code widget, the subject and the expert mode that you can simply copy into your EmailBuilder templates.
Click on one of the following links to be forwarded directly to the corresponding sub-chapter:
1. Code examples for the code widget
Use if queries or for loops in your email templates to display specific information on a case-by-case basis. In the following sub-chapters, you find some if queries and for loops that you can simply copy to your code widget.
Click on one of the following links to be forwarded directly to the corresponding sub-chapter with the code example:
1.1. Code example: Shipping profile
In the code widget, insert a code that causes a note regarding the freight-forwarding company and contacting to only be displayed in the email to your customers if the shipping service provider in the shipping profile is a freight-forwarding company. In our example the shipping profile with the freight-forwarding company has the ID 6.
{% if order.formattedShipping.profileId == 6 %}

<strong>INFORMATION REGARDING YOUR DELIVERY</strong>

<p>Estimated delivery date: {{order.formattedDates.estimatedDeliveryDate ? ( order.formattedDates.estimatedDeliveryDate | date('d-m-Y') ) : ''}}</p>

<p>On the day of the delivery, {{order.formattedShipping.providerName}} will call you to arrange the time of delivery at your front door.</p>
<p>
Your phone number: {{order.formattedAddresses.invoiceAddress.formattedOptions.telephone}}
<br>If this number is no longer correct, please contact us.
</p>

<p>
To track or reschedule your delivery, follow this link:
<br>{{order.formattedShipping.trackingURL}}
</p>
{% endif %}
1.2. Code example: Bank details
In the code widget, insert a code that causes bank details to only be displayed in the email to your customers if Cash in advance (ID 0) was selected as payment method in your plentyShop.
{% if order.formattedProperties.paymentMethod == 0 %}

<strong>BANK DETAILS</strong>

<p>Please use the following bank details when paying with cash in advance:</p>
<p>
Bank: {{globals.bank.name}}
<br>BIC: {{globals.bank.bic}}
<br>Account number: {{globals.bank.iban}}
<br>Account holder: {{globals.bank.owner}}
</p>
<p>
Please enter the following information as the designated use:
<br>Order ID: {{order.id}}, Customer ID: {{contact.id}}
</p>
<p>
International account data
<br>IBAN: {{globals.bank.iban}}
<br>Swift: {{globals.bank.bic}}
</p>

{% endif %}
1.3. Code example: Order items
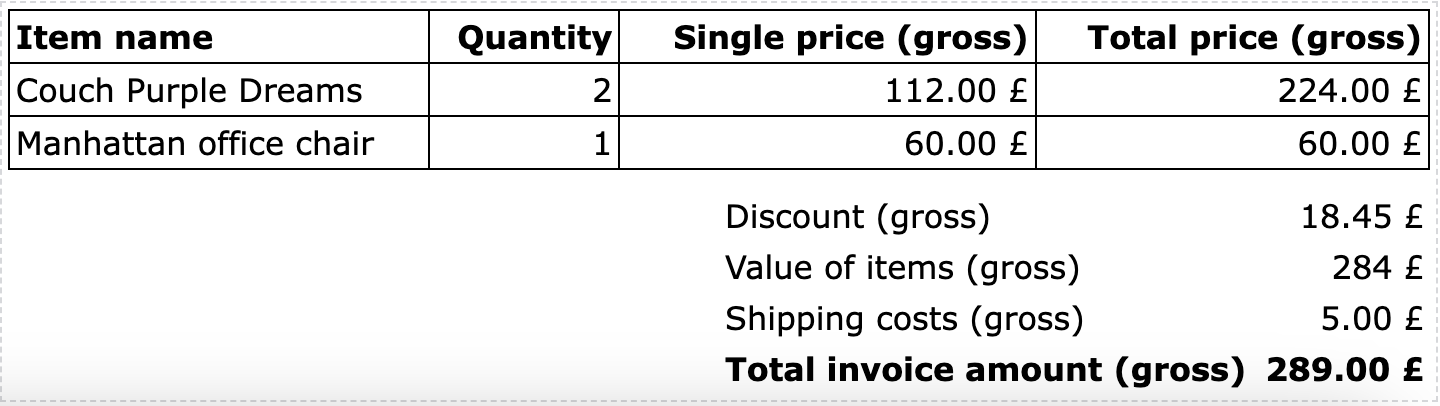
In the code widget, insert a code that causes the order items with the variation IDs, the item names, the item quantity and the price to be shown in a table.
<strong>Order items</strong>

<p>Items of order ID {{order.id}}:</p>
<table>
  <tr>
    <th>ID</th>
    <th>Item image</th>
    <th>Name</th>
    <th>Quantity</th>
    <th>Price</th>
  </tr>
  {% for orderItem in order.orderItems %}
  <tr>
    <td>{{orderItem.variation.id}}</td>
    <td><img src="{{orderItem.formattedImageUrl}}" alt="Item image" height="50px" width="auto"/></td>
    <td>{{orderItem.orderItemName}}</td>
    <td>{{orderItem.quantity}}</td>
    <td>{{orderItem.formattedAmounts.grossPrice}}</td>
  </tr>
  {% endfor %}
</table>
1.4. Code example: Items of the order shown as list
In the code widget, insert a code that causes the item IDs and quantities of all items that are contained in the order to be shown in a list.
{% for orderItem in order.orderItems %}
{{ orderItem.quantity }} x {{ orderItem.orderItemName }} <br>
ID: {{ orderItem.variation.itemId }} <br>
{{ order.formattedSubtotals.currencyCode }} {{ orderItem.formattedAmounts.grossPrice }}
--- <br>
{% endfor %}
1.5. Code example: Items of the order shown in one line and separated by comma
In the code widget, insert a code that causes the item IDs and quantities of all items that are contained in the order to be shown in one line and separated by comma.
{{ order.orderItems| map(p => "#{p.variation.itemId}")|join(', ') }}1.6. Code example: Show header depending on the client
In the code widget in the header, insert a code that causes the header to be shown depending on the plenty ID for the client you have selected.
Note: Do not forget to replace the plenty IDs in the code example with the correct IDs and to insert the correct logos.
{% if order.plentyId == 1234 %}
    <!-- Header content for client 1 -->
    <center><img src="/path/to/shop/logo1.svg" alt="MyShop Logo 1" /></center>
{% else if order.plentyId == 5678 %}
    <!-- Header content for client 2 -->
    <center><img src="/path/to/shop/logo1.svg" alt="MyShop Logo 2" /></center>
{% else if order.plentyId == 2233 %}
    <!-- Header content for client 3 -->
    <center><img src="/path/to/shop/logo1.svg" alt="MyShop Logo 3" /></center>
{% else if order.plentyId == 4455 %}
    <!-- Header content for client 4 -->
    <center><img src="/path/to/shop/logo1.svg" alt="MyShop Logo 4" /></center>
{% endif %}|
Same approach in case of footers
Proceed in the same way using the code example and insert the code into the code widget in the footer if you also want to display different footers depending on the plenty ID. |
1.7. Code example: Date format
The setting for the date format that you have carried out in the Language settings section does not apply for date-related twig expressions that you use in the code widget. Here, you have to carry out the formatting yourself.
Example: If you have selected a hyphen for the English date notation in the language settings, but insert one of the following twig expressions for the order date in the code widget, the notation used for the date in the code widget will be returned in the email template. The setting from the Language settings section will be overwritten here.
1.7.1. dd.mm.yyyy without time
{{ order.formattedDates.createdOnDateAndTime | date('d.m.Y') }}-
Displayed result: 24.04.2023
1.8. Code example: Number format
The setting for the number format that you have carried out in the Language settings section does not apply for number values in twig expressions that you use in the code widget. Here, you have to carry out the formatting yourself.
Example: If you have selected a dot for the English number notation in the language settings, but insert one of the following twig expressions for the total invoice amount in the code widget, the notation used for the amount in the code widget will be returned in the email template. The setting from the Language settings section will be overwritten here.
1.8.1. Comma as thousands separator and dot as decimal separator
{{ order.formattedGeneral.invoiceTotal }}-
Displayed result: 3,141.59
1.9. Encode text to Base64
Add code with the twig filter |base64_encode to the code widget to output the text or variable in Base64 encoding.
{{ `my text` |base64_encode }}
-
Output: bXkgdGV4dA==
1.10. Display TrustedShops review link
Add code to the code widget that displays the review link for TrustedShops according to their specifications in Base64 encoding.
<a href="https://www.trustedshops.de/bewertung/bewerten_XA2A8D35838AF5F63E5EB0E05847B1CB8.html&buyerEmail={{ contact.formattedOptions.emailPrivate |base64_encode }}&shopOrderID={{ order.id |base64_encode }}" target="_blank">Rate us at TrustedShops</a>
2. Code examples for the subject line
In the subject line of your template, insert a code that displays a certain word at the beginning of the subject line in case of certain order referrers. In our example, the word [IMPORTANT] is always displayed at the beginning of the subject line if the referrers are between 9 and 11.
{% if order.formattedReferrer.id >= 9 and order.formattedReferrer.id <= 11 %}
[IMPORTANT]
{% endif %}
Your order {{order.id}} has been shipped
3. Code examples for the expert mode
By means of an example, we will show in this chapter how you can use complex templates in expert mode.
We will create an order confirmation in expert mode as an example. The following steps are required:
-
Create a folder in which you save the basic template
-
Create a regular template that contains the Order items widget
-
Extend the basic template with the text for the order confirmation
It is best to create a folder with the name Auxiliary templates. Create a template in expert mode in it and name it Basic template, for example. The basic template forms the framework for your template, so to speak.
{#
    This template is used to define the general styling of our actual templates.
        This makes it possible to define and maintain the styling of various templates in one central location.

    #}

    <!DOCTYPE html>
    <html>
        <head>
            <style>
                body {
                    font-family: Verdana, Arial, Helvetica, sans-serif;
                    background-color: Azure;
                }
            </style>
        </head>
        <body>
            {# The template that extends this is inserted here. #}
            {% block MyTemplate %}{% endblock %}
        </body>
    </html>
We also want to show the order items in the order confirmation. To do so, we create another “regular” template in which the Order items widget is the only content. In our example, this template has the ID 51 and the language ID for DE is 105.
In the next step, we extend the basic template with the text for the order confirmation. In our example, the basic template in DE has the ID 103.
{#
    Extend general styling.
    The extends statement inserts the *MyTemplate* block into the template with ID 50. However, the template ID is not relevant here, but the language ID of the English template (ID 101).
#}
{% extends 101 %}

{% block MyTemplate %}

    Hello {{ order.formattedAddresses.invoiceAddress.name2 ~ ' ' ~ order.formattedAddresses.invoiceAddress.name3 }}, </br>
    </br>
    Thank you for the trust you have placed in us and your order with the ID {{ order.id }}. </br>
    </br>
    With this message, we confirm that we have received your order. At the same time, the purchase contract is legally binding. </br>
    </br>
    </br>
    <strong>SHORT SUMMARY</strong> </br>
    </br>
    Your customer ID: {{ contact.id }} </br>
    Your order ID: {{ order.id }} (please always specify in case of queries) </br>
    Payment method: {{ order.formattedGeneral.methodOfPaymentName }} </br>
    Shipped by: {{ order.formattedShipping.providerName }} </br>
    Value of items: {{ order.formattedGeneral.valueOfItems }} {{ order.formattedSubtotals.currencySymbol }}</br>
    Shipping costs: {{ order.formattedSubtotals.shippingCostsGross }} {{ order.formattedSubtotals.currencySymbol }}</br>
    Total amount including shipping costs: {{ order.formattedGeneral.invoiceTotal }} {{ order.formattedSubtotals.currencySymbol }}</br>
    </br>
    </br>
    <strong>ITEM OVERVIEW</strong> </br>
    </br>

    {# insert regular template with *Order items* widget (template ID: 51, language ID for EN: 105)#}
    {% include 105 %}

    </br>
    We look forward to welcoming you back to our shop soon.</br>
    </br>
    {{ globals.account.signatureHTML | raw }}</br>
    </br>
    </br>

{% endblock %}