Setting up idealo
On this page, you will find information about the settings you need to carry out in order to set up the price search engine idealo in PlentyONE. Learn how to set up the interface, how to export items to idealo and how to define sales prices.
1. About idealo
idealo started business in 2000 with the vision of helping users to make the right choices when buying products online and, now counting 50,000 sellers and 18 million users per month, has become one of Germany’s most important e-commerce websites.
2. Registering with idealo
In order to set up idealo in PlentyONE, you have to register as an idealo seller first.
3. Select a method for item data export
Inform idealo about how item data should be transferred before setting up idealo in PlentyONE (creating, updating, and deleting items on idealo). You can either transfer item data to idealo with the automatic item export via an API (PWS 2.0 interface) or via catalogue export. Table 1 shows the most important differences between these two methods of exporting item data. How to set up the different methods of data transfer in PlentyONE is described in the chapter Setting up the item export.
| Item data export via API (PWS 2.0) | Item export via catalogue |
|---|---|
Item data export via interface |
Item data export via catalogue |
Unlimited number of items can be transferred |
Unlimited number of items can be transferred |
Items are created once a day |
Items are created once a day |
Price updates every 15 minutes |
Price updates every 15 minutes |
Stock updates every 15 minutes |
Stock is not updated in the catalogue. |
Orders are imported to the selected client |
Orders are imported to the selected client |
3.1. Changing item data when using the item export via API
If you use the item export via API to transfer item data to idealo, new offers will be created on idealo if there is no offer for this item on idealo yet - for example, if you transfer an item to idealo for the first time or if an item is in stock again after its stock was 0.
Afterwards, items will only be updated on idealo if the price or stock of an item changes. In this case, the following data will be updated on idealo:
-
SKU
-
Price
-
Stock
-
Delivery time
|
Not all item data is transferred to idealo when exporting items via API
If you transfer your items to idealo via API, any other changes to item data will not be automatically transferred to idealo. Thus, if item texts, characteristics, shipping costs etc. are changed, it is currently not possible to automatically transfer those changes to idealo. |
4. Installing the necessary plugins
To use idealo in PlentyONE, you need the following plugins:
-
idealo
-
Elastic Export
Note: You also need the Elastic Export plugin if you export your item data to idealo via the interface PWS 2.0.
Adding plugin to the system:
-
Go to Plugins » plentyMarketplace.
→ The marketplace opens in a new tab. -
Navigate to the plugin idealo.
Tip: Either use the search function or open the category Plugins » Sales » Marketplaces. -
Open the detail view of the plugin.
-
In the column to the right, click Go to checkout.
→ The Checkout window opens. -
Read and accept the General Terms and Conditions.
-
Click Order now.
→ Wait a few minutes before installing the plugin.
Installing plugins:
-
Go to Plugins » Plugin set overview.
-
Click on the plugin set in which you want to install the plugin.
→ The plugin set opens. -
Click add Add plugin.
-
Select idealo from the plugin list.
-
Click Install.
→ The plugin is installed.
→ The plugin set is shown. -
Switch the plugin to active (toggle_on).
-
Save (save) the plugin set.
Tip: Problems saving the plugin set? Click Open details to show additional information.
Adding plugin to the system:
-
Go to Plugins » plentyMarketplace.
→ The marketplace opens in a new tab. -
Navigate to the plugin Elastic Export.
Tip: Either use the search function or open the category Plugins » Sales » Marketplaces. -
Open the detail view of the plugin.
-
In the column to the right, click Go to checkout.
→ The Checkout window opens. -
Read and accept the General Terms and Conditions.
-
Click Order now.
→ Wait a few minutes before installing the plugin.
Installing plugins:
-
Go to Plugins » Plugin set overview.
-
Click on the plugin set in which you want to install the plugin.
→ The plugin set opens. -
Click add Add plugin.
-
Select Elastic Export from the plugin list.
-
Click Install.
→ The plugin is installed.
→ The plugin set is shown. -
Switch the plugin to active (toggle_on).
-
Save (save) the plugin set.
Tip: Problems saving the plugin set? Click Open details to show additional information.
5. Completing the idealo assistant
Use the assistant Base settings - idealo in the Setup » Assistants » Plugins » [Open client] menu to set up idealo in PlentyONE. Moreover, you set up the data transfer to OTTO Market. Keep the API access data at hand that you received from idealo.
Carrying out settings in the assistant:
-
Go to Setup » Assistants » Plugins » [Open client].
-
Click on the assistant idealo Basic settings.
-
Follow the instructions on the screen. If you need additional information about one of the options, expand the info boxes below this description ().
-
In the Summary step, check your settings to make sure they are correct.
Tip: In the Summary step, click on the arrow () to show the settings.
Tip: You can run through the assistant again at any time to update settings.
Important: To automatically extract item data from the catalogue via API (PWS 2.0), make sure that:
-
You activate the checkbox Export items via interface in the idealo assistant,
-
and have activated the idealo catalogue.
Only then the data will be automatically transferred to idealo.
| Setting | Explanation |
|---|---|
Enter the shop ID of the idealo shop that you would like to set up the user account for. |
Enter the shop ID of your idealo store. Go to the idealo Business Portal to find the shop ID. |
Select the platform that your idealo shop is set up for. |
Select the platform from the drop-down list. |
Select the client that should be used to export your items to idealo and to import your orders into PlentyONE. |
From the drop-down list Client, select a client. |
| Setting | Explanation |
|---|---|
Would you like to export your items to idealo via interface (Partner Web Service 2.0)? |
Items can be exported to idealo via interface or via CSV file with the elastic export. Check with idealo how item data should be transferred before the setup in PlentyONE. Via interface, prices and stock will be transferred every fifteen minutes. The interval of data transfer with CSV export is defined by idealo. |
Would you like to export your stock and prices? |
Export stock and prices activated = Prices and stock are updated every 15 minutes. |
| Setting | Explanation |
|---|---|
Enter the access data of your Partner Web Service 2.0 API client. |
You need the API client access data so that PlentyONE can connect to your idealo account. This activates the exchange of item data. Generate the access data in the idealo Business Portal. |
| Setting | Explanation |
|---|---|
Select the item name that should be transferred to idealo. |
Select Name 1, Name 2 or Name 3 from the drop-down list. This item name is transferred. |
Select the item description that should be transferred to idealo. |
Select Item description, Preview text, Technical data or Item description and technical data from the drop-down list. This item description is transferred to idealo. |
Select the URL that should be transferred to idealo. |
The URL is required so that customers can be redirected from the price search engine to your plentyShop. Variation URLs can only be transferred if you use the plentyShop LTS. Item URL Variation URL |
Which price would you like to transfer to idealo as minimum price? |
The minimum price was used as part of the price adjustment feature for idealo Checkout. As idealo Checkout was discontinued on 31 December 2022, the function for transferring a minimum price is no longer relevant.
|
What is the maximum order processing time to be transferred to idealo? |
Enter the required time in days until an order is ready for shipping. |
| Setting | Explanation | ||||
|---|---|---|---|---|---|
Select the attributes that you have created in PlentyONE to specify colours for your items. |
Activate the attributes that you use to create variations based on colour. |
||||
Select the attributes that you have created in PlentyONE to specify sizes for your items. |
Activate the attributes that you use to create variations based on size. |
||||
What PlentyONE property do you use for the idealo energy efficiency attribute "Energy efficiency class"? |
This property is used to export the energy efficiency class of products that need to be labelled. Allowed values:
Note: You specify the energy efficiency scale used with the idealo attribute Version.
Tip: Learn how to link properties to variations in the Linking properties with variations chapter. |
||||
What PlentyONE property do you use for the idealo energy efficiency attribute "Spectrum"? |
This property is used to export the spectrum of available energy efficiency classes of products that need to be labelled. Use a minus sign to specify a range. Allowed values:
Background: The spectrum depends on the device type. For example, a spectrum of A to D is used for household washing machines. However, for household refrigerating appliances, the spectrum range is A to G.
Tip: Learn how to link properties to variations in the Linking properties with variations chapter. |
||||
What PlentyONE property do you use for the idealo energy efficiency attribute "Link to label"? |
This property is used to export links to image files that contain the energy efficiency labels of products that need to be labelled.
Tip: Learn how to link properties to variations in the Linking properties with variations chapter. |
||||
What PlentyONE property do you use for the idealo energy efficiency attribute "Link to data sheet"? |
This property is used to export links to PDF files that contain the EEK data sheets of products that need to be labelled.
Tip: Learn how to link properties to variations in the Linking properties with variations chapter. |
||||
What PlentyONE property do you use for the idealo energy efficiency attribute "Version"? |
This property is used to specify if the data that you export with the other idealo attributes is based on the old or the new energy efficiency scale. Allowed values:
Tip: Learn how to link properties to variations in the Linking properties with variations chapter. |
| Setting | Explanation |
|---|---|
idealo payment methods |
Activate the payment methods that you want to offer for idealo orders. |
| Setting | Explanation |
|---|---|
Link PlentyONE shipping service provider with: |
For each of your shipping profiles, select an idealo shipping method from the drop-down list. |
| Setting | Explanation |
|---|---|
Would you like to activate your idealo user account now? |
check_box_outline_blank = The settings are saved but the data exchange with idealo is not started. |
Would you like to copy existing SKUs from the old idealo interface to your new user account? |
Activate the option Copy existing SKUs if you already sell on idealo. This prevents duplicate items on idealo. |
6. Activating the order referrer
Go to Setup » Orders » Order referrer to activate the order referrer. This ensures that orders are assigned to the correct sales channel.
An order referrer tags an order with the sales channel on which the order was generated. Sales channels can be e.g. your online shop or markets on which you sell your items. Each sales channel has an individual order referrer. Some order referrers are available by default in your PlentyONE system. Further order referrers are added e.g. if you install a new plugin. For further information about the order referrer, see the page Order referrer of the PlentyONE manual.
Activating the order referrer for idealo price comparison:
-
Go to Setup » Orders » Order referrer.
-
Click Search (search).
-
In the list, navigate to the option idealo with the ID 121.
-
On the right of the referrer’s line, click Edit (edit).
→ The window Edit referrer opens. -
Activate the option Visible in selection (toggle_on).
-
Click SAVE (save).
→ The referrer is active.
7. Setting the variation availability
You need to activate the variations you want to sell on idealo and enable them for the relevant sales channel. This is done in the Item » Items » [Open variation] menu.
Making a variation available for idealo:
-
Go to Item » Items » [Open variation].
Tip: To sell all variations of an item on idealo, carry out the settings for the item’s main variation. If the inheritance function is active for the variations, then this activates the availability of all variations of the item. -
In the Availability and visibility section, enable the option Active (toggle_on).
-
Click the Sales channels tab.
-
In the Sales channels section, activate the sales channel idealo in the Status column (toggle_on).
Tip: You can activate multiple sales channels at once. To do so, activate the checkboxes to the left of the desired sales channels. Then activate the toggle above the checkbox column (toggle_on). Click ACTIVATE to confirm the activation. -
Activate WEB-API.
Note: If you export your items to idealo via catalogue export, then you do not have to activate the option Web API. -
Save (save) the settings.
→ The variation is available for idealo.
Use the variation group function to edit multiple variations at once. You select the variations that you want to edit.
Making several variations available for idealo using the variation group function:
-
Go to Item » Items.
-
Select () the variations to be edited.
-
In the toolbar, click on layers » layers Variation group function.
→ The Variation group function window opens. -
Select the action Sales channels from the drop-down list Actions.
→ The action is added to the lower part of the window. -
Select (check_box) the option idealo from the drop-down list Sales channels.
→ The sales channel is added below the Sales channels drop-down list. -
Select (check_box) WEB-API.
Note: If you export your items to idealo via catalogue export, then you do not have to add WEB API. -
Activate (toggle_on) the toggles to the left of the sales channels.
-
Click EXECUTE & CLOSE to apply the settings.
Batch processing allows you to edit several variations at once. You use filters to limit which variations are edited.
Making several variations available for idealo using batch processing:
-
Navigate to the area Market availability.
-
Activate the checkbox to the left of the option idealo.
-
Activate the checkbox to the right of the option idealo.
-
Activate the checkbox to the left of the option Web API.
-
Activate the checkbox to the right of the option Web API.
Note: If you export your items to idealo via catalogue export, then you do not have to activate the option Web API. -
Navigate to the area Availability.
-
Activate the checkbox to the left of the option Active.
-
Activate the checkbox to the right of the option Active.
-
Click on Apply to apply the settings to the variations.
8. Defining a sales price
Proceed as described below to define a sales price for the order referrer idealo. This price is displayed on idealo.
To sell variations on idealo price comparison, you need a sales price in which the order referrer idealo price comparison is activated. The price that you save for this sales price is the price that will be shown on idealo price comparison.
Sales prices define the conditions under which a variation is sold at a specific price and on a specific sales channel. For example, you can sell your items at a lower price in your webshop than on Amazon. Or you can sell products cheaper to B2B customers than to B2C customers.
Two default sales prices are already configured in your PlentyONE system. However, you can also create new sales prices and edit them individually. In addition to default sales prices, you can also create RRPs, special offers, and set prices.
Defining a sales price for idealo price comparison:
-
Go to Setup » Item » Sales prices » [Open sales price].
Tip: No sales prices? Then create a sales price first. -
Activate the referrer idealo.
-
Save () the settings.
|
Minimum price
If you want to use a minimum price for the "price range" feature for idealo, then you have to define at least two sales prices for idealo: a minimum price and a standard sales price. The minimum price must have the price type Special offer. |
9. Optional: Saving SKU
SKU are generated automatically when your variations are exported. However, you can also save market specific SKU for variations that you want to sell on this market instead.
-
Go to Item » Items » [Open variation].
→ The General tab opens. -
Switch to the Sales channels tab.
-
Expand the section SKU (chevron_right).
-
Click Add SKU (add).
→ The Add SKU window opens. -
Select the referrer idealo from the drop-down list.
-
Select the corresponding Account.
-
Click Apply.
-
Enter the SKU.
-
Enter the Parent SKU, if necessary.
-
Click Save (save).
| Only the most important settings for the import are described here. Is this your first time working with the import tool? Then get familiar with how data imports work in PlentyONE first. |
| Column in CSV file | Explanation | PlentyONE data field for mapping |
|---|---|---|
Variation ID |
Enter the variation ID in this column. |
Variation ID |
Marketplace ID |
Enter the referrer ID 121 in this column. |
SKU > Marketplace ID |
Account ID |
This market does not require a marketplace account. As such, enter the number 0 in this column. |
SKU > Account-ID |
SKU |
Enter the SKU that you want to save for the variation for this market in this column. |
SKU > SKU |
10. Setting up the item export
Items can be transferred to idealo with the automatic item data export via API (PWS 2.0 interface) or via a catalogue. Depending on how you want to transfer your items to idealo, different settings are required.
|
Data transfer to idealo
Check with idealo how item data should be transferred before the setup in PlentyONE. |
Information about the different types of data transfer is available here.
10.1. Alternative 1: Item export via API (PWS 2.0 interface)
Carry out the following settings if you want to transfer your items automatically via API:
-
Go through the idealo Base settings assistant in the Setup » Assistants » Plugins » [Open client] menu and activate the option Export items via interface in the Automatic data transfer step.
-
To automatically extract item data from the catalogue via API (PWS 2.0), activate the idealo catalogue in the Data » Catalogues menu.
| If you transfer your items via API, items will be created at idealo once per day. Prices and stock are updated every 15 minutes. Items can also be deleted every 15 minutes. |
10.2. Alternative 2: Catalogue export
You can export item data to idealo using catalogue formats. Go to Data » Catalogues to create catalogues.
Catalogues are used to export data from your PlentyONE system. There are two different catalogue formats:
-
Marketplace formats are used to export item data to markets.
-
Standard formats are used to export data from your PlentyONE system into a file.
Catalogues with marketplace formats allow you to tailor your item information exactly to the needs of the market. Because here, you assign a suitable PlentyONE data field to each of the data fields of the market. When your variation data is exported to the market, the market’s data fields are then filled with the correct PlentyONE data.
-
Is this your first time working with catalogues? Then read up on the basic concept of catalogues first.
10.2.1. Creating a catalogue
Item data is exported to idealo via catalogue using the marketplace format idealo. To export your items to idealo, create a catalogue in the Data » Catalogues menu. Link the idealo data fields with item data saved in PlentyONE in the marketplace format afterwards.
|
Catalogue only available from plugin version 3.3.41
In order to be able to create a catalogue for idealo, the idealo plugin version 3.3.41 has to be installed in your PlentyONE system. The idealo catalogue is only available from this version. |
Note: You can create one catalogue for every account for idealo.
After you activate the catalogue, the item data is automatically exported to idealo in regular intervals.
Creating a catalogue:
-
Go to Data » Catalogues.
-
Click Create catalogue (add).
-
Enter a name for the catalogue.
-
In the drop-down list Marketplace, select the option idealo.
-
In the drop-down list Export type, select the option Item (new).
-
In the drop-down list Category, select the option idealo.
Tip: You can only create one catalogue for this sales channel, which is why only one category is selectable. -
Select the idealo account that you want to create a catalogue for.
-
Save () the settings.
→ The catalogue is created.
→ The catalogue is opened for editing.
Other catalogue settings
Other catalogue settings are optional. Once you carried out the settings described on this page, your catalogue is automatically exported to idealo. That means you can ignore the catalogue settings for Format settings, Export settings and Download settings.
The Format settings, Export settings, and Download settings allow you to create a file with the variation data contained in the catalogue. However, this file does not contain information about whether the data export to idealo was successful.
|
Do not change the format in the catalogue’s Format settings. To ensure that the export to the sales channel works, all required settings are already configured when you create a catalogue. If you change the settings, errors might occur during the export. |
10.2.2. Mapping data fields in the catalogue
Now, map the idealo data fields to the item data saved in PlentyONE.
-
The market expects product data that cannot be saved in the PlentyONE item menu? Then create a property for this data. Link this property with your variations. The actual values are saved as property values for this property. Is this your first time working with properties? Then read up on the principles of properties first.
| Availability | Explanation |
|---|---|
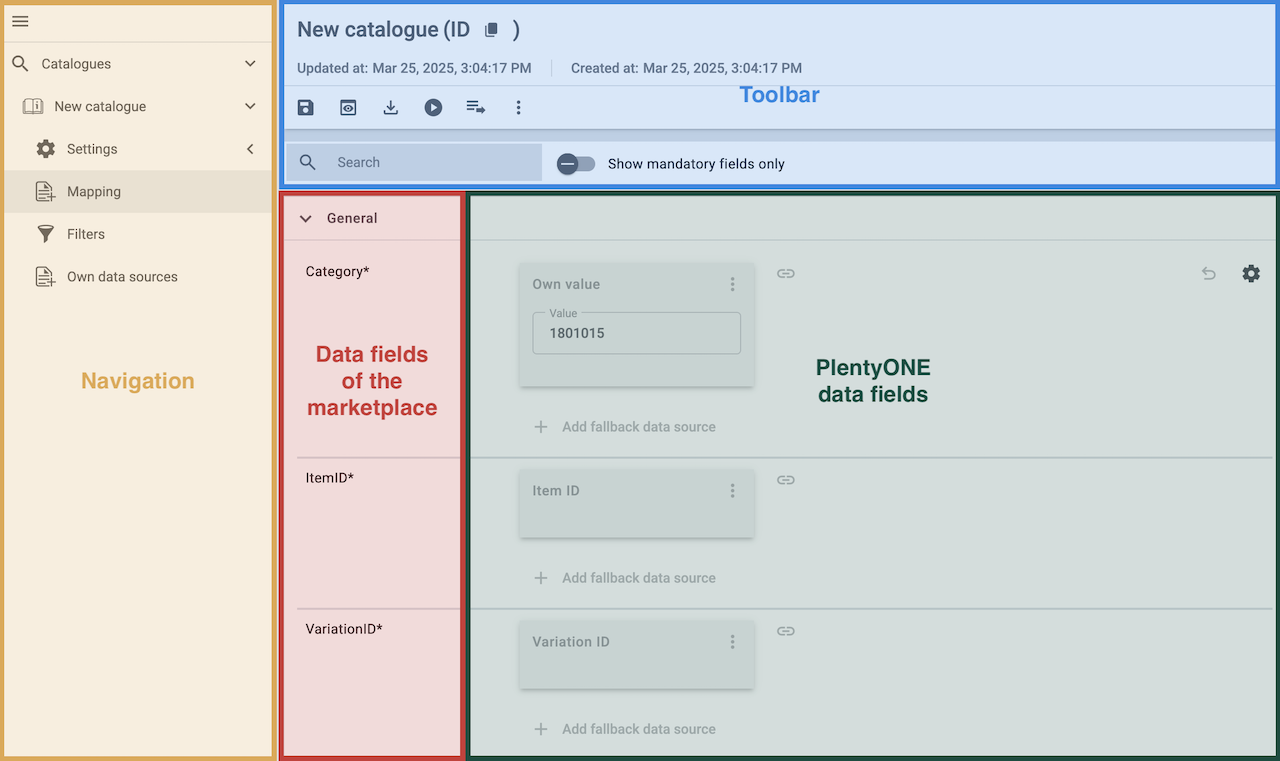
Navigation |
When you open a catalogue, the view Mapping is shown. On the very left is the navigation.
|
Toolbar |
The toolbar provides actions for the catalogue. For example, save your mappings, restore an older version of the catalogue or hide or show optional marketplace data fields. |
Marketplace data field |
To the right of the navigation, all data fields available for the market are listed. Mandatory fields are marked with an asterisk (✱). |
PlentyONE data fields |
On the right side of the catalogue, you map the marketplace data fields to appropriate PlentyONE data fields. In the screenshot above, a few of the fields are already mapped. |
Mapping catalogue fields:
-
Go to Data » Catalogues.
-
Click on the catalogue.
→ The Mapping tab opens.
→ In the left-hand column, the market’s data fields are listed.
Tip: Mandatory fields are flagged with an asterisk (*).
→ In the right column, you map the PlentyONE data fields. Any PlentyONE data fields that you already mapped are also shown in this column. -
Map suitable PlentyONE data fields to the market data fields.
For each marketplace data field, you have a number of mapping options. Expand the info boxes below to get more information about each of these mapping options.-
Simple 1:1 mapping
-
Simple 1:1 mapping with properties
-
Complex 1:1 mapping
-
1:1 mapping with fallback data fields
-
1:n mapping
-
Own value mapping
-
Mapping with mathematical calculations
-
-
Save () the catalogue.
→ The mappings are saved.
In a simple 1:1 mapping, you map a PlentyONE data field to the marketplace data field. If no suitable setting exists in PlentyONE. you can map a property instead.
As such, simple 1:1 mappings allow you to:
-
I want to fill this marketplace data field with the data from this PlentyONE setting.
-
If the data field is empty for a variation, no value is exported for this variation.
Creating a simple 1:1 mapping:
-
Next to the marketplace data field, click on + Add data field.
→ To the left, the list of available PlentyONE data fields are shown in groups. -
Click on the group you need.
→ The PlentyONE data fields of the group are shown. -
Click on the plus to the right of the PlentyONE data field you want to select.
→ The PlentyONE data field is added to the right. -
Click on Confirm.
Example: Sales price and RRP for Otto Market
This gif shows you how to map the marketplace data fields Sales price and RRP for Otto Market to PlentyONE data fields:
Reminder: In a simple 1:1 mapping, you map a PlentyONE data field to the marketplace data field. However, what can you do if PlentyONE does not offer a suitable data field? Then it’s the properties' moment to shine. Properties allow you to save any kind of information in your properties.
-
Is this your first time working with properties? Then read up on the principles of properties first.
Creating a property:
-
Create a property with the necessary values.
Tip: Find out how to do that here.
Creating a simple 1:1 mapping with properties:
-
Next to the marketplace data field, click on + Add data field.
→ To the left, the list of available PlentyONE data fields are shown in groups. -
Expand the group Property.
→ The property groups are shown. -
Expand the group you need.
-
Click on the Plus sign on the right of the property you want.
-
From the drop-down list Language, select the language in which you send the data to the market.
-
Click on Confirm.
→ The property is mapped to the marketplace data field.
Like with the simple 1:1 mappings, you map a PlentyONE setting or property to a marketplace data field. Complex mappings are necessary whenever a marketplace data field has more than one possible value. Instead of mapping data fields, for complex mappings you map individual values of these data fields. For example, you cannot simply map the PlentyONE data field Shipping profile to the marketplace data field Shipping method. Why? The market cannot know which of your shipping profiles in PlentyONE corresponds to which of their shipping methods.
| Do not enter own values for complex mappings. All values that you enter must be saved for the variations, either in a setting or as a property value. This also applies if the value Comparative value is shown. You still need to enter exactly the value of the setting or property that you mapped. |
In complex mappings, the value of the market is always exported. Only when you map an own value, the own value that you enter is exported.
You can recognise complex mappings from the field that is shown below the name of the marketplace data field. Click on the field to show the values available for the marketplace data field.

Examples for complex 1:1 mappings are:
-
Categories
-
Brands
-
Shipping setting
Important: For complex mappings, do not map own values or properties of the type None.
Creating a complex 1:1:n mapping:
-
Click on the field for the marketplace data field.
→ A list of the available values is shown. -
Select the value that you want to map a PlentyONE data field to.
→ The value is mapped. -
Next to the marketplace data field, click on + Add data field.
→ To the left, the available PlentyONE data fields are listed in groups. -
Click on a group.
→ The PlentyONE data fields of the group are shown. -
Click on the PlentyONE data field for which you want to map values.
Important: Do not map own values or properties of the type None. -
Your next steps depend on the PlentyONE data field you selected:
-
Alternative 1: The available values for the PlentyONE data value are shown on the left.
-
Next to the value you want to select, click on the plus.
→ The value is added to the field on the right. -
Click on Confirm.
-
-
Alternative 2: The PlentyONE data field is inserted and the field Comparative value is shown.
-
In the field Comparative value, enter a value that is saved in the setting or the property of the mapped PlentyONE data field.
-
Click on Confirm.
-
-
Alternative 3: The PlentyONE data field is inserted and a drop-down list is shown.
-
Select a value from the drop-down list.
-
Click on Confirm.
→ The value of the marketplace data field is exported, not the value of the PlentyONE data field.
Exception: Only when you map an own value, the own value that you enter is exported.
-
-
Example: Delivery time in days for Otto Market
This gif shows you how to map suitable PlentyONE values to the values of the marketplace data fields Delivery time in days for Otto Market:
In a 1:1 mapping with one or more fallback data fields, you map a PlentyONE data field to the marketplace data field. In addition, you specify one or more fallback data fields. This ensures that the system keeps looking if the first PlentyONE data field is missing or empty.
So this mapping specifies:
-
I want to fill the marketplace data field with the data from the selected PlentyONE setting.
-
If that data field is missing or empty for a variation, the first fallback data field is checked. The value of that fallback data field is exported instead.
-
If the first fallback data field is also missing or empty for the variation, the second fallback data field is checked. If a value is found, the value of the second fallback data field is exported for the variation etc.
Two separate fallback conditions are available:
Null (default) |
The fallback data field is used if the data field above is mapped in the catalogue but not linked to the variation. The condition "Null" is useful when you want to map fallback data fields for the following types of PlentyONE data fields:
Important: When you add a fallback data field, the fallback condition "null" is selected automatically. To apply the fallback condition "leer", you need to change the default setting. |
Empty |
The fallback data field is used if the data field above is mapped in the catalogue and linked to the variation, but is empty. The condition "Empty" is useful when you want to map fallback data fields for the following type of PlentyONE data fields:
Important: When you add a fallback data field, the fallback condition "null" is selected automatically. To apply the fallback condition "leer", you need to change the default setting. |
Note: Even if you assign one or more fallback data fields, the value of only one of those fields is exported. For each variation, the mapped PlentyONE data fields are checked in the order in which you mapped them. This means that if the first data field does not provide a value for a variation, the first fallback data field is exported etc.
Creating a 1:1 mapping with fallback data fields:
-
Next to the marketplace data field, click on + Add data field.
→ To the left, the list of available PlentyONE data fields are shown in groups. -
Click on the group you need.
→ The PlentyONE data fields of the group are shown. -
Click on the plus to the right of the PlentyONE data field you want to select.
→ The PlentyONE data field is added to the right. -
In the list of PlentyONE data fields, click on the plus icon next to the PlentyONE data field that you want to map.
→ The fallback data field is added with the fallback condition "null". -
Alternative 1: To add the fallback data field with the fallback condition "null":
-
Click on Confirm.
→ The fallback data field is exported if the data field above is not linked to the variation.
-
-
Alternative 2: To add the fallback data field with the fallback condition "empty":
-
To the left of the fallback data field, click on the cog ().
→ The window Data column settings is shown. -
For the setting Fallback condition, select the option Empty.
-
Click on Save.
→ The fallback data field is added with the fallback condition "empty". -
Click on Confirm.
→ The fallback data field is exported if the data field above is empty for the variation.
-
Example: Fallback data field for SKU for Otto Market
This GIF shows you the mapping for the OTTO Market marketplace data field SKU. The PlentyONE data field SKU is mapped to this marketplace data field. The PlentyONE data field Variation ID is mapped as the fallback data field. The fallback condition "null" is applied automatically.
Result: The fallback data field Variation ID is exported if the data field SKU is not linked to the variation.
In a 1:n mapping, you map several PlentyONE data fields to the marketplace data field. You can link these data fields with a separator.
So this mapping specifies:
-
I want to combine these PlentyONE data fields during export so that the marketplace data field is filled with the data of these two or more PlentyONE settings.
Creating a 1:n mapping:
-
Next to the marketplace data field, click on + Add data field.
→ To the left, the list of available PlentyONE data fields are shown in groups. -
Click on the group you need.
→ The PlentyONE data fields of the group are shown. -
Click on the plus to the right of the PlentyONE data field you want to select.
→ The PlentyONE data field is added to the right. -
Click on Confirm.
-
To the right of the mapped PlentyONE data field, click on Add data field ().
→ To the left, the list of available PlentyONE data fields again are shown in groups. -
Map one or several additional PlentyONE data fields to the marketplace data field as described above.
-
Click on Confirm.
-
To the very right of the row, click on Settings ().
-
Select a separator from the drop-down list Separator or add a custom separator.
-
Click on Save.
-
Save () the catalogue.
→ The mappings are saved.
→ During the export, the content of the PlentyONE data fields is combined and exported as one field.
You are sure that you want to export the same value for all variations of a catalogue for a marketplace data field? Then specify an own value. This own value is then exported for all variations.
So this mapping specifies:
-
For this marketplace data field, I want to export the value that I entered in the field Own value for all variations of this catalogue. The value you enter is always exported. The value overwrites the market value also in complex mappings where usually the value of the market is exported. As such, make sure you enter an own value that the market accepts for this marketplace data field.
Creating an own value mapping:
-
Next to the marketplace data field, click on + Add data field.
→ To the left, the list of available PlentyONE data fields are shown in groups. -
Click on the plus next to Own value at the top of the list.
→ The field for the own value is added to the view. -
Enter a value into the input field.
→ This value is exported for all variations.
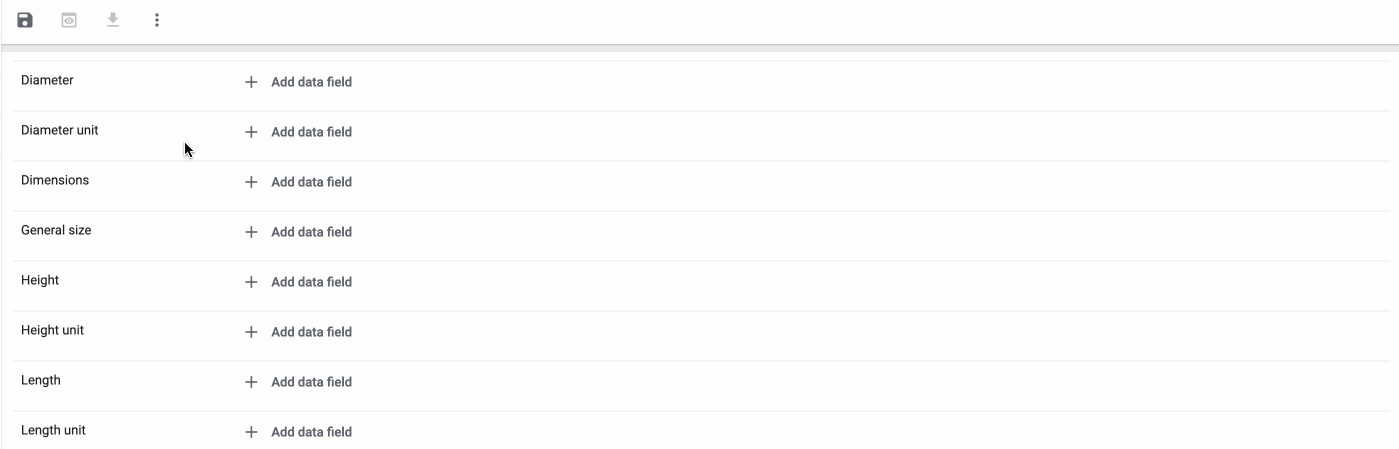
Example: Diameter information
You want to export diameter information for some of your variations. The diameter is saved in centimetres for all your variations. Instead of creating a property for the unit and linking this property to the variations, you can enter the own value cm.
This is an example of how you can map an own value for the diameter unit:
Mathematical calculations allow you to change numerical values automatically during the export.
-
This function only works for data fields that contain numerical values.
-
This functionality is new and not available for all catalogue formats.
So this mapping specifies:
-
I want the numerical value of a PlentyONE data field to be recalculated during the export. Basic arithmetic operations are available for the formulas.
Recalculating numerical values:
-
Next to the marketplace data field, click on + Add data field.
→ To the left, the list of available PlentyONE data fields are shown in groups. -
At the very top of the list, click on the plus icon next to Formula (calculate).
→ The data field Formula is added to the field on the right. -
Click into the data field.
→ The window Modify value is shown. -
Enter a numerical value or select a PlentyONE data field at the bottom right of the window to add it to the calculation (add).
Tip: Use the search function. This helps you to find data fields quickly. -
Optional: If the symbol more_vert is shown in the data field, select the correct assignment for the data field.
Tip: A number tells you how many assignments are necessary for the data field.-
Click on the icon more_vert.
-
In the window shown, select the assignments from the drop-down list.
-
Save the settings.
-
-
Enter numbers and mathematical operators with the on-screen calculator or the keyboard.
-
Save the settings.
→ The entered formula is displayed in the overview.
→ The calculation will be carried out in the next export.
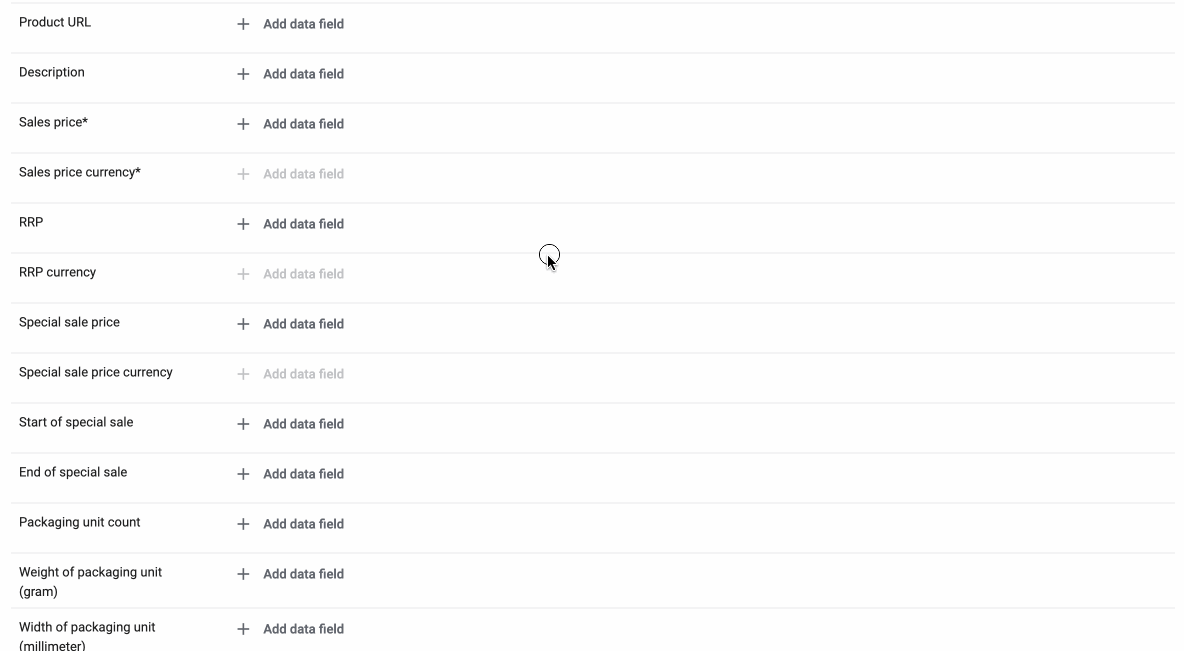
10.2.3. Recommendations for data field mappings
To help you with mapping your data fields for the catalogue, we have created a list of recommended data field mappings. Note that these mappings are recommendations only. Depending on how you manage your item data, other mappings may be more appropriate than the recommendation given here.
-
Need more information about the PlentyONE data fields? All data fields are described on the manual page for the standard format Item (new).
| Marketplace field | Mandatory? | Recommended PlentyONE mapping |
|---|---|---|
General |
||
Variation ID |
yes |
This data field is assigned automatically. |
SKU |
yes |
|
Sales price |
yes |
|
Base price |
yes |
Note: You have to map multiple data fields for the base price (link), so that it will be displayed in the format
and
and
and
and
Note: Select space as separator so that the base price will be displayed correctly. You can define the separator in the Settings (settings) of a mapping. |
Product URL |
yes |
|
Item name |
yes |
or
or
|
Brand |
no |
|
Item description |
no |
or
|
Image URL |
no |
and
Enter a maximum number of images for the image list. Tip: For the order referrer, select the referrer which is saved in the Availability tab of an item. |
Barcode |
no |
|
Colour |
no |
or
|
Size |
no |
Note: If possible, do not use abbreviations. Possible values: for example |
Delivery time |
no |
Information about the delivery time.
or
Example: |
Category path |
no |
|
Gender |
no |
Possible values: |
Material |
no |
Possible values: for example |
Free return |
no |
The free return period of the item in days.
Possible values: for example |
Deposit fee |
no |
The deposit rate of the item.
Possible values: for example |
Fulfillment type |
no |
The shipping type available for the item.
Allowed values: |
Delivery comment |
no |
Further information about payment or shipping.
Example: “Pickup in shop possible” |
Used |
no |
Is the item used or new?
Allowed values: Note: If no value is entered, then the value |
Replica |
no |
Is the item a replica?
Allowed values: Note: If no value is entered, then the value |
Max. processing time |
no |
The maximum processing time before the order is shipped.
Possible values: for example Note: You have to enter at least |
Local store ID |
no |
|
Voucher code |
no |
The voucher code for the offer. The actual code must be entered here.
Example: |
Stock |
yes |
Note: If this data field is mapped, then the stock is checked. If the stock is 0, then nothing will be transferred to idealo. |
Payment costs |
||
Click and buy; |
yes |
Payment methods and the costs for each method. Enter the costs for each payment method that you want to use for idealo.
Example: |
Shipping costs |
||
Deutsche Post; |
yes |
Shipping methods and the costs for each method. Enter the costs for each shipping method that you want to use for idealo.
Example: |
Energy efficiency label 1-3 |
||
Energy efficiency class |
no |
The energy efficiency class according to EU regulations.
Allowed values: |
Spectrum |
no |
The spectrum of the energy efficiency class.
Example: |
Fuel efficiency class |
no |
The fuel efficiency class of tires according to EU regulations.
Allowed values: |
Wet grip class |
no |
The wet grip class of tires according to EU regulations.
Allowed values: |
External rolling noise |
no |
The measured value of the external rolling noise in decibels.
Example: |
External rolling noise class |
no |
The external rolling noise class according to EU regulations.
Allowed values: |
Snow grip |
no |
Were the tires tested for snow grip?
Allowed values: |
Ice grip |
no |
Were the tires tested for ice grip?
Allowed values: |
Image URL of the energy efficiency label |
no |
The image URL of the energy efficiency label.
or
Example: |
Data sheet URL |
no |
The URL of the data sheet. Example: |
Energy efficiency label version |
no |
Optional: Do you use the old or the new version of the energy efficiency label?
Allowed values: |
10.2.4. Optional: Exporting specific items
Add filters to only export specific items. You can find the filters in the side navigation of the Data » Catalogues » [Open catalogue] » Filters menu.
For catalogues with marketplace formats, both template filters and user-defined filters are available. Template filters are applied automatically and cannot be deselected. User-defined filters can be set as needed to only export specific items.
Adding a filter:
-
Go to Data » Catalogues.
→ The catalogue overview opens. -
Open the catalogue.
-
On the left in the side navigation, click on the Filters (filter_alt) tab.
-
Select a filter from the Select filter drop-down list.
-
On the right, click on Add filter (add).
→ The filter is added.
→ Depending on the filter, either a drop-down list or an input field is displayed. -
Select a value from the drop-down list.
Or: Enter the desired value in the field of the filter you added. -
Save (save) the settings.
→ The filter is saved. -
Add additional filters as necessary.
→ Only data sets that meet all filter criteria are exported.
Tip: The number next to the word Filter shows how many filters have been set. The template filters are not included in this number.
For idealo, the filters explained in Table 3 are available.
| User-defined filters | |
|---|---|
Has a SKU |
Add the filter and select the Account ID, Order referrer and Status. |
Item IDs |
Enter one or more item IDs. Separate multiple IDs using commas. Only variations with these item IDs are exported. |
Variation is active |
Add the filter and select Active or Inactive.
|
Visible for at least one market |
Add the filter and select one or multiple sales channels. |
Has tags |
Add the filter and select one or multiple tags. |
Has at least one barcode |
Add the filter and select one or multiple barcodes. |
Has barcode |
Add the filter and select one or multiple barcodes. |
Without tags |
Only variations without tags are exported. |
Linked to at least one property selection value |
Add the filter and enter one or multiple values of a selection property. |
At least one availability |
Add the filter and select one or multiple availabilities. |
Item has images |
Add the filter and select an option. Has item images = Only items for which at least one image is saved in the Images section of the Item » Items » [Open item] menu will be exported. |
Currencies |
Add the filter and select one or multiple currencies. |
Variation has sales price |
Add the filter and select one or multiple sales prices. |
Price value |
Add filter and select the sales price, operator, and the sales price value. |
Has flag 1 |
Add the filter and select one or multiple flags. |
Has flag 2 |
Add the filter and select one or multiple flags. |
Item created at |
Add the filter, select a value and enter a date or time span if needed.
|
Item updated at |
Add the filter, select a value and enter a date or time span if needed.
|
Variation created at |
Add the filter, select a value and enter a date or time span if needed.
|
Variation updated at |
Add the filter, select a value and enter a date or time span if needed.
|
Belongs to at least one Amazon product category |
Add the filter and select one or multiple Amazon product categories. |
Item type |
Add the filter and select Default, Set, or Multi-Pack. |
Variation is main variation |
|
Variation has an image |
|
Variation is in categories |
Add the filter and select one or multiple categories. Note: Enter the category IDs. |
Variation is in one of these categories |
Add the filter and select one or multiple categories. Note: Enter the category IDs. |
Item has manufacturers |
Add the filter and select one or multiple manufacturers. |
Item has no manufacturers |
Only items for which the option None is saved for the Manufacturer setting in the Settings section of the Item » Items »[Open item] menu are exported. |
Visible for markets |
Add the filter and add one or multiple sales channels. |
Bundle type |
Add the filter and select the bundle type.
|
Visible for a client |
Add the filter and select one or multiple clients. |
Visible for clients |
Add the filter and select one or multiple clients. |
Linked to property selection values |
Add the filter and enter one or multiple values of a selection property. |
Has at least one tag |
Add the filter and select one or multiple tags. |
Variation has child variations |
|
Variation IDs |
Enter one or more variation IDs. Separate multiple IDs using commas. Only variations with these variation IDs are exported. |
Sales price updated at |
Add the filter, select a value and enter a date or time span if needed.
|
Stock updated at |
Add the filter, select a value and enter a date or time span if needed.
|
10.2.5. Setting up the catalogue export
Setting up catalogue export:
-
Go to Data » Catalogues.
-
Open the catalogue for idealo.
-
In the navigation on the left, open the tab Settings (settings).
-
Carry out the settings described in Table 4.
-
Save the settings.
| Setting | Explanation |
|---|---|
Basic settings |
|
Catalogue name; |
These settings are saved automatically when you create the catalogue. |
Format settings |
|
File name |
Enter a name for the file. |
Format |
Select the option JSON. |
Field separator |
Select the option expected by idealo. |
Text delimiter |
Select the option expected by idealo. |
Line break |
Select the option expected by idealo. |
Header is included |
This setting is not required for price search engines. |
Decimal separator |
Select the option expected by idealo. |
Export settings |
|
Limit |
Enter a number in order to determine a maximum number of lines for the export. |
Skip empty files |
Activate to skip the export to the FTP server if the export file is empty. |
Provisioning |
This setting is not required for price search engines. |
Transfer |
For exports to sales channels and price search engines, select the interval Every 20 minutes. This is to ensure that the export is always up-to-date. |
Download settings |
|
Shop URL |
Select the client to be used for creating the URL. |
Receive notifications |
This setting is not required for price search engines. |
Options for admin link |
|
Use version |
If you activate this option, the public link is updated every time you make changes to the catalogue. As such, you need to save the new URL in the idealo back end. |
Options for public link |
|
Activate options |
Activate the option to generate a public link. |
Use version |
If you activate this option, the public link is updated every time you make changes to the catalogue. As such, you need to save the new URL in the idealo back end. |
Use token |
Activate the option to add a token to the download URL. The file is then only accessible if the token is known. |
Security token |
Click on the symbol on the right () to generate a new token. |
10.2.6. Activating the catalogue
You have set up idealo in PlentyONE and created a catalogue for exporting your item data? Then start the export of your item data. To do so, activate the catalogues which should be exported to idealo in the Data » Catalogues menu.
Activating the catalogue export to idealo:
-
Go to Data » Catalogues.
→ The catalogues are listed. -
Scroll to the idealo catalogue.
-
In the Active column, move the toggle button to the right ().
→ The catalogue is active.
→ The catalogue data is exported to idealo once a day.
Tip: Go to Data » Catalogue export status for information about the status of the export.
Note: As long as you have not activated the catalogue, your items will still be exported via the PWS 2.0 interface (if you activated this method to export item data in the idealo assistant). As soon as the catalogue has been activated, items will be exported via the catalogue.
11. Viewing the log
The Data » Log menu contains a history of processes that run via the idealo interface.
Note that integrations and identifiers are only shown in the drop-down lists as filters after the process has run at least once.
For idealo, the following filters are recommended:
-
Identifier » ElasticExportIdealoDE
-
Go to Data » Log.
-
In the toolbar, click on tune.
-
Select appropriate filters from the drop-down lists.
-
Optional: Select filters for dates and/or times to only show entries from a specific period.
Tip: For information about the filters, refer to the Data log page of the manual. -
Click on Search ().
→ The results are shown. -
Check all entries for the levels warning and error.
Tip: Click on the entry to see details.
12. FAQ
12.1. Item data export via API (PWS 2.0)
If you transfer your items to idealo via API (PWS 2.0), but not all of your items have been exported, you can try to update the timestamp for market exports. Updating the timestamp might help because usually, only variations which have been updated within the last two days are exported to idealo.
Updating the timestamp for market exports:
-
Go to Item » Batch processing.
-
In the Procedures area, activate the option Update timestamp for market exports.
-
Click on Apply ().
→ All items which are configured for idealo will be exported to idealo with the next item export.