Your contract with PlentyONE
Hover over the account icon () and click on My account to see information about your PlentyONE system. You can make changes to the information saved here. In this menu, you can:
-
view and edit your contract with PlentyONE.
-
book an additional client (store).
-
modify your contact information.
-
grant partner agencies access to your system.
-
contact our telephone support hotline.
1. Your contract with PlentyONE
Hover over the account icon () and click on My account » Contracts to see and edit information about your contract with PlentyONE. For example, you can:
|
Service centre has been removed
Perhaps you can remember previously looking at your contract information in the menu PlentyONE Logo (Start) » Service centre. The Service centre is now deprecated. Contract information is now managed in the “My account” area. |
1.1. Changing your edition
PlentyONE grows along with your needs. You can decide, e.g. which modules your company needs and approximately how many orders you’ll process with PlentyONE each month. We will provide you with the necessary system performance.
You can use the “My account” area to make changes to your PlentyONE contract any time, i.e. even while the system is up and running. It makes sense to change your contract e.g. if you generate more orders than are included in your current edition. It is possible to book a larger edition any time. If you book a smaller edition, the change will go into effect once the regular duration of your current contract has ended.
Changing the contract:
-
Go to PlentyONE logo (Start) » My account.
Tip: To do so, point your cursor at the PlentyONE logo at the top left of the screen.
→ The "My account" area opens in a new browser tab. -
Click on Contracts.
→ You will see information about your current contracts. -
Click on Edit contract.
→ The configurator appears. -
Make changes to the contract information as desired.
1.2. Viewing services
You can see all of your billed services in the “My account” area.
Viewing services:
-
Hover over the account icon () and click on My account.
→ The “My account” area opens in a new browser tab. -
Click on Contracts.
→ You will see information about your current contracts.
Cancelling services
Proceed as described below to cancel services. If needed, you can cancel individual modules or your entire contract with PlentyONE.
Cancelling services:
-
Hover over the account icon () and click on My account.
→ The “My account” area opens in a new browser tab. -
Click on Contracts.
-
Expand the contract information ().
→ Click on Cancel contract in the upper right corner to request that your entire contract be cancelled.
→ Click on Cancel now next to a specific module to only cancel this specific service.
Before your contract ends or you cancel it, you should think about which data you need beyond the existence of your system. Because your data is not saved automatically and thus will not be accessible anymore. With cancelling your contract you also agree that all of your data is irrevocably deleted four to six weeks after the contract ends.
Therefore, you should for example think about which information is tax relevant and thus needed later and which legal retention obligations you have to comply with. In the following we give you an overview of possible data exports from your PlentyONE system:
| Setting | Explanation |
|---|---|
Accounting data |
Use the custom export in the Data » Custom export menu to export your financial accounting. To do so, choose the export you need from the drop-down list (e.g. Financial accounting) and select the appropriate settings. |
Documents |
Use the document archive to export relevant documents. To do so, go to Data » Document archive » Tab: Export. Select the appropriate settings and export all relevant documents. When selecting the documents and the time period, take legal tax requirements and retention periods into consideration. |
Stock |
Create an export format for your stock data in the Data » Elastic export menu. We recommend that you select at least the following export fields:
|
Stock movements |
Create an export format for your stock movement in the Data » Elastic export menu. We recommend that you select at least the following export fields:
|
This list is a recommendation and makes no claim to be complete. If needed, create further exports for relevant information and data. If in doubt, always consult a tax advisor.
If you have further questions about your contract, contact our Sales team. To do so, you can use the forum, write an email (sales@plentyone.com) or contact them via phone (0561 98 681 010).
1.3. Viewing transactions in the clearing account
Have you bought a setup package offered by PlentyONE on plentyMarketplace? Or does your current PlentyONE edition include a certain number of free support minutes? In these cases, the clearing account provides an overview of the amounts and transactions that you will be billed for when PlentyONE issues the next monthly invoice. This way, you can view all transactions and your current balance resulting from the services you bought any time and without complications.
Proceed as described below to view the transactions in the clearing account.
Viewing transactions in the clearing account:
-
Hover over the account icon () and click on My account.
→ The “My account” area opens in a new browser tab. -
Click on Clearing account.
→ The clearing account opens.
Note: The clearing account is only displayed if conditions described above apply to you. If not, a message telling you that no clearing account is available is displayed.
The clearing account consists of two areas. The Postings area displays the transactions of the current invoicing period. In the Cleared postings area, you can find transactions that took place at an earlier point in time and that have already been set off against your balance.
| Information | Explanation |
|---|---|
Postings area |
|
Date |
The date of the transaction. |
Sub-account |
Currently, the sub-account of the type Support is available. In the future, more types of sub-accounts will be added so that other billable services can be represented as well. |
Reference |
This field provides information on the service and the date for which an amount is either credited to or debited from the clearing account. In some PlentyONE editions, a certain contingent of support services is included per month. For these kinds of credit, the date range displayed represents the regular monthly invoicing period. |
Amount |
The amount of the transaction. Credited amounts are displayed in green while debited amounts are displayed in red. |
Cleared postings area |
|
This area contains information on individual transactions that have already been cleared at past dates. The balance calculated in the course of this clearing process is displayed as a separate entry of the type “Amount carried over” in the Postings area. Basically, the Cleared postings area provides you with an overview of older transactions and the respective details. The detailed information regarding the individual transactions are listed in the same way as in the Postings area. |
|
|
Additional functions planned
Our goal is to provide you with an up-to-date and transparent overview of your transactions in the clearing account. To achieve this goal, we will add further functions and display even more precise information in the near future. For example, debits will be displayed on the same date that the corresponding service has been provided to you, instead of only shortly before the current invoicing period ends. Subscribe to our changelogs to keep track of the upcoming changes. |
1.4. Practical example: Booking an additional online store
In PlentyONE. the term client (store) refers to an additional online store, which is managed with the same PlentyONE system as the default store. Existing online stores are displayed in the “My account” area. You can book additional stores as needed.
|
Domain settings for clients (stores)
You need to have a domain before you can order a client (store). You have to create this domain for the main system beforehand. |
Ordering a client (store):
-
Hover over the account icon () and click on My account.
→ The “My account” area opens in a new browser tab. -
Click on Contracts.
→ You will see information about your current contracts. -
Click on Edit contract.
→ The configurator appears. -
Make changes to the contract information as desired.
2. Granting certified agencies access to the system
OHover over the account icon () and click on My account » Agencies to grant certified service providers access to your system. It makes sense to grant a service provider access to your system, e.g. if you hired a design agency to create your website or if you work with a consultant. The service provider will be given unlimited access to your system, i.e. admin access.
|
Decide which functions and menus should be accessible!
When giving an agency access to your system, you grant it unlimited, admin access. If you would prefer to only give the agency access to specific functions or menus, create a new user account, such as a back end account, and customise its access rights. |
2.1. Granting access
Proceed as described below to grant an agency and/or consultant access to your system:
Assigning service providers:
-
Hover over the account icon () and click on My account.
→ The “My account” area opens in a new browser tab. -
Click on Agencies.
→ You will see information about the agencies that you already work with. -
Click on Add agency.
→ You will see a list of certified service providers. -
Click on Add next to whichever agency should be given access to your system.
Note: You can revoke this access at any time.
2.2. Withdrawing access
Would you like to permanently withdraw access for an agency? Then proceed as described below.
-
Hover over the account icon () and click on My account.
→ The “My account” area opens in a new browser tab. -
Click on Agencies.
→ You will see information about the agencies that you already work with. -
In the area of the agency that should be removed, click on Remove.
→ A confirmation window opens. -
Click on Remove now to confirm your decision.
→ System access for the selected agency is permanently withdrawn.
|
Effective withdrawal of agency access
Always follow the steps described above to safely and permanently withdraw agency access to your system. It is not sufficient to simply delete the user account created by the agency in your PlentyONE back end. |
3. Calling the support hotline
Do you prefer direct contact? Our support hotline is there for you. In the My account section, you can find the telephone numbers and business hours for our support hotline. Here you can also find your support PIN. You will need to enter it when you call the hotline.
Calling the support hotline:
-
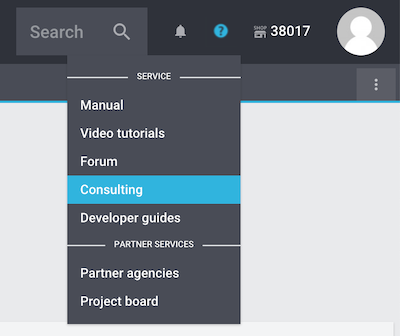
Go to » Consulting.
→ The My account section opens in a new browser tab and information about the support hotline is displayed. -
Take note of your support PIN and call the hotline.
|
Another way to find your support PIN
Alternatively, Hover over the account icon () and click on My account. Then click Support hotline in the More information section. Information about the support hotline is displayed in a pop-up window. |