Etsy
Etsy is an American online market focused on handmade and vintage items.
1. Registering with Etsy
Register as an Etsy seller before you set up Etsy in your PlentyONE system.
2. Frequency of data exchange
After you have set up Etsy in PlentyONE, data is exchanged with the market in the intervals described in Table 1:
| Data | Interval |
|---|---|
Item export |
once a day |
Stock synchronisation |
once a day |
Price synchronisation |
once a day |
Order import |
hourly |
3. Workflow of an order
-
Your products are listed in the Etsy marketplace.
-
Customers place an order on Etsy.
-
Customers make their payments to Etsy.
-
The order is imported into PlentyONE.
Note: Customers make their payments to Etsy. As such, orders are imported with Status [5] Cleared for shipping.
Note: In some cases, it can take 72 hours or longer before Etsy confirms payment. Such orders are imported with the status [3] Waiting for payment. Once Etsy confirms payment, the payment information is imported. The order is automatically moved to status [5] Cleared for shipping.
4. Settings in Etsy back end
Carry out the following settings in your Etsy account before you set up the market in PlentyONE:
-
In the Etsy back end, go to Shop-Manager » Listings » [Open listing] and set the setting Renewal options to Manual. Otherwise, the setup will not work correctly.
-
Create shipping profiles on Etsy.
5. Setting up the market in PlentyONE
Set up the market in PlentyONE after you carried out the settings at Etsy.
|
Manual setting for Renewal options on Etsy
Prior to setting up Etsy in PlentyONE, you have to set the setting Renewal options to Manual in the Shop-Manager » Listings » [Open listing] menu of the Etsy back end. Otherwise, the setup will not work correctly. |
5.1. Activating your Etsy account
First, the interface to Etsy has to be activated in the Setup » Markets » Etsy » OAuth2 menu. This is to grant PlentyONE access to your Etsy account and to enable the data exchange between PlentyONE and Etsy.
Activating the interface:
-
Go to Setup » Markets » Etsy » OAuth2.
-
Enter the name of your Etsy shop.
-
Save the settings.
→ A new window opens and you are forwarded to Etsy.
Troubleshooting: You are not redirected?-
Deactivate your pop-up blocker or try a different browser.
-
-
Enter your Etsy access data.
-
Click on Allow access.
→ PlentyONE can access your Etsy account.
→ You can continue the setup.
Troubleshooting: Are you redirected to the start page of your plentyShop?-
Your plentyShop is probably locked. Go to Setup » Client » Standard shop » Online store » Lock store to unlock your plentyShop. Remember to lock the plentyShop again once you have completed the authentication.
-
5.2. Carrying out the basic settings
Carry out the basic settings for the market in the Setup » Markets » Etsy » Settings menu.
Carrying out the basic settings:
-
Go to Setup » Markets » Etsy » Settings.
-
Select the Etsy shop from the Shop drop-down list.
-
Select the Main shop language from the drop-down list.
→ This is the main language of your Etsy shop. The export languages are used for translating your offers. -
Save () the settings.
5.3. Activating the data exchange
Go to Setup » Markets » Etsy » Settings to activate the data exchange with Etsy.
Activating the data exchange:
-
Go to Setup » Markets » Etsy » Settings.
-
In the Processes area, activate the Item export, Stock update, and Order import.
-
Save () the settings.
5.4. Setting up export languages
In the Export languages area, you carry out settings for export languages. The Main shop language is exported by default. Other languages are used for translations of your offers.
Setting up export languages:
-
Go to Setup » Markets » Etsy » Settings.
-
Activate the languages that you want to export for your offers. The following languages are available:
-
English
-
German
-
French
-
-
Save () the settings.
Note: The Main shop language is always exported irrespective of these settings.
5.5. Activating the order referrer
Go to Setup » Orders » Order referrer to activate the order referrer. This ensures that orders are assigned to the correct sales channel.
An order referrer tags an order with the sales channel on which the order was generated. Sales channels can be e.g. your online shop or markets on which you sell your items. Each sales channel has an individual order referrer. Some order referrers are available by default in your PlentyONE system. Further order referrers are added e.g. if you install a new plugin. For further information about the order referrer, see the page Order referrer of the PlentyONE manual.
Activating the order referrer for Etsy:
-
Go to Setup » Orders » Order referrer.
-
Click Search (search).
-
In the list, navigate to the option Etsy with the ID 156.00.
-
On the right of the referrer’s line, click Edit (edit).
→ The window Edit referrer opens. -
Activate the option Visible in selection (toggle_on).
-
Click SAVE (save).
→ The referrer is active.
5.6. Defining a sales price
To sell variations on Etsy, you need a sales price in which the order referrer Etsy is activated. The price that you save for this sales price is the price that will be shown on Etsy.
Sales prices define the conditions under which a variation is sold at a specific price and on a specific sales channel. For example, you can sell your items at a lower price in your webshop than on Amazon. Or you can sell products cheaper to B2B customers than to B2C customers.
Two default sales prices are already configured in your PlentyONE system. However, you can also create new sales prices and edit them individually. In addition to default sales prices, you can also create RRPs, special offers, and set prices.
Defining a sales price for Etsy:
-
Go to Setup » Item » Sales prices » [Open sales price].
Tip: No sales prices? Then create a sales price first. -
Activate the referrer Etsy.
-
Save () the settings.
5.7. Saving legal information
The item texts for Etsy offers must contain specific legal information, for example relating to delivery time and cancellation rights. Save this in formation in all languages in which you offer your products. The legal information is automatically added to the item description during the export.
Saving legal information:
-
Go to Setup » Markets » Etsy » Legal information.
-
Select the language in which you want to save legal information from the drop-down list.
-
Enter the text.
-
Save () the settings.
5.8. Creating processing profiles
Etsy requires processing profiles to be transferred. These processing profiles contain information about whether your item is ready to ship or made to order, and the minimum and maximum processing time you need before you can ship the order.
In PlentyONE, you can create processing profiles and transfer them to Etsy in two steps. First, create the processing profiles, and then map them in your Etsy catalogues.
Creating a processing profile:
-
Go to Setup » Markets » Etsy » Processing profiles.
-
Click add New processing profile.
-
Enter a name for the processing profile.
-
Select the processing state.
-
Select the minimum processing time.
-
Select the maximum processing time.
-
Select the unit for processing time.
-
Save (save) the settings.
Mapping a processing profile in the catalogue:
-
Go to Data » Catalogues.
-
Open your Etsy catalogue.
-
In the Processing profiles section, select the desired processing profile in the Export as field.
-
Click add Add data source next to the Export as field.
-
Select the desired PlentyONE data source.
Tip: Create a property of the type Selection and save it on your variations. Enter the names of the processing profiles you created as selection values. -
Save (save) the settings.
6. Preparing variations
Now, prepare your variations.
6.1. Setting the variation availability
You need to activate the variations you want to sell on Etsy and enable them for the relevant sales channel. This is done in the Item » Items » [Open variation] menu. For Etsy, you also need to activate the main variation of the item for the market. This is because the main variation data is needed to create the listing. Variations can only be added once the listing has been created.
Making a variation available for Etsy:
-
Go to Item » Items » [Open variation].
Tip: To sell all variations of an item on Etsy, carry out the settings for the item’s main variation. If the inheritance function is active for the variations, then this activates the availability of all variations of the item. -
In the Availability and visibility section, enable the option Active (toggle_on).
-
Click the Sales channels tab.
-
In the Sales channels section, activate the sales channel Etsy in the Status column (toggle_on).
Tip: You can activate multiple sales channels at once. To do so, activate the checkboxes to the left of the desired sales channels. Then activate the toggle above the checkbox column (toggle_on). Click ACTIVATE to confirm the activation. -
Save (save) the settings.
→ The variation is available for Etsy. -
Open the main variation of the item.
-
Click the Multichannels tab.
-
In the Sales channels section, activate the sales channel Etsy in the Status column (toggle_on).
-
Save (save) the settings.
Use the variation group function to edit multiple variations at once. You select the variations that you want to edit.
Making several variations available for Etsy using the variation group function:
-
Go to Item » Items.
-
Select () the variations to be edited.
-
In the toolbar, click on layers » layers Variation group function.
→ The Variation group function window opens. -
Select the action Sales channels from the drop-down list Actions.
→ The action is added to the lower part of the window. -
Select (check_box) the option Etsy from the drop-down list Sales channels.
→ The sales channel is added below the Sales channels drop-down list. -
Activate (toggle_on) the toggles to the left of the sales channels.
-
Click EXECUTE & CLOSE to apply the settings.
Batch processing allows you to edit several variations at once. You use filters to limit which variations are edited.
Making several variations available for Etsy using batch processing:
-
Navigate to the area Market availability.
-
Activate the checkbox to the left of the option Etsy.
-
Activate the checkbox to the right of the option Etsy.
-
Navigate to the area Availability.
-
Activate the checkbox to the left of the option Active.
-
Activate the checkbox to the right of the option Active.
-
Click on Apply to apply the settings to the variations.
6.2. Optional: Saving existing Etsy listing IDs
Do you already sell a variation on Etsy? Save the Etsy listing ID as an SKU for the referrer Etsy. Variations are then assigned to the variations that are already listed on Etsy during the export. This prevents overselling.
Saving an Etsy listing-ID:
-
Go to Item » Edit item » [Open item] » [Open variation] » Variation tab: Settings.
-
Click on the Availability tab.
-
In the SKU area, click on Add ().
→ The New SKU window opens. -
Select the referrer Etsy.
-
Enter the SKU in the following format:
[Etsy listing ID]-[PlentyONE variation ID]
Example:708093072-3467 -
Enter the Parent SKU in the following format:
[Etsy Listing-ID]
Example:708093072 -
Click on Add ().
→ The SKU is saved and displayed.
6.3. Check list: Requirements for exporting variations
To export a variation to Etsy, this variation has to meet the following requirements:
-
Go to Setup » Orders » Order referrer.
-
Is the option Etsy with the ID 156.00 active?
-
If necessary, activate this order referrer.
-
Click Save (save).
The variation must be available for the sales channel.
-
Go to Item » Items » [Open variation].
-
Switch to the Sales channels tab.
-
In the section Sales channels, select the option Etsy (check_box).
-
Activate the toggle button Activate sales channel (toggle_on).
-
Confirm the pop-up by clicking ACTIVATE.
-
Click Save (save).
→ The variation is available for Etsy.
For Etsy, the sales channel must be added to the main variation of the item. This is because the main variation data is needed to create the listing. Variations can only be added once the listing has been created.
-
Go to Item » Items » [Open item].
→ The main variation of the item opens. -
Switch to the Sales channels tab.
-
In the section Sales channels, select the option Etsy (check_box).
-
Activate the toggle button Activate sales channel (toggle_on).
-
Confirm the pop-up by clicking ACTIVATE.
-
Click Save (save).
→ The sales channel is added.
-
Go to Item » Items » [Open variation].
-
In the Availability and visibility section of the General tab, activate the option Active.
-
Click Save (save).
-
Go to Item » Items » [Open variation].
-
Switch to the Stock tab.
-
Expand the Stock (arrow_forward_ios) section.
→ The net stock per warehouse is shown in the Net stock column.
Check the sales price:
-
Go to Setup » Item » Sales prices.
-
For the filter Referrer, select Etsy.
-
Click Search (search).
→ The sales price that is active for the referrer is shown. -
Check the settings of the sales price.
-
Make any necessary corrections.
Check the price:
-
Go to Item » Items » [Open variation].
→ The sales prices are listed in the tab Pricing. -
Check the following settings:
-
Is the sales price for the referrer linked?
-
Does the price for the referrer have the correct price?
-
-
Make any necessary corrections.
-
Go to Item » Items » [Open variation].
-
Switch to the Images tab.
-
Check if at least one image is linked to the variation.
At the least the mandatory fields for the sales channel have to be mapped to PlentyONE data fields. In the catalogue, mandatory fields are marked with an asterisk.
The catalogue that the variation is associated with must be activated.
-
Go to Data » Catalogues.
→ The catalogues are listed. -
Scroll to the Etsy catalogue.
-
In the column Active, activate the toggle (toggle_on).
You have confirmed that the above settings are correct but the variation is still not exported? Then check the data log.
-
Go to Data » Log.
-
Use the following filters:
-
Etsy
-
-
Click Search (search).
-
Check all entries for the levels warning and error.
-
Open the logs containing the message Variation invalid.
→ The the variation ID and the reason for the rejection or the missing characteristic are shown. -
Correct the variation data.
7. Setting up the item export
Item data is exported to Etsy via catalogues. The marketplace format Listing - Etsy creates a catalogue for exporting data for all Etsy product categories.
7.1. Creating a catalogue
Item data is exported to Etsy via catalogue using the marketplace format Listing - Etsy. To export your items to Etsy, create a catalogue in the Data » Catalogue menu. Link the Etsy data fields with item data saved in PlentyONE in the marketplace format afterwards. The catalogue data is automatically exported to Etsy once a day if you have activated the Item export in the Setup » Markets » Etsy » Settings menu.
Catalogues are used to export data from your PlentyONE system. There are two different catalogue formats:
-
Marketplace formats are used to export item data to markets.
-
Standard formats are used to export data from your PlentyONE system into a file.
Catalogues with marketplace formats allow you to tailor your item information exactly to the needs of the market. Because here, you assign a suitable PlentyONE data field to each of the data fields of the market. When your variation data is exported to the market, the market’s data fields are then filled with the correct PlentyONE data.
-
Is this your first time working with catalogues? Then read up on the basic concept of catalogues first.
| You can create only one catalogue for Etsy. Multiple catalogues are currently not supported for Etsy. |
Creating a catalogue:
-
Go to Data » Catalogues.
-
Click Create catalogue (add).
-
Enter a name for the catalogue.
-
Select the option Listing from the Marketplace drop-down list.
-
In the drop-down list Export type, select the option Item.
-
From the drop-down list Category, select the option Etsy.
Tip: You can only create one catalogue for this sales channel. Thus, the only category you can select is the name of the sales channel. -
Save () the settings.
→ The catalogue is created.
→ The catalogue is opened for editing.
Other catalogue settings
Other catalogue settings are optional. Once you carried out the settings described on this page, your catalogue is automatically exported to Etsy. That means you can ignore the catalogue settings for Format settings, Export settings and Download settings.
The Format settings, Export settings, and Download settings allow you to create a file with the variation data contained in the catalogue. However, this file does not contain information about whether the data export to Etsy was successful.
|
Do not change the format in the catalogue’s Format settings. To ensure that the export to the sales channel works, all required settings are already configured when you create a catalogue. If you change the settings, errors might occur during the export. |
7.2. Mapping catalogue fields
After you have created a catalogue, map the market’s data fields to item data saved in PlentyONE. This chapter describes how you map data fields and what particularities apply for item exports to Etsy. In addition, we provide recommendations for suitable mappings. This information is structured as follows:
7.2.1. Mapping data fields in the catalogue
After you have created a catalogue, map the market’s data fields to item data saved in PlentyONE. Check the documentation of the sales channel to find out what data the market expects for the individual data fields.
-
The market expects product data that cannot be saved in the PlentyONE item menu? Then create a property for this data. Link this property with your variations. The actual values are saved as property values for this property. Is this your first time working with properties? Then read up on the principles of properties first.
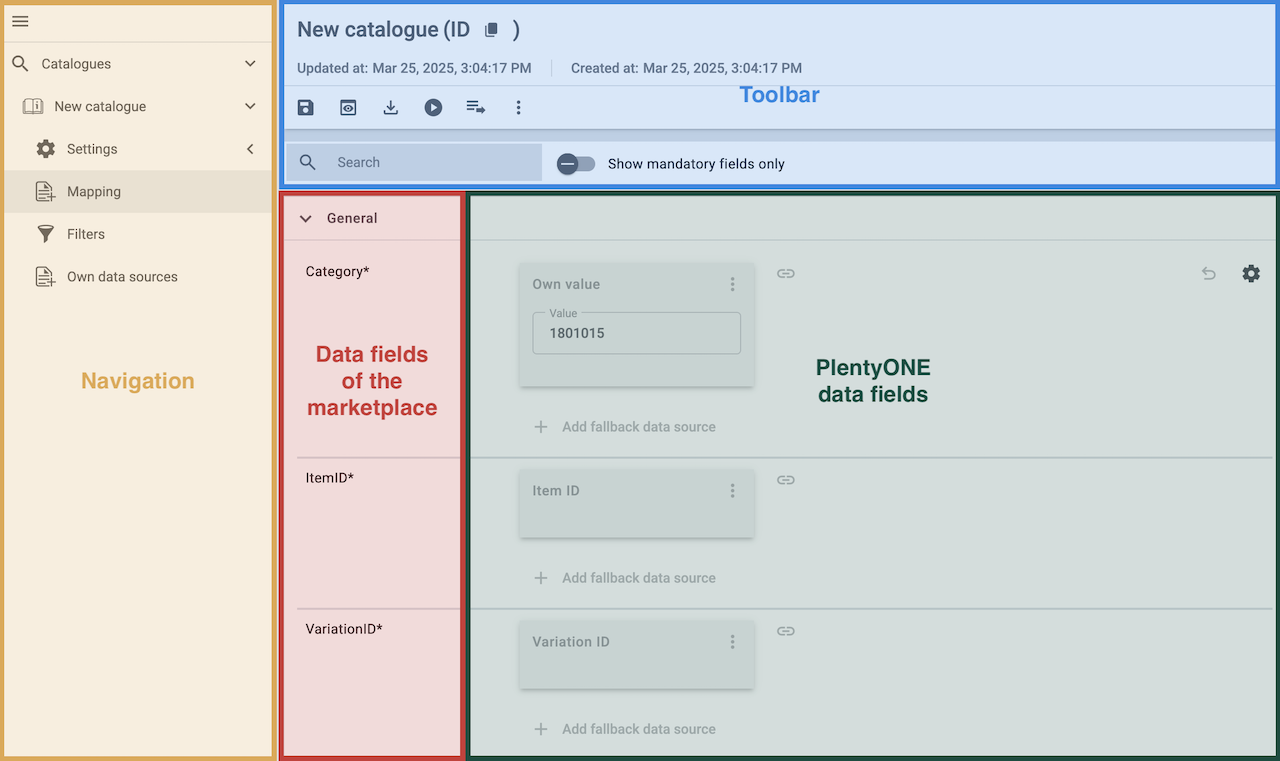
| Availability | Explanation |
|---|---|
Navigation |
When you open a catalogue, the view Mapping is shown. On the very left is the navigation.
|
Toolbar |
The toolbar provides actions for the catalogue. For example, save your mappings, restore an older version of the catalogue or hide or show optional marketplace data fields. |
Marketplace data field |
To the right of the navigation, all data fields available for the market are listed. Mandatory fields are marked with an asterisk (✱). |
PlentyONE data fields |
On the right side of the catalogue, you map the marketplace data fields to appropriate PlentyONE data fields. In the screenshot above, a few of the fields are already mapped. |
Mapping catalogue fields:
-
Go to Data » Catalogues.
-
Click on the catalogue.
→ The Mapping tab opens.
→ In the left-hand column, the market’s data fields are listed.
Tip: Mandatory fields are flagged with an asterisk (*).
→ In the right column, you map the PlentyONE data fields. Any PlentyONE data fields that you already mapped are also shown in this column. -
Map suitable PlentyONE data fields to the market data fields.
For each marketplace data field, you have a number of mapping options. Expand the info boxes below to get more information about each of these mapping options.-
Simple 1:1 mapping
-
Simple 1:1 mapping with properties
-
Complex 1:1 mapping
-
1:1 mapping with fallback data fields
-
1:n mapping
-
Own value mapping
-
Mapping with mathematical calculations
-
-
Save () the catalogue.
→ The mappings are saved.
In a simple 1:1 mapping, you map a PlentyONE data field to the marketplace data field. If no suitable setting exists in PlentyONE. you can map a property instead.
As such, simple 1:1 mappings allow you to:
-
I want to fill this marketplace data field with the data from this PlentyONE setting.
-
If the data field is empty for a variation, no value is exported for this variation.
Creating a simple 1:1 mapping:
-
Next to the marketplace data field, click on + Add data field.
→ To the left, the list of available PlentyONE data fields are shown in groups. -
Click on the group you need.
→ The PlentyONE data fields of the group are shown. -
Click on the plus to the right of the PlentyONE data field you want to select.
→ The PlentyONE data field is added to the right. -
Click on Confirm.
Example: Sales price and RRP for Otto Market
This gif shows you how to map the marketplace data fields Sales price and RRP for Otto Market to PlentyONE data fields:
Reminder: In a simple 1:1 mapping, you map a PlentyONE data field to the marketplace data field. However, what can you do if PlentyONE does not offer a suitable data field? Then it’s the properties' moment to shine. Properties allow you to save any kind of information in your properties.
-
Is this your first time working with properties? Then read up on the principles of properties first.
Creating a property:
-
Create a property with the necessary values.
Tip: Find out how to do that here.
Creating a simple 1:1 mapping with properties:
-
Next to the marketplace data field, click on + Add data field.
→ To the left, the list of available PlentyONE data fields are shown in groups. -
Expand the group Property.
→ The property groups are shown. -
Expand the group you need.
-
Click on the Plus sign on the right of the property you want.
-
From the drop-down list Language, select the language in which you send the data to the market.
-
Click on Confirm.
→ The property is mapped to the marketplace data field.
Like with the simple 1:1 mappings, you map a PlentyONE setting or property to a marketplace data field. Complex mappings are necessary whenever a marketplace data field has more than one possible value. Instead of mapping data fields, for complex mappings you map individual values of these data fields. For example, you cannot simply map the PlentyONE data field Shipping profile to the marketplace data field Shipping method. Why? The market cannot know which of your shipping profiles in PlentyONE corresponds to which of their shipping methods.
| Do not enter own values for complex mappings. All values that you enter must be saved for the variations, either in a setting or as a property value. This also applies if the value Comparative value is shown. You still need to enter exactly the value of the setting or property that you mapped. |
In complex mappings, the value of the market is always exported. Only when you map an own value, the own value that you enter is exported.
You can recognise complex mappings from the field that is shown below the name of the marketplace data field. Click on the field to show the values available for the marketplace data field.

Examples for complex 1:1 mappings are:
-
Categories
-
Brands
-
Shipping setting
Important: For complex mappings, do not map own values or properties of the type None.
Creating a complex 1:1:n mapping:
-
Click on the field for the marketplace data field.
→ A list of the available values is shown. -
Select the value that you want to map a PlentyONE data field to.
→ The value is mapped. -
Next to the marketplace data field, click on + Add data field.
→ To the left, the available PlentyONE data fields are listed in groups. -
Click on a group.
→ The PlentyONE data fields of the group are shown. -
Click on the PlentyONE data field for which you want to map values.
Important: Do not map own values or properties of the type None. -
Your next steps depend on the PlentyONE data field you selected:
-
Alternative 1: The available values for the PlentyONE data value are shown on the left.
-
Next to the value you want to select, click on the plus.
→ The value is added to the field on the right. -
Click on Confirm.
-
-
Alternative 2: The PlentyONE data field is inserted and the field Comparative value is shown.
-
In the field Comparative value, enter a value that is saved in the setting or the property of the mapped PlentyONE data field.
-
Click on Confirm.
-
-
Alternative 3: The PlentyONE data field is inserted and a drop-down list is shown.
-
Select a value from the drop-down list.
-
Click on Confirm.
→ The value of the marketplace data field is exported, not the value of the PlentyONE data field.
Exception: Only when you map an own value, the own value that you enter is exported.
-
-
Example: Delivery time in days for Otto Market
This gif shows you how to map suitable PlentyONE values to the values of the marketplace data fields Delivery time in days for Otto Market:
In a 1:1 mapping with one or more fallback data fields, you map a PlentyONE data field to the marketplace data field. In addition, you specify one or more fallback data fields. This ensures that the system keeps looking if the first PlentyONE data field is missing or empty.
So this mapping specifies:
-
I want to fill the marketplace data field with the data from the selected PlentyONE setting.
-
If that data field is missing or empty for a variation, the first fallback data field is checked. The value of that fallback data field is exported instead.
-
If the first fallback data field is also missing or empty for the variation, the second fallback data field is checked. If a value is found, the value of the second fallback data field is exported for the variation etc.
Two separate fallback conditions are available:
Null (default) |
The fallback data field is used if the data field above is mapped in the catalogue but not linked to the variation. The condition "Null" is useful when you want to map fallback data fields for the following types of PlentyONE data fields:
Important: When you add a fallback data field, the fallback condition "null" is selected automatically. To apply the fallback condition "leer", you need to change the default setting. |
Empty |
The fallback data field is used if the data field above is mapped in the catalogue and linked to the variation, but is empty. The condition "Empty" is useful when you want to map fallback data fields for the following type of PlentyONE data fields:
Important: When you add a fallback data field, the fallback condition "null" is selected automatically. To apply the fallback condition "leer", you need to change the default setting. |
Note: Even if you assign one or more fallback data fields, the value of only one of those fields is exported. For each variation, the mapped PlentyONE data fields are checked in the order in which you mapped them. This means that if the first data field does not provide a value for a variation, the first fallback data field is exported etc.
Creating a 1:1 mapping with fallback data fields:
-
Next to the marketplace data field, click on + Add data field.
→ To the left, the list of available PlentyONE data fields are shown in groups. -
Click on the group you need.
→ The PlentyONE data fields of the group are shown. -
Click on the plus to the right of the PlentyONE data field you want to select.
→ The PlentyONE data field is added to the right. -
In the list of PlentyONE data fields, click on the plus icon next to the PlentyONE data field that you want to map.
→ The fallback data field is added with the fallback condition "null". -
Alternative 1: To add the fallback data field with the fallback condition "null":
-
Click on Confirm.
→ The fallback data field is exported if the data field above is not linked to the variation.
-
-
Alternative 2: To add the fallback data field with the fallback condition "empty":
-
To the left of the fallback data field, click on the cog ().
→ The window Data column settings is shown. -
For the setting Fallback condition, select the option Empty.
-
Click on Save.
→ The fallback data field is added with the fallback condition "empty". -
Click on Confirm.
→ The fallback data field is exported if the data field above is empty for the variation.
-
Example: Fallback data field for SKU for Otto Market
This GIF shows you the mapping for the OTTO Market marketplace data field SKU. The PlentyONE data field SKU is mapped to this marketplace data field. The PlentyONE data field Variation ID is mapped as the fallback data field. The fallback condition "null" is applied automatically.
Result: The fallback data field Variation ID is exported if the data field SKU is not linked to the variation.
In a 1:n mapping, you map several PlentyONE data fields to the marketplace data field. You can link these data fields with a separator.
So this mapping specifies:
-
I want to combine these PlentyONE data fields during export so that the marketplace data field is filled with the data of these two or more PlentyONE settings.
Creating a 1:n mapping:
-
Next to the marketplace data field, click on + Add data field.
→ To the left, the list of available PlentyONE data fields are shown in groups. -
Click on the group you need.
→ The PlentyONE data fields of the group are shown. -
Click on the plus to the right of the PlentyONE data field you want to select.
→ The PlentyONE data field is added to the right. -
Click on Confirm.
-
To the right of the mapped PlentyONE data field, click on Add data field ().
→ To the left, the list of available PlentyONE data fields again are shown in groups. -
Map one or several additional PlentyONE data fields to the marketplace data field as described above.
-
Click on Confirm.
-
To the very right of the row, click on Settings ().
-
Select a separator from the drop-down list Separator or add a custom separator.
-
Click on Save.
-
Save () the catalogue.
→ The mappings are saved.
→ During the export, the content of the PlentyONE data fields is combined and exported as one field.
You are sure that you want to export the same value for all variations of a catalogue for a marketplace data field? Then specify an own value. This own value is then exported for all variations.
So this mapping specifies:
-
For this marketplace data field, I want to export the value that I entered in the field Own value for all variations of this catalogue. The value you enter is always exported. The value overwrites the market value also in complex mappings where usually the value of the market is exported. As such, make sure you enter an own value that the market accepts for this marketplace data field.
Creating an own value mapping:
-
Next to the marketplace data field, click on + Add data field.
→ To the left, the list of available PlentyONE data fields are shown in groups. -
Click on the plus next to Own value at the top of the list.
→ The field for the own value is added to the view. -
Enter a value into the input field.
→ This value is exported for all variations.
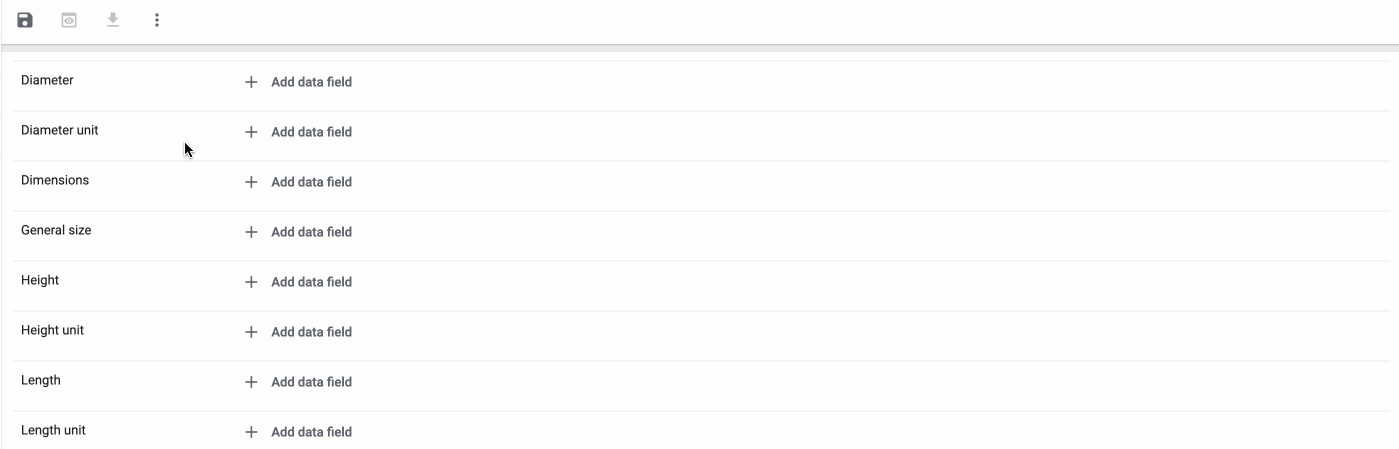
Example: Diameter information
You want to export diameter information for some of your variations. The diameter is saved in centimetres for all your variations. Instead of creating a property for the unit and linking this property to the variations, you can enter the own value cm.
This is an example of how you can map an own value for the diameter unit:
Mathematical calculations allow you to change numerical values automatically during the export.
-
This function only works for data fields that contain numerical values.
-
This functionality is new and not available for all catalogue formats.
So this mapping specifies:
-
I want the numerical value of a PlentyONE data field to be recalculated during the export. Basic arithmetic operations are available for the formulas.
Recalculating numerical values:
-
Next to the marketplace data field, click on + Add data field.
→ To the left, the list of available PlentyONE data fields are shown in groups. -
At the very top of the list, click on the plus icon next to Formula (calculate).
→ The data field Formula is added to the field on the right. -
Click into the data field.
→ The window Modify value is shown. -
Enter a numerical value or select a PlentyONE data field at the bottom right of the window to add it to the calculation (add).
Tip: Use the search function. This helps you to find data fields quickly. -
Optional: If the symbol more_vert is shown in the data field, select the correct assignment for the data field.
Tip: A number tells you how many assignments are necessary for the data field.-
Click on the icon more_vert.
-
In the window shown, select the assignments from the drop-down list.
-
Save the settings.
-
-
Enter numbers and mathematical operators with the on-screen calculator or the keyboard.
-
Save the settings.
→ The entered formula is displayed in the overview.
→ The calculation will be carried out in the next export.
7.2.2. Notes on mapping data fields
Every market structures item data differently. As such, there are some particularities for each market when mapping data fields. Table 2 contains mapping information for important data fields for Etsy.
| Marketplace data field | PlentyONE data field |
|---|---|
Shop sections |
For this marketplace data field, all shop sections that you created on Etsy are available. |
Occasion; |
If you only use the export language "German", export the values in German. If you use other export languages, either in addition to or instead of German, export the values in English. |
Who made it? (who_made); |
The combination of these three marketplace data fields determines if a product can be sold on Etsy:
This results in the following rules for the export:
|
Price information |
You cannot export any strikethrough prices to Etsy using PlentyONE. In other words: You cannot visualise price reductions on Etsy where the old price is shown but crossed out. |
Processing profiles |
You first need to create processing profiles for this data field. Once you have created processing profiles, you can select them under Export as. |
7.2.3. Recommendations for data field mappings
To help you with mapping your data fields for the catalogue, we have created a list of recommended data field mappings. Note that these mappings are recommendations only. Depending on how you manage your item data, other mappings may be more appropriate than the recommendation given here.
-
Need more information about the PlentyONE data fields? All data fields are described on the manual page for the standard format Item (new).
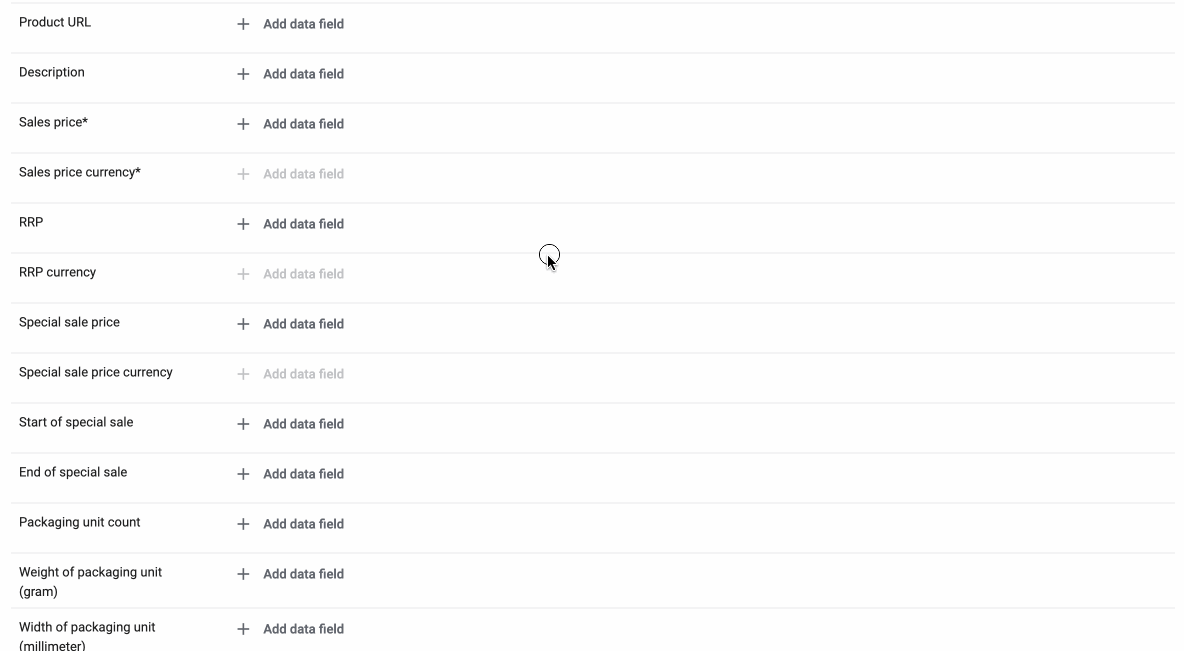
| Etsy field | Mandatory? | Recommended mapping | ||||||||||||||||||||||||||||||||||||||||||||||||||||||||||||||||||||
|---|---|---|---|---|---|---|---|---|---|---|---|---|---|---|---|---|---|---|---|---|---|---|---|---|---|---|---|---|---|---|---|---|---|---|---|---|---|---|---|---|---|---|---|---|---|---|---|---|---|---|---|---|---|---|---|---|---|---|---|---|---|---|---|---|---|---|---|---|---|---|
Title |
||||||||||||||||||||||||||||||||||||||||||||||||||||||||||||||||||||||
German title |
if shop language |
or
or
or
|
||||||||||||||||||||||||||||||||||||||||||||||||||||||||||||||||||||
English title |
if shop language |
or
or
or
|
||||||||||||||||||||||||||||||||||||||||||||||||||||||||||||||||||||
French Title |
if shop language |
or
or
or
|
||||||||||||||||||||||||||||||||||||||||||||||||||||||||||||||||||||
Description |
||||||||||||||||||||||||||||||||||||||||||||||||||||||||||||||||||||||
German description |
if shop language |
or
|
||||||||||||||||||||||||||||||||||||||||||||||||||||||||||||||||||||
English description |
if shop language |
or
|
||||||||||||||||||||||||||||||||||||||||||||||||||||||||||||||||||||
French description |
if shop language |
or
|
||||||||||||||||||||||||||||||||||||||||||||||||||||||||||||||||||||
Tags |
||||||||||||||||||||||||||||||||||||||||||||||||||||||||||||||||||||||
German tags |
no |
Tip: German tags can be up to 30 characters long. You can specify up to 13 tags for a listing. Enter several tags separated by commas and without spaces. Do not add the same tag more than once. |
||||||||||||||||||||||||||||||||||||||||||||||||||||||||||||||||||||
English tags |
no |
Tip: English tags can be up to 20 characters long. You can specify up to 13 tags for a listing. Enter several tags separated by commas and without spaces. Do not add the same tag more than once. |
||||||||||||||||||||||||||||||||||||||||||||||||||||||||||||||||||||
French tags |
no |
Tip: You can specify up to 13 tags for a listing. Enter several tags separated by commas and without spaces. Do not add the same tag more than once. |
||||||||||||||||||||||||||||||||||||||||||||||||||||||||||||||||||||
Properties |
||||||||||||||||||||||||||||||||||||||||||||||||||||||||||||||||||||||
Renew automatically? (See documentation!) |
no |
By default, products are renewed automatically when the listing period ends. As such, you need to specifically flag any variations that you want to exclude for this automatic renewal process.
or
Notes:
|
||||||||||||||||||||||||||||||||||||||||||||||||||||||||||||||||||||
Who made it? |
yes |
|
||||||||||||||||||||||||||||||||||||||||||||||||||||||||||||||||||||
When was it made? |
yes |
|
||||||||||||||||||||||||||||||||||||||||||||||||||||||||||||||||||||
A supply or tool to make things? |
yes |
|
||||||||||||||||||||||||||||||||||||||||||||||||||||||||||||||||||||
Material |
no |
|
||||||||||||||||||||||||||||||||||||||||||||||||||||||||||||||||||||
Occasion |
no |
Note: If you only use the export language German, export the values in German. If you use other export languages, either in addition to or instead of German, export the values in English.
|
||||||||||||||||||||||||||||||||||||||||||||||||||||||||||||||||||||
Recipient |
no |
Note: If you only use the export language "German", export the values in German. If you use other export languages, either in addition to or instead of German, export the values in English.
|
||||||||||||||||||||||||||||||||||||||||||||||||||||||||||||||||||||
Customizable |
no |
Note: Only map a PlentyONE data field to this sales channel data field if you have activated the option Accept custom orders on Etsy.
Note: Your customers' requests for customisation are imported as order notes. |
||||||||||||||||||||||||||||||||||||||||||||||||||||||||||||||||||||
Not taxable |
no |
|
||||||||||||||||||||||||||||||||||||||||||||||||||||||||||||||||||||
Style |
no |
|
||||||||||||||||||||||||||||||||||||||||||||||||||||||||||||||||||||
Item weight |
no |
or
|
||||||||||||||||||||||||||||||||||||||||||||||||||||||||||||||||||||
Item height |
no |
|
||||||||||||||||||||||||||||||||||||||||||||||||||||||||||||||||||||
Item length |
no |
|
||||||||||||||||||||||||||||||||||||||||||||||||||||||||||||||||||||
Item width |
no |
|
||||||||||||||||||||||||||||||||||||||||||||||||||||||||||||||||||||
Sales price |
||||||||||||||||||||||||||||||||||||||||||||||||||||||||||||||||||||||
Sales price |
yes |
Note: Strikethrough prices cannot be exported. |
||||||||||||||||||||||||||||||||||||||||||||||||||||||||||||||||||||
Categories |
||||||||||||||||||||||||||||||||||||||||||||||||||||||||||||||||||||||
Categories |
yes |
|
||||||||||||||||||||||||||||||||||||||||||||||||||||||||||||||||||||
Processing profiles |
||||||||||||||||||||||||||||||||||||||||||||||||||||||||||||||||||||||
Processing profiles |
yes |
This data field contains a complex mapping. This means that you can select from different values of the sales channel data field. In this case, the values are your processing profiles. The values are then assigned to a PlentyONE data field. Example:
Note: You can map the sales channel values to individual selection values of a Multi selection property in PlentyONE. If you have saved several selection values for an item, all of these values that are mapped to a sales channel value are exported. |
||||||||||||||||||||||||||||||||||||||||||||||||||||||||||||||||||||
Shipping profiles |
||||||||||||||||||||||||||||||||||||||||||||||||||||||||||||||||||||||
Shipping profiles |
yes |
Important: For this sales channel data field, you can select the shipping profiles that you created on Etsy. If you create new shipping profiles on Etsy after you created the catalogue, you may have to create a new catalogue. Shipping profiles added later are not always recognised by the catalogue. |
||||||||||||||||||||||||||||||||||||||||||||||||||||||||||||||||||||
Shop sections |
||||||||||||||||||||||||||||||||||||||||||||||||||||||||||||||||||||||
Shop sections |
no |
|
||||||||||||||||||||||||||||||||||||||||||||||||||||||||||||||||||||
7.3. Activating the catalogue
You have set up Etsy in PlentyONE and created a catalogue for exporting your item data? Then start the export of your item data. To do so, activate the catalogues which should be exported to Etsy in the Data » Catalogues menu.
Activating the catalogue export to Etsy:
-
Go to Data » Catalogues.
→ The catalogues are listed. -
Scroll to the Etsy catalogue.
-
In the Active column, move the toggle button to the right ().
→ The catalogue is active.
→ The catalogue data is exported to Etsy once a day during the night.
Tip: Go to Data » Catalogue export status for information about the status of the export.
8. Automating order processing
You can automatically inform Etsy about changes to the order status by using one of the following options:
-
Option 1: PlentyONE Flow (recommended)
-
Option 2: Event procedures (old method)
| Returns, credit notes and cancellations cannot be processed in PlentyONE. Manage these processes in your Etsy account instead. |
8.1. Option 1: PlentyONE Flow (recommended)
Create event-based Flows to automatically inform Etsy about changes to the order status. The following actions are available for Etsy in the PlentyONE Flow Studio:
With PlentyONE Flow (short: "Flow"), you can automate workflows for your business processes. Flow provides you with two functions in the Automation menu:
-
In Flow Studio you create and configure automated workflows. Depending on the trigger type, there are three flow types: event- based, time-based or manual.
-
In the Flow Tracker, you can monitor ongoing or finished workflows.
The central element in both functions is the Canvas - a graphical interface on which the workflows are visualised with Actions and Controls. In Flow Studio the canvas can be edited, in Flow Tracker it is only used for visualisation and is therefore read-only.
-
Is this your first time working with PlentyONE Flow? Then read up on the basic concept of Flow first.
8.1.1. Notify Etsy that an order was paid
Create an event-based Flow to automatically inform Etsy that an order has been paid.
-
Go to Automation » Flow Studio.
-
Click Create flow (add).
→ A stepper opens and guides you through the following three steps.-
General
-
Enter a unique name and, if necessary, a description for the new flow.
-
Click Next.
-
-
Trigger
-
Select Event-based as the trigger.
-
Click Next.
-
-
Settings
-
If desired, select a UI from the optional drop-down list Flow available in.
→ The option to manually trigger the flow directly from the selected UI is added to the group functions in that UI.
Note: UIs currently selectable: Order UI. -
From the drop-down list Trigger selection, select the event according to Table 3.
Note: If the trigger event has additional settings, then these are invariably mandatory. Without performing these settings, you will not be able to save the flow. -
Save () the settings.
→ The flow is created.
→ The Flow Studio Canvas appears, on which two elements are already displayed: The trigger type and the placeholder for the next step.
Note: With some event-based flows you cannot save the flow if it consists of only a trigger. In such cases, you need to add at least one further step.
-
-
-
Configure the new flow according to Table 3.
-
Save () the settings.
Note: The selected statuses, controls and filters in Table 3 only serve as an example. Select the status, controls and filters for the Flow which best suit your workflow.
| Setting | Option | Selection | |||||||||
|---|---|---|---|---|---|---|---|---|---|---|---|
Trigger selection |
Select a trigger, for example:
|
||||||||||
Controls |
Branch |
|
|||||||||
Actions |
Plugin (Legacy) |
Report order confirmation to Etsy |
8.1.2. Send shipping confirmations to Etsy
Create an event-based flow to automatically inform Etsy that an item related to an order has been shipped.
-
Go to Automation » Flow Studio.
-
Click Create flow (add).
→ A stepper opens and guides you through the following three steps.-
General
-
Enter a unique name and, if necessary, a description for the new flow.
-
Click Next.
-
-
Trigger
-
Select Event-based as the trigger.
-
Click Next.
-
-
Settings
-
If desired, select a UI from the optional drop-down list Flow available in.
→ The option to manually trigger the flow directly from the selected UI is added to the group functions in that UI.
Note: UIs currently selectable: Order UI. -
From the drop-down list Trigger selection, select the event according to Table 4.
Note: If the trigger event has additional settings, then these are invariably mandatory. Without performing these settings, you will not be able to save the flow. -
Save () the settings.
→ The flow is created.
→ The Flow Studio Canvas appears, on which two elements are already displayed: The trigger type and the placeholder for the next step.
Note: With some event-based flows you cannot save the flow if it consists of only a trigger. In such cases, you need to add at least one further step.
-
-
-
Configure the new flow according to Table 4.
-
Save () the settings.
Note: The selected statuses, controls and filters in Table 4 only serve as an example. Select the status, controls and filters for the flow which best suit your workflow.
| Setting | Option | Selection | ||||||
|---|---|---|---|---|---|---|---|---|
Trigger selection |
Select an event, for example:
or
|
Select an order status, for example:
|
||||||
Control element |
Branch |
|
||||||
Actions |
Plugin (Legacy) > Etsy |
Send shipping confirmation to Etsy |
8.2. Option 2: Event procedures
Set up event procedures to automatically inform Etsy about changes to the order status. The following event procedures are available for Etsy:
8.2.1. Automatically sending payment confirmations
Set up an event procedure to automatically send payment confirmations to Etsy when incoming payment is booked.
-
Go to Setup » Orders » Events.
-
Click on Add event procedure ().
→ The Create new event procedure window opens. -
Enter a distinct name for the event procedure.
-
Select the event according to Table 5.
-
Save () the settings.
-
Carry out the additional settings according to Table 5.
-
Select the setting Active ().
-
Save () the settings.
| Setting | Option | Selection |
|---|---|---|
Event |
Payment: Complete |
|
Filter 1 |
Order > Order type |
Order |
Filter 2 |
Order > Referrer |
Etsy |
Procedure |
Plugin > Send payment confirmation to Etsy |
8.2.2. Automatically sending shipping confirmations
Set up an event procedure to automatically send shipping confirmations to Etsy when the outgoing items are booked.
-
Go to Setup » Orders » Events.
-
Click on Add event procedure ().
→ The Create new event procedure window opens. -
Enter a distinct name for the event procedure.
-
Select the event according to Table 6.
-
Save () the settings.
-
Carry out the additional settings according to Table 6.
-
Select the setting Active ().
-
Save () the settings.
| Setting | Option | Selection |
|---|---|---|
Event |
Order change: Outgoing items booked |
|
Filter 1 |
Order > Order type |
Order |
Filter 2 |
Order > Referrer |
Etsy |
Procedure |
Plugin > Send shipping confirmation to Etsy |
9. Assigning rights
Users with roles that are not of the type Administrator can only see certain sections and menus in PlentyONE. This means they only have limited access to the system. If employees use Etsy in PlentyONE, they need at least the following rights:
-
Rights > Markets > Credentials
Note that only users with roles of the type Administrator can grant rights.
Assigning rights:
-
Open the menu Setup » Account management » Roles.
→ The roles overview opens. -
Click on New (add).
→ The role creation menu opens. -
Enter a name for the role.
-
Switch to the advanced mode by toggling Advanced (toggle_on) slider.
-
Assign the rights for the respective section by ticking the check boxes indicated above.
Note: You can either grant rights for complete sections or limit the rights you grant the user. To only grant limited rights in a certain section, expand the section. -
Save (save) the settings.
|
The simple mode and advanced mode are connected. If you check menu visibilities in the simple mode the corresponding permissions in the advanced mode will be checked automatically. The connection only exists in this direction. If you check permissions in the advanced mode no menu or plugin visibilities will be checked automatically. |
10. FAQ & error messages
10.1. FAQ
If an item can be customised, then the item can, for example, be engraved or a name can be added.
If you want to offer your customers the possibility to customise an item, then you have to activate the option Accept custom orders on Etsy.
Additionally, you have to link the data field Customizable (is_customizable) to a property of the type Selection in your Etsy catalogue.
Possible selection values for the property:
-
If the item cannot be customised:
0 or false or n
-
If the item can be customised:
1 or true or y
Note: Your customers' requests for customisation are imported as order notes.
10.2. Error messages
Reason for the error message:
You have not activated the option Accept custom orders in the Etsy back end. However, in the catalogue you mapped a PlentyONE data field to the marketplace data field Customizable.
Solution:
-
Activated the option Accept custom orders in the Etsy back end.
or
-
In the catalogue, delete the mapping for the marketplace data field Customizable.
Reason for the error message:
In the catalogue, shipping profiles are not mapped or mapped incorrectly.
Solution:
Map the shipping profiles correctly.
Reason for the error message:
Something went wrong while trying to activate your account.
Solution:
-
Next to the error message, click on the further actions ().
-
Click on Check authorization. If the authorization has been granted in the meantime, your Etsy account is activated.
-
If the second check is not successful, click on Delete account.
-
Repeat the steps for activating the Etsy account. Take extra care to check your credentials.
11. Brand and licensing information
The term “Etsy” is a trademark of Etsy, Inc. The Etsy integration uses the Etsy API. However, the integration is not endorsed or certified by Etsy, Inc.